
You are using an out of date browser. It may not display this or other websites correctly.
You should upgrade or use an alternative browser.
You should upgrade or use an alternative browser.
Project '9' (EK Na Na Niiiiiine)
- Thread starter Ashy C
- Start date
UPDATE
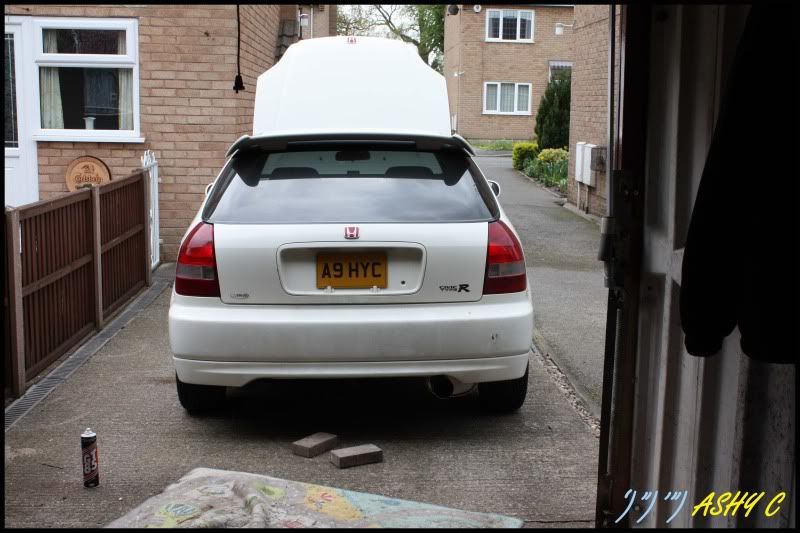
Week off work, and a garage full of bushes, arms and springs that need fitting.

I have no track days booked now, so under no pressure to get it completed, hopefully be done this week though, then a trip to get it aligned and set up.
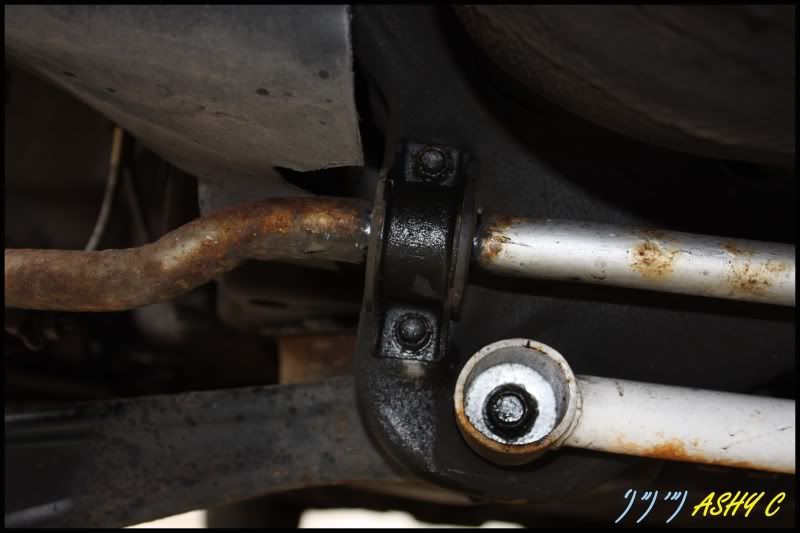
First job was to prepare the LCA bolts and all the trailing arm bolts, a trusty can of No nonesense Penetrating Spray/Oil (£4 ish screwfix) sprayed all the bolts, 24 hours in advance then began with a wire brush and more spray.

Started by removing the old LCA, i recently purchased
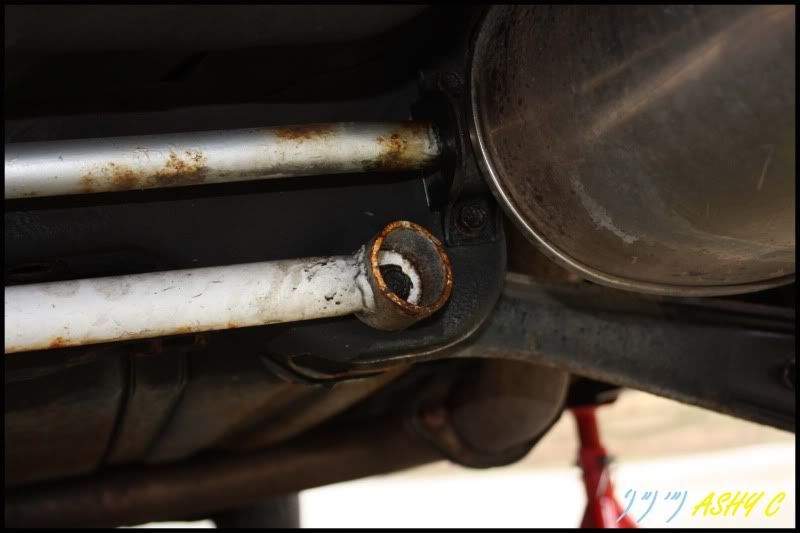
The first problem was the rusty old antirollbar drop links, as usual the allen key hole rounded off, so out came the hack saw.
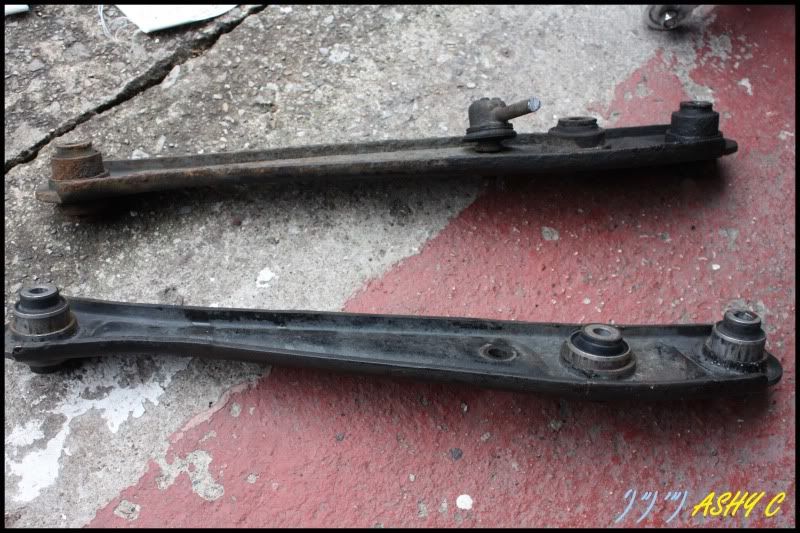
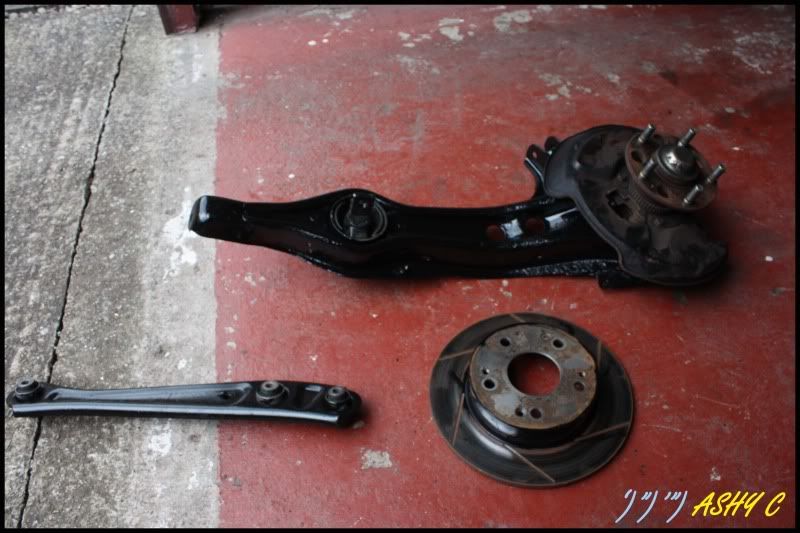
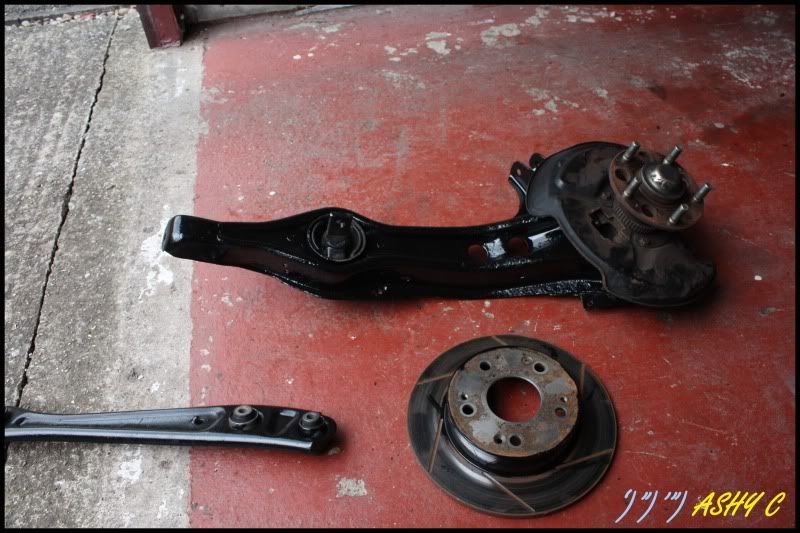
New LCA with new HARDRACE Bushes vs Old LCA
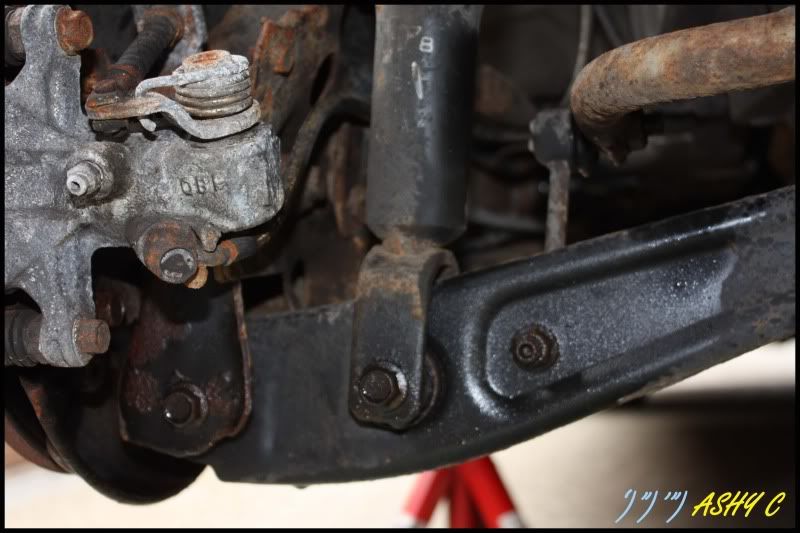
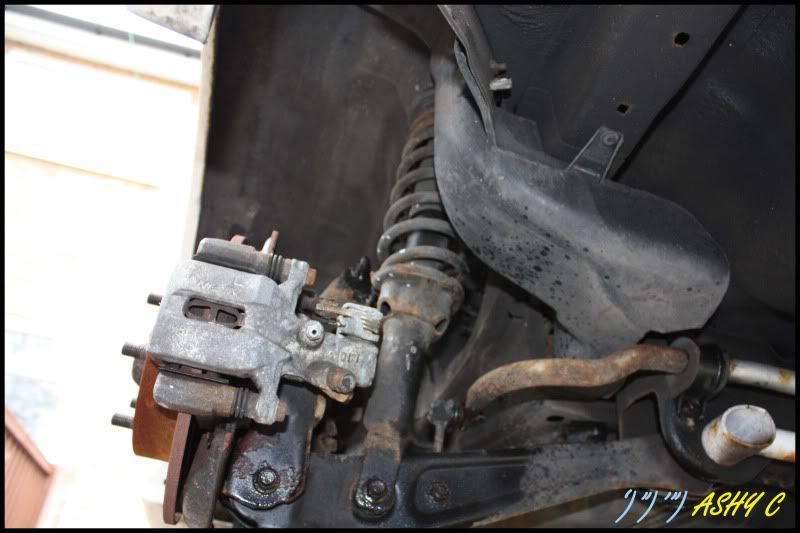
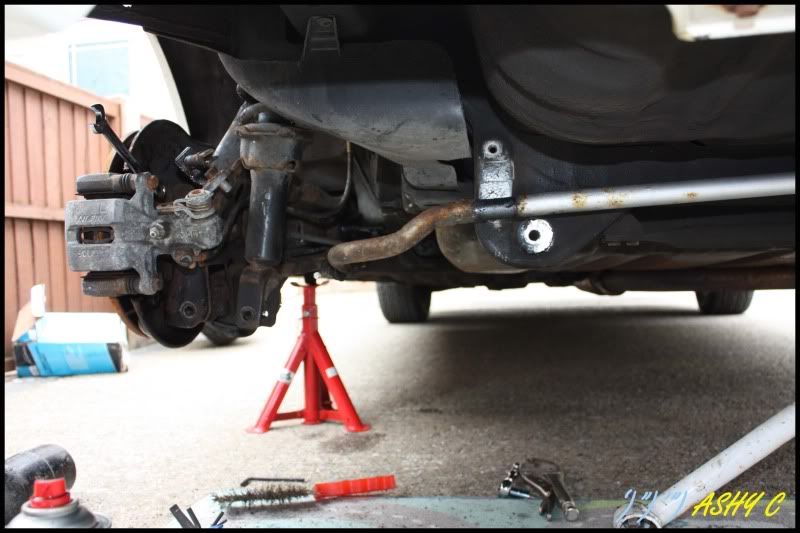
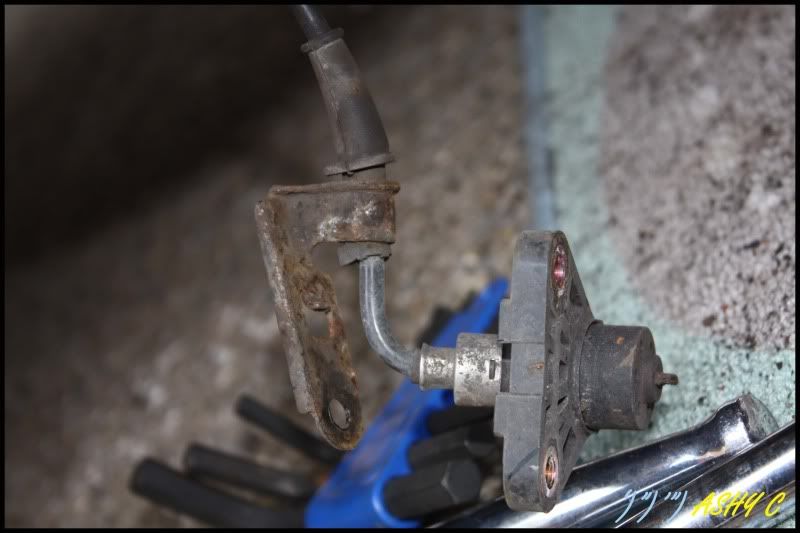
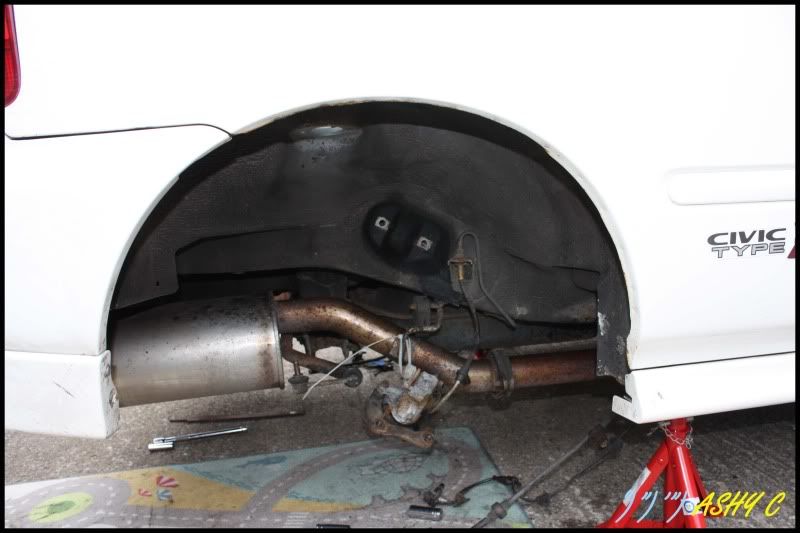
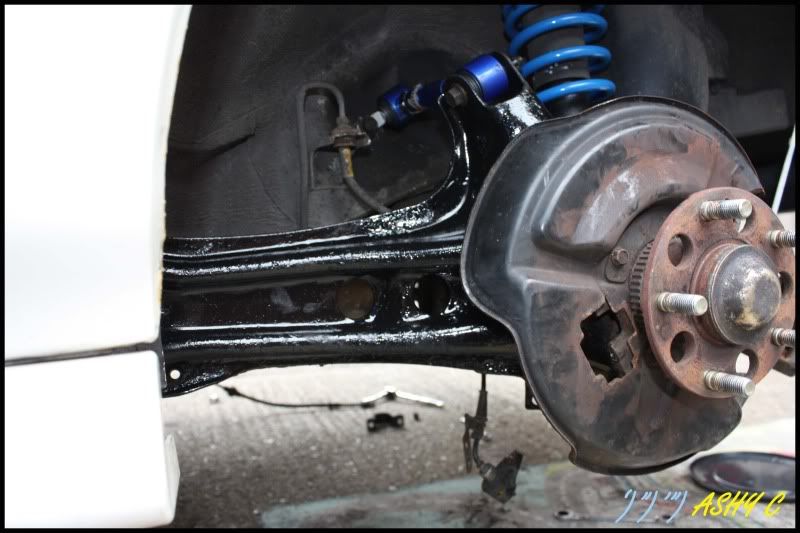
Started to remove the brake disc and caliper, next was the abs sensor and handbrake cables
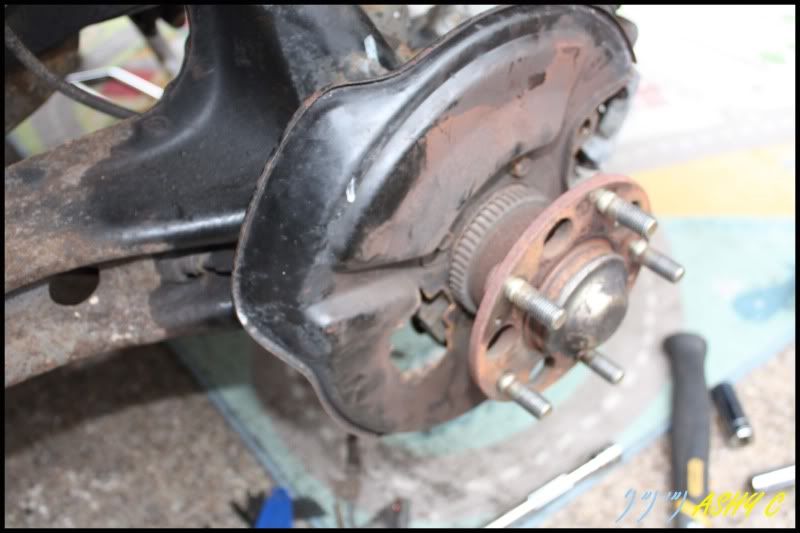
Sensor still in good condition, undamaged
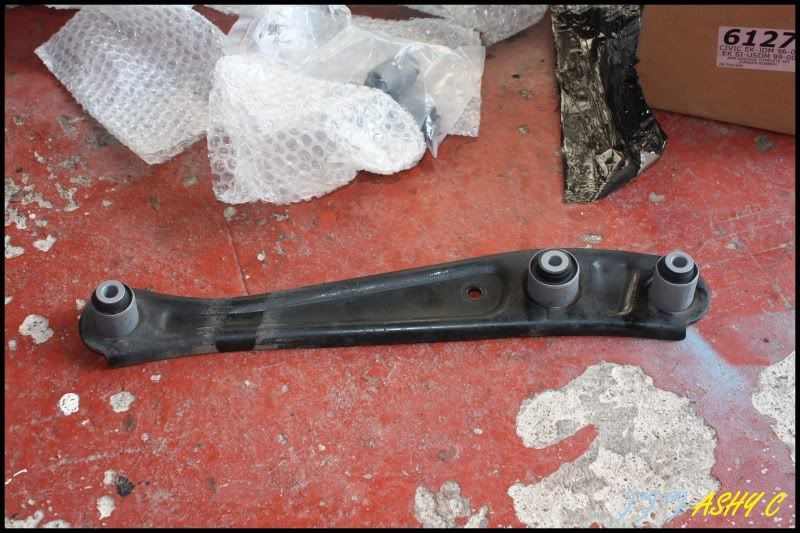
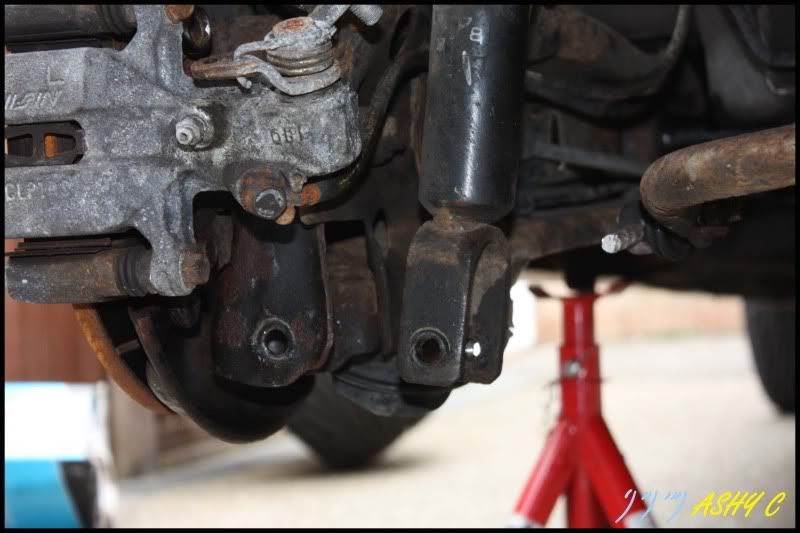
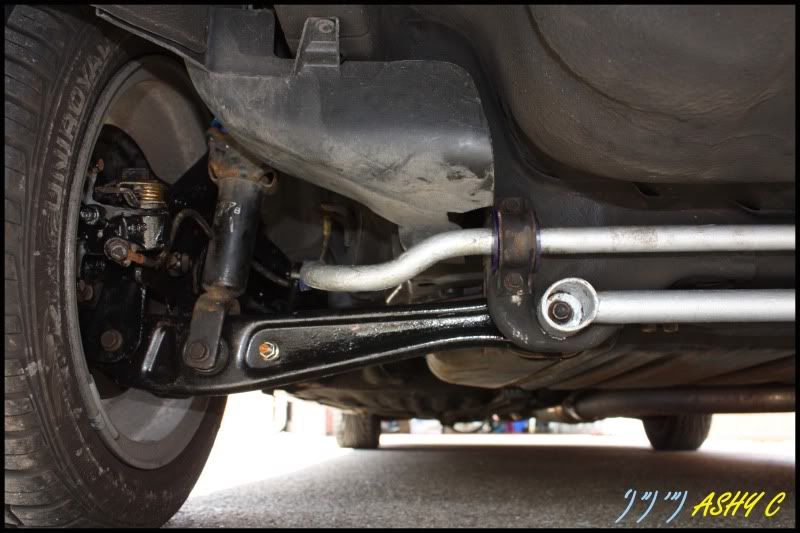
Once all this was removed i could drop the RTA to allow me to change this bush, noted the position of the old bush
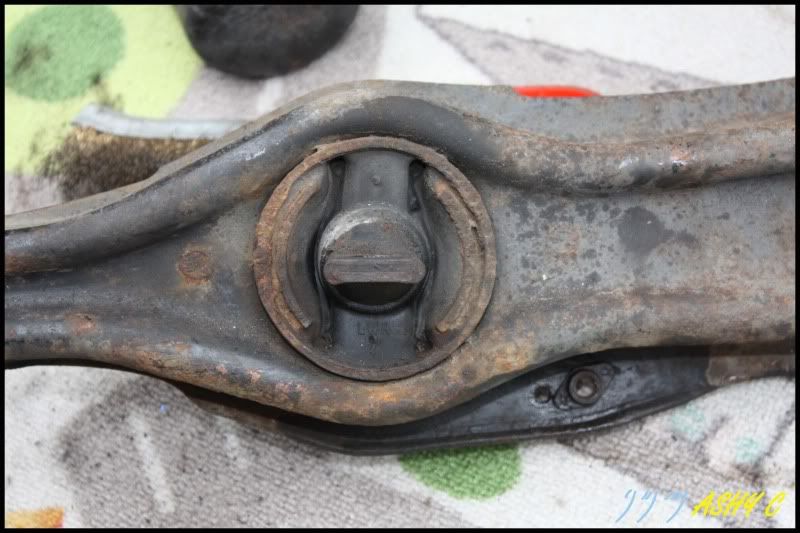
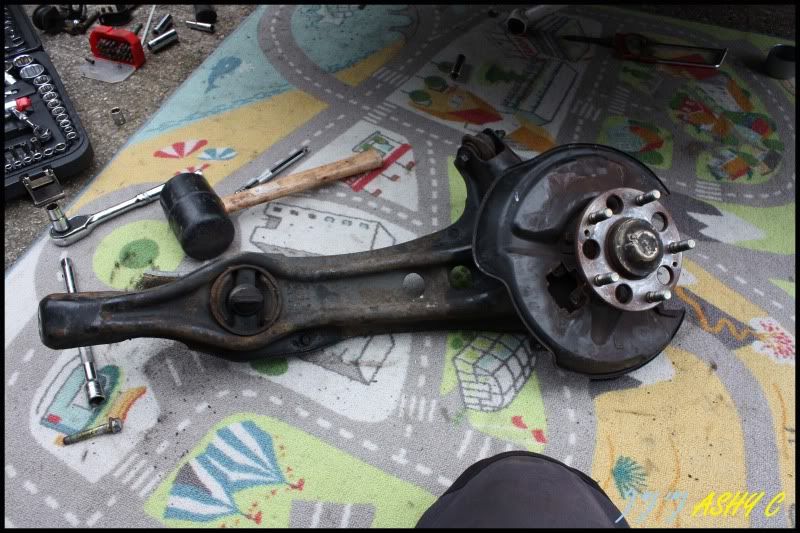
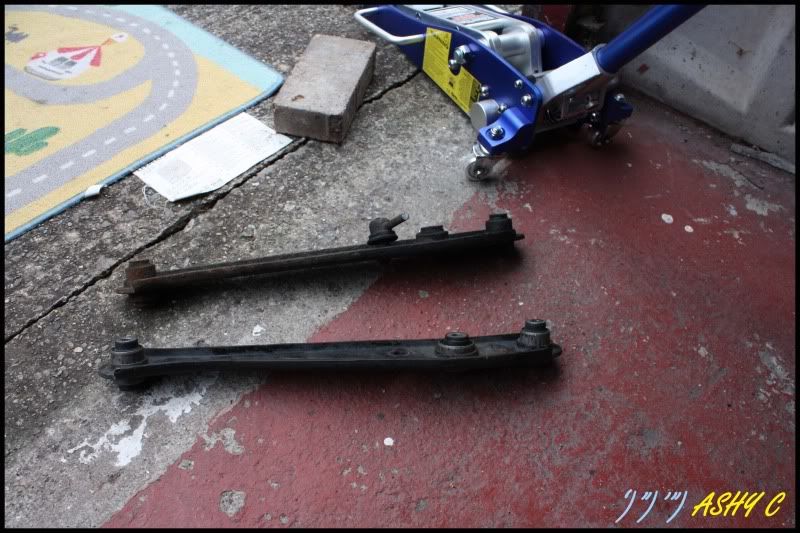
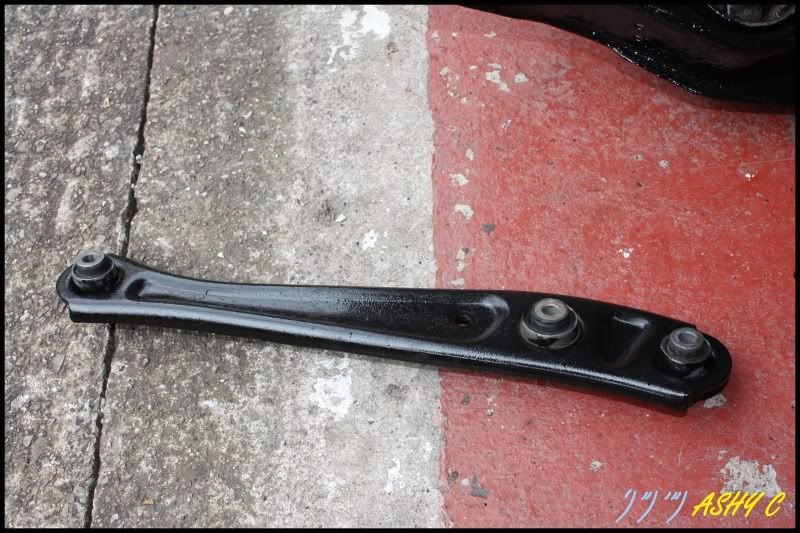
Old Toe arm

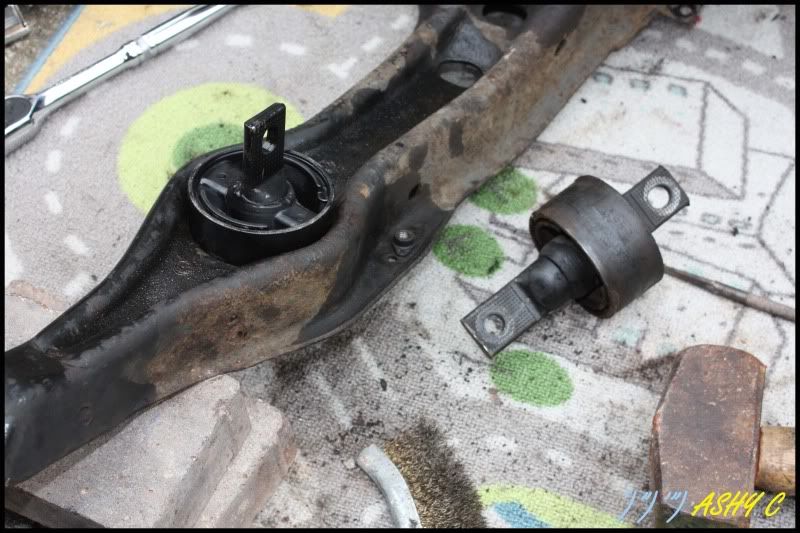
New blue print LCA bush vs old
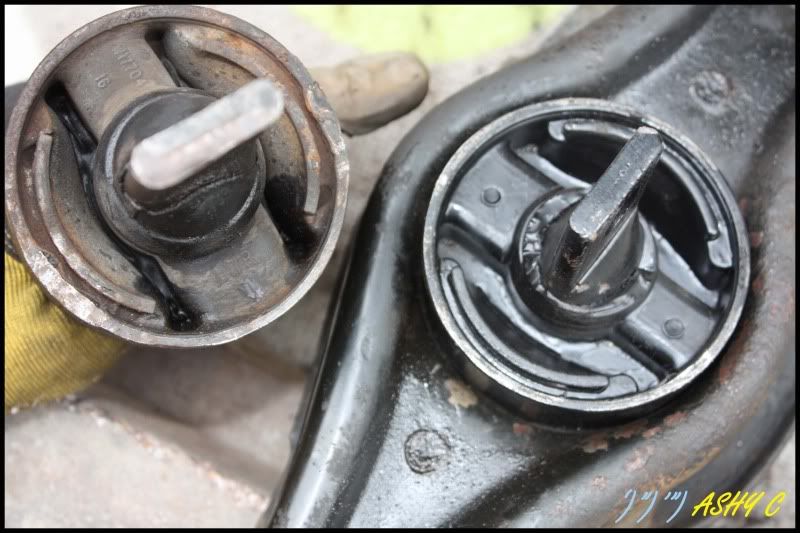
There was a little play in the old one, nothing as dramatic as some i have seen.
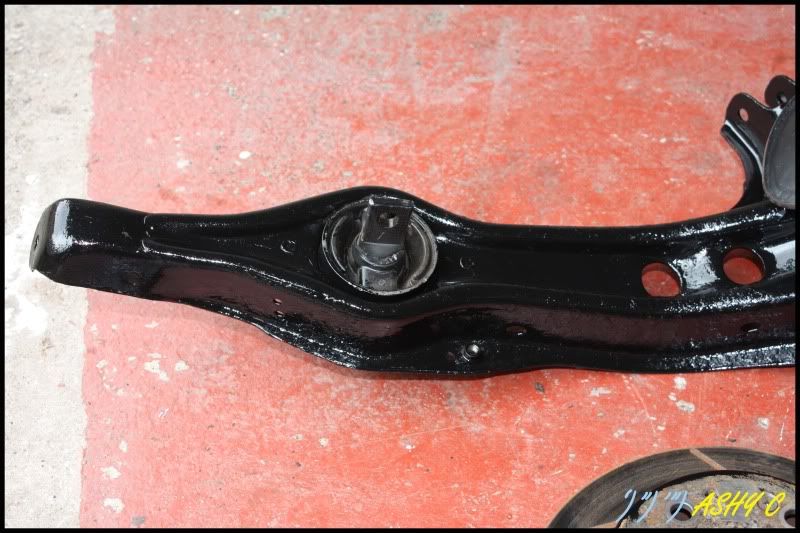
Awaiting a brush down and a lick of black hammerite paint
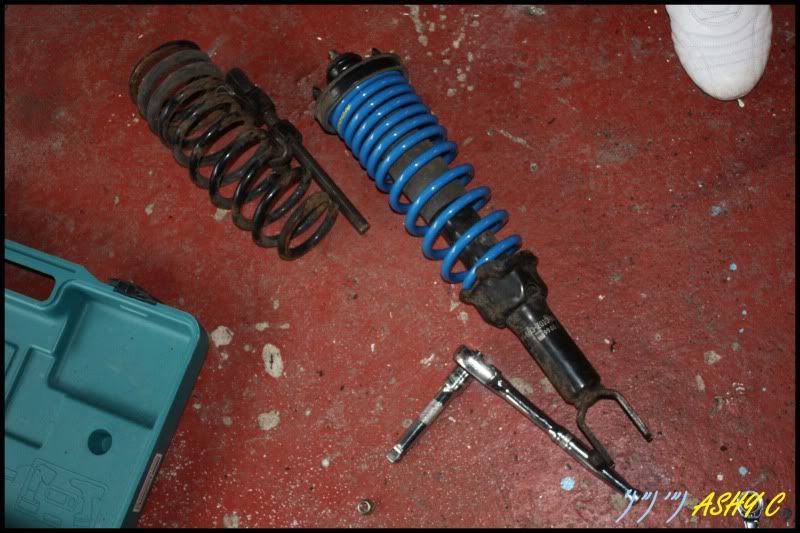
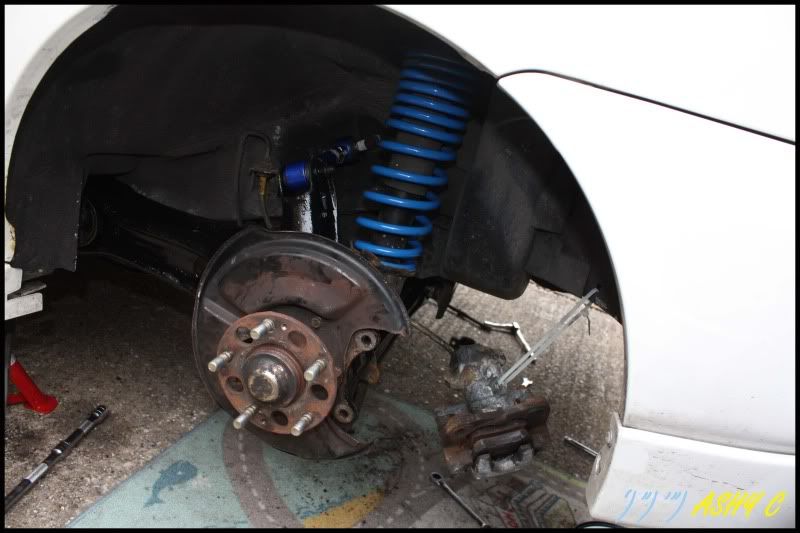
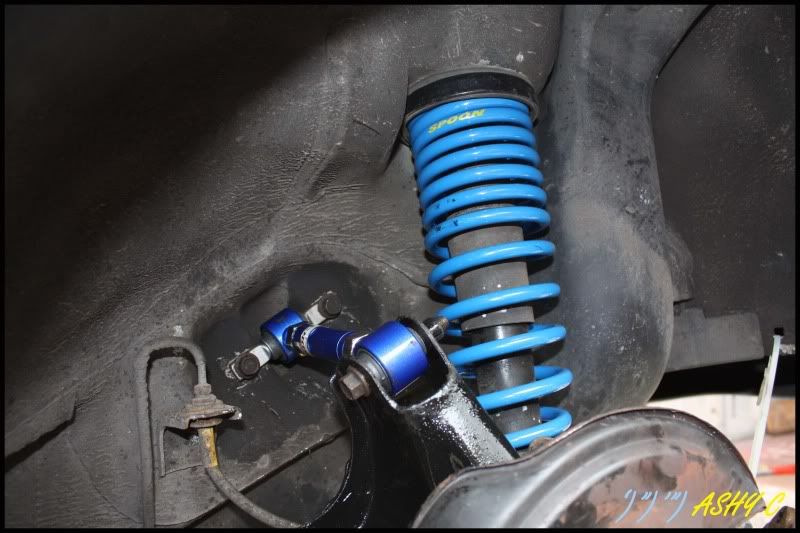
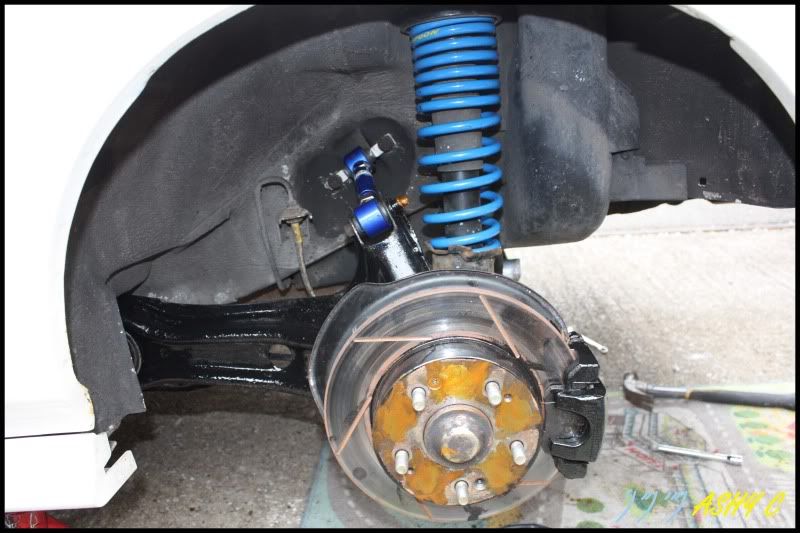
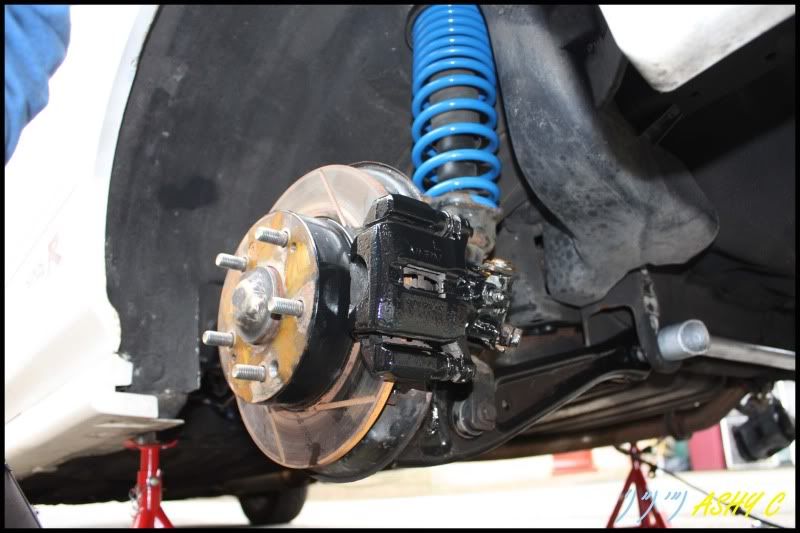
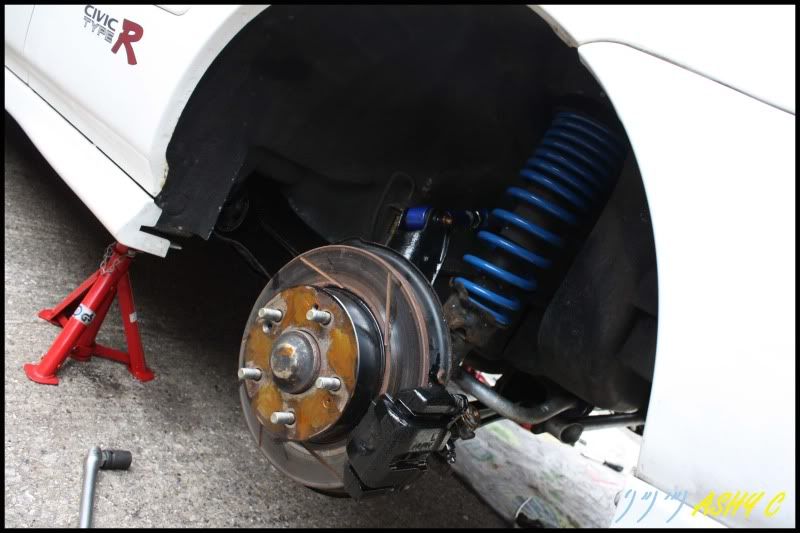
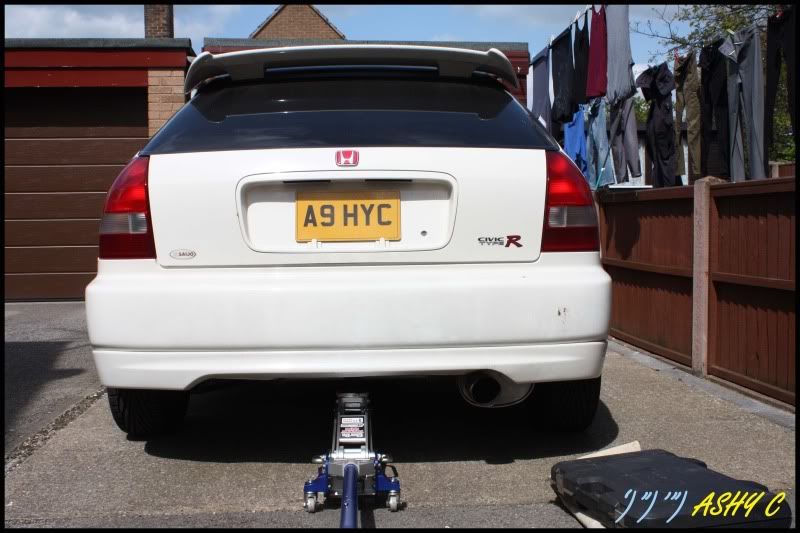
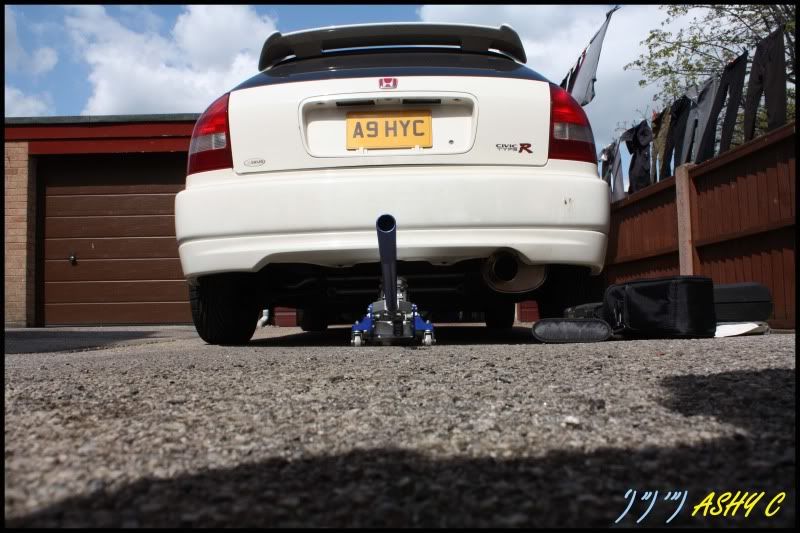
Fitted my new SPOON springs to my OEM HONDA shocks
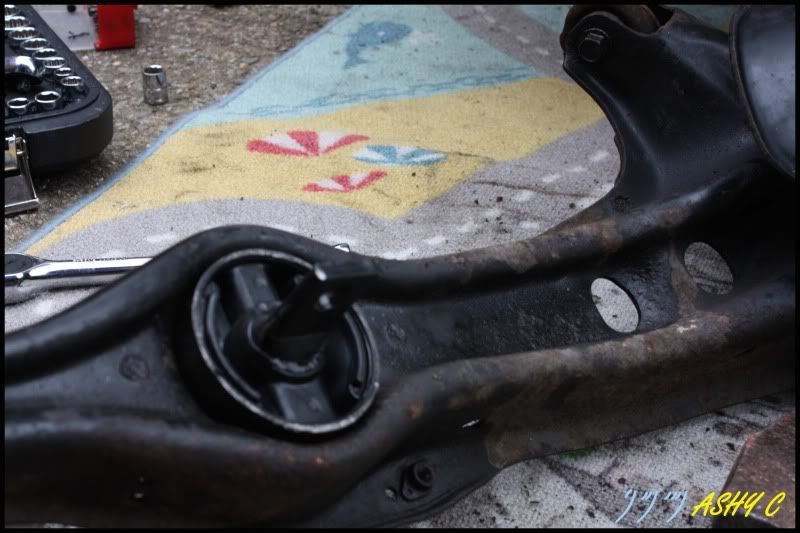
The hole that i was left with once everything was removed
Now i had read somewhere online that this was a 30min job to replace the RTA bush, now i wouldnt like to do it on the car, and i cant see an easier way really?
Going to rebuild it back up today, everything was painted up, so hopefully should be rolling by this evening. Look out for another update this weekend!
Week off work, and a garage full of bushes, arms and springs that need fitting.
I have no track days booked now, so under no pressure to get it completed, hopefully be done this week though, then a trip to get it aligned and set up.
First job was to prepare the LCA bolts and all the trailing arm bolts, a trusty can of No nonesense Penetrating Spray/Oil (£4 ish screwfix) sprayed all the bolts, 24 hours in advance then began with a wire brush and more spray.
Started by removing the old LCA, i recently purchased
The first problem was the rusty old antirollbar drop links, as usual the allen key hole rounded off, so out came the hack saw.
New LCA with new HARDRACE Bushes vs Old LCA
Started to remove the brake disc and caliper, next was the abs sensor and handbrake cables
Sensor still in good condition, undamaged
Once all this was removed i could drop the RTA to allow me to change this bush, noted the position of the old bush
Old Toe arm
New blue print LCA bush vs old
There was a little play in the old one, nothing as dramatic as some i have seen.
Awaiting a brush down and a lick of black hammerite paint
Fitted my new SPOON springs to my OEM HONDA shocks
The hole that i was left with once everything was removed
Now i had read somewhere online that this was a 30min job to replace the RTA bush, now i wouldnt like to do it on the car, and i cant see an easier way really?
Going to rebuild it back up today, everything was painted up, so hopefully should be rolling by this evening. Look out for another update this weekend!
Last edited:
joe_thompson
Engineering Tech
- Joined
- May 21, 2010
- Messages
- 788
This is going to be lethal!
Bit of an update seeing as its now raining
The parts i painted yesterday had dried nicely
That should keep the rust at bay for another few years, underneath should be pretty clean, going to re underseal it all in the summer.
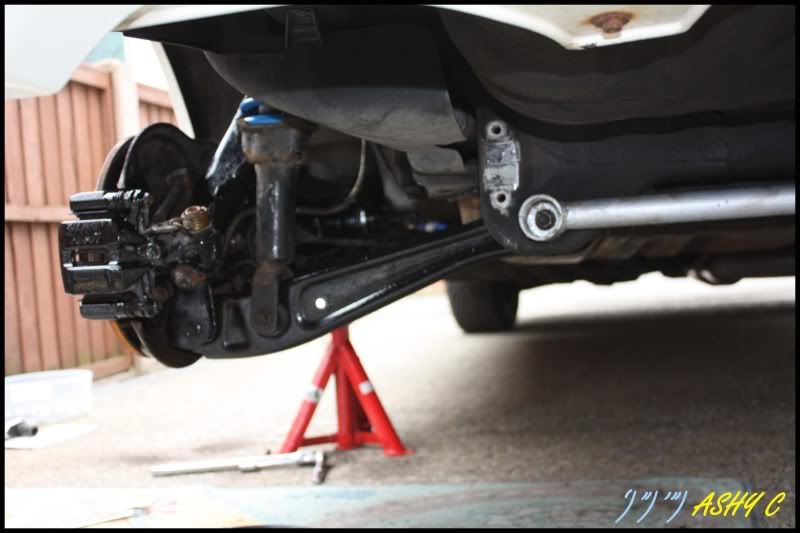
Rear trailing arm back on
Also painted the lip on the brake disk as it had gone rusty
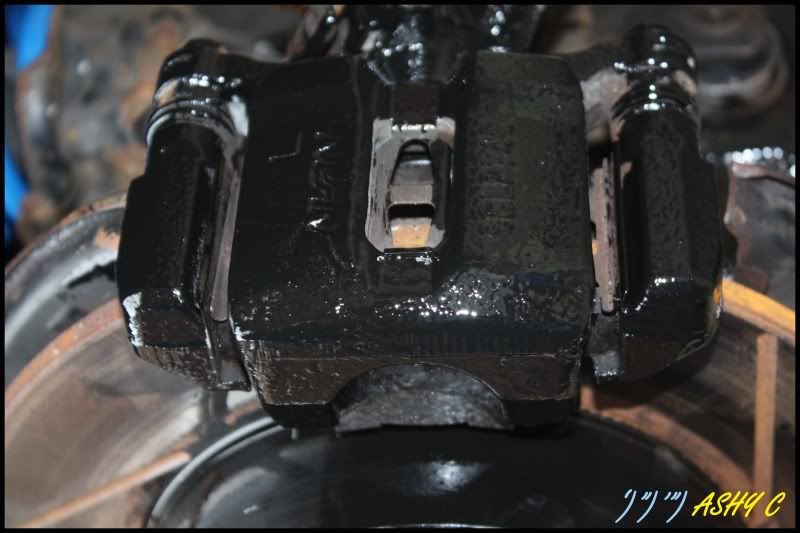
The recently purchased calipers also got a lick of Black paint!
Joe Thompson Strut bar got a lick of silver paint too!
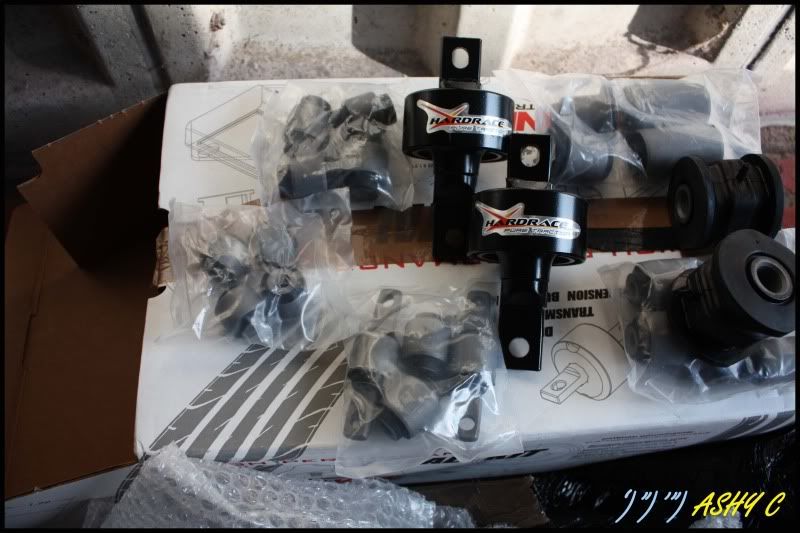
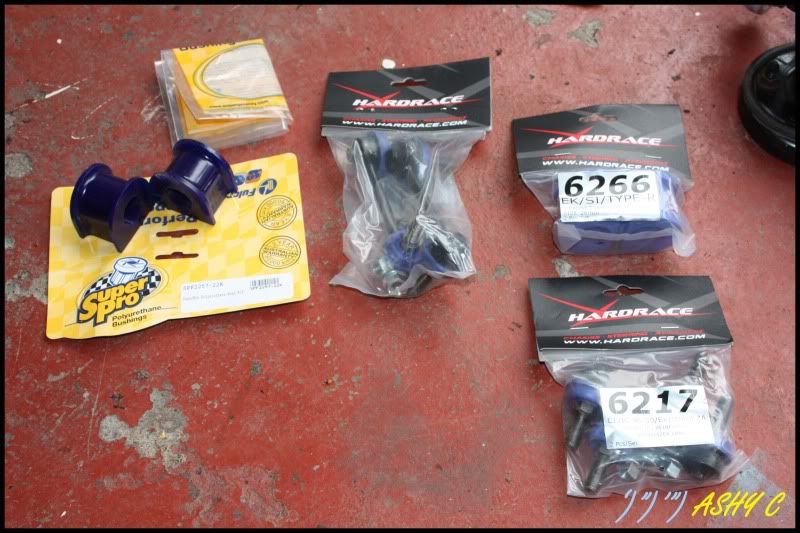
More goodies that need to be fitted
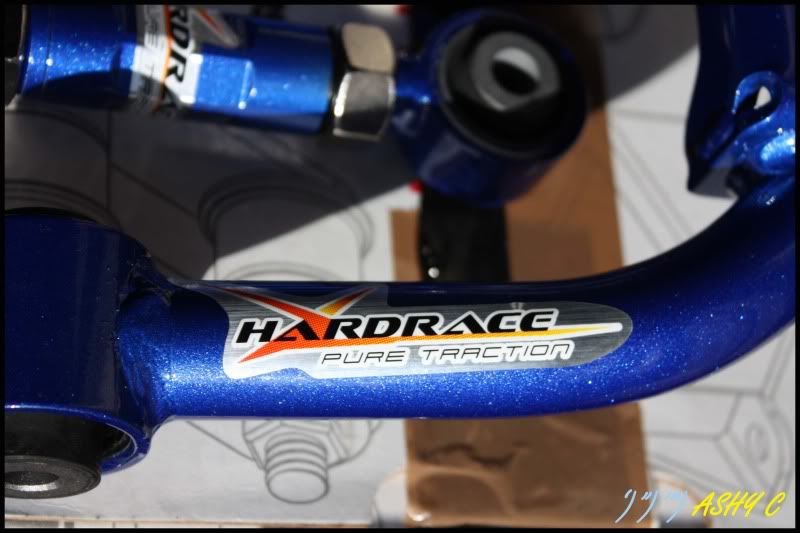
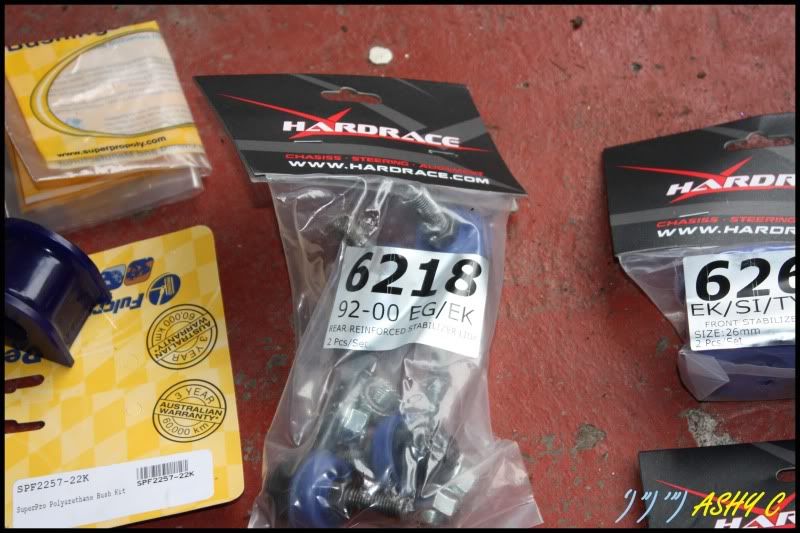
HARDRACE Front Anti Roll Bar Droplinks
HARDRACE Rear Anti Roll Bar Droplinks
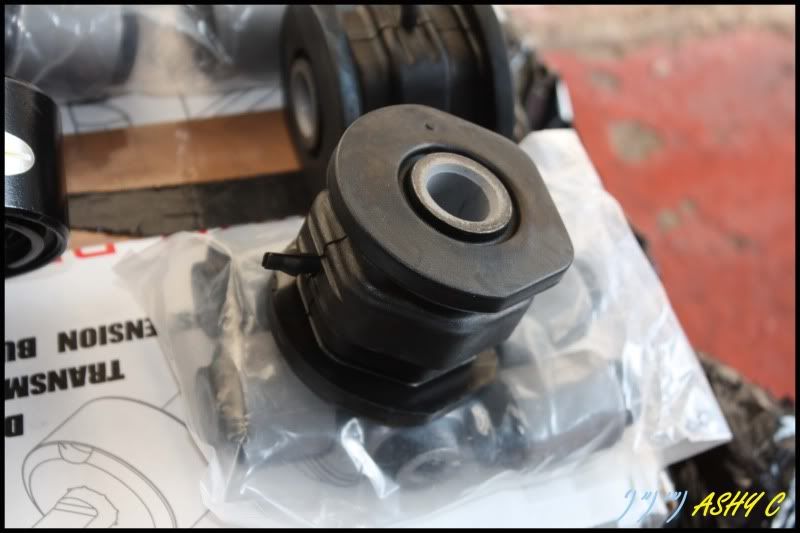
HARDRACE Front Anti Roll Bushes
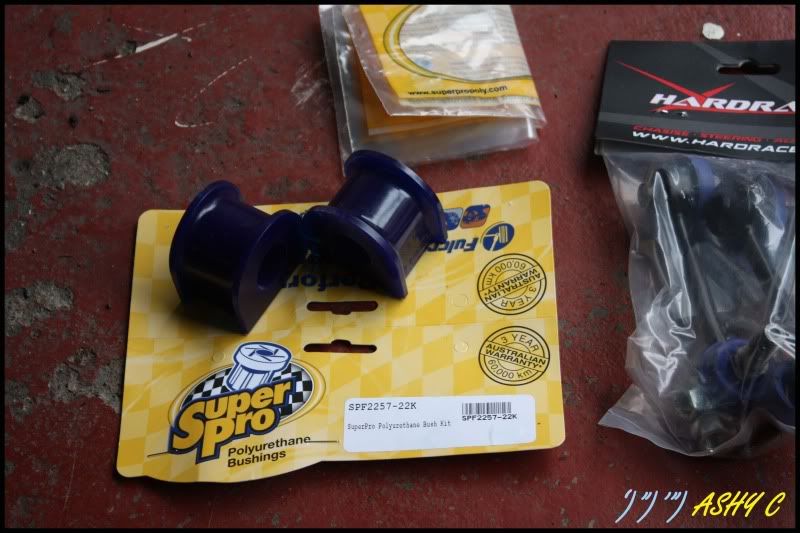
Super Pro Rear Anti Roll Bar Bushes
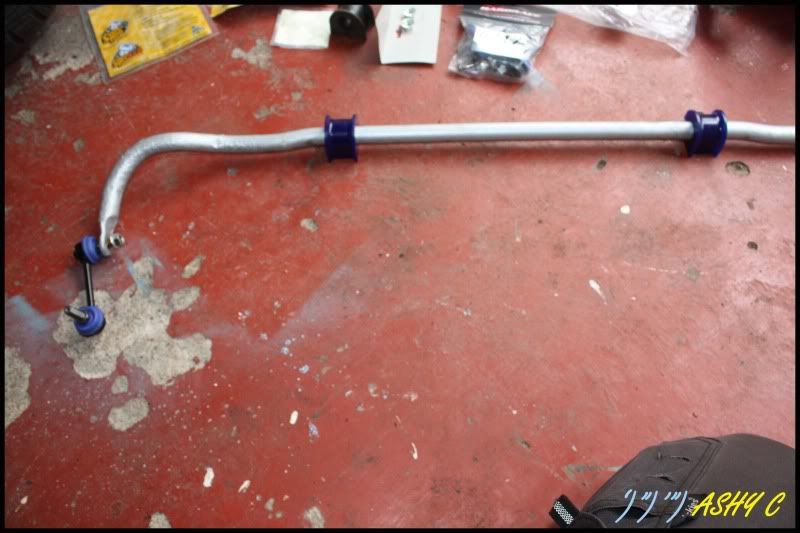

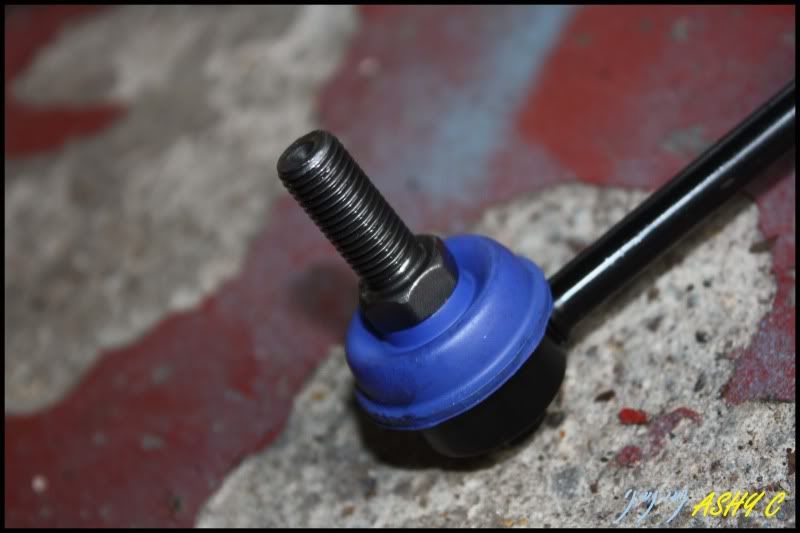
The HARDRACE anti roll bar drop links have a better design and do away with the allen key hole, instead they use two nuts , a fixed inner nut and seperate outer nut! No more rounded holes
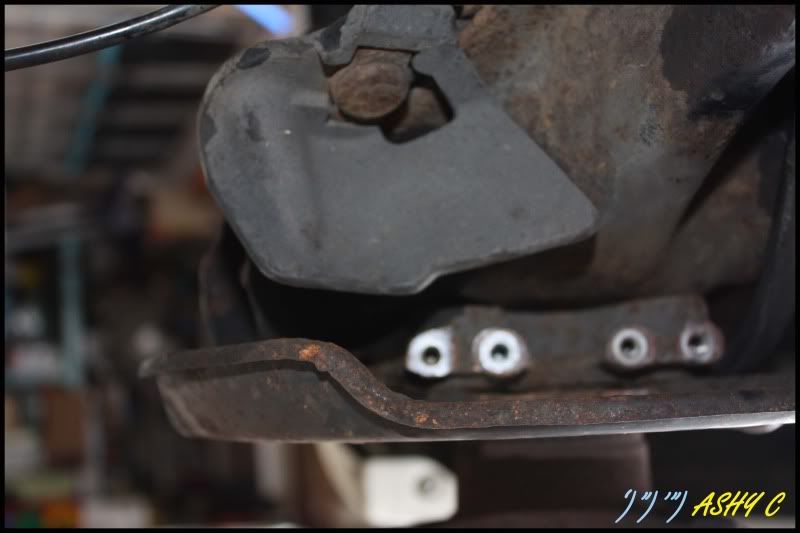
Thats as much as i have done, passenger side is finished and just requires tightening up, the drivers side RTA arm is mounted but the brakes and the other bits need fitting. The anti roll bar also needs refitting.
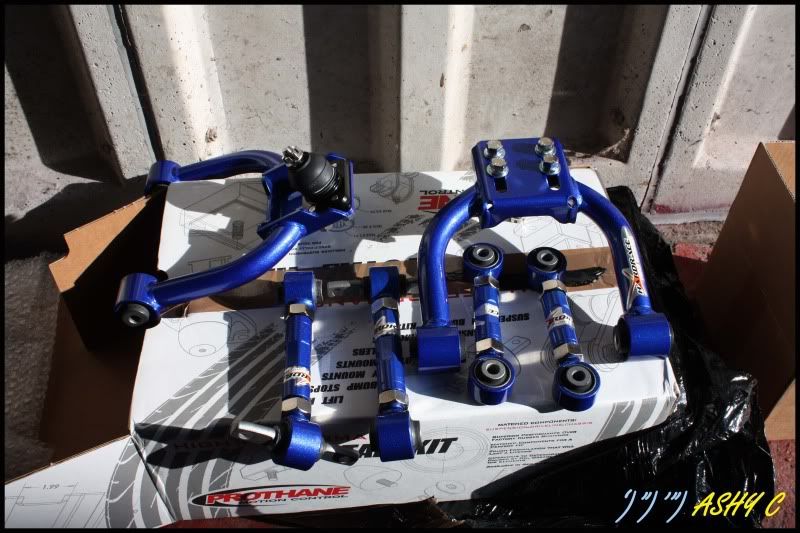
Spec for the suspension will be as follows:
Spec is as Follows:
FRONT:
HARDRACE Rebushed
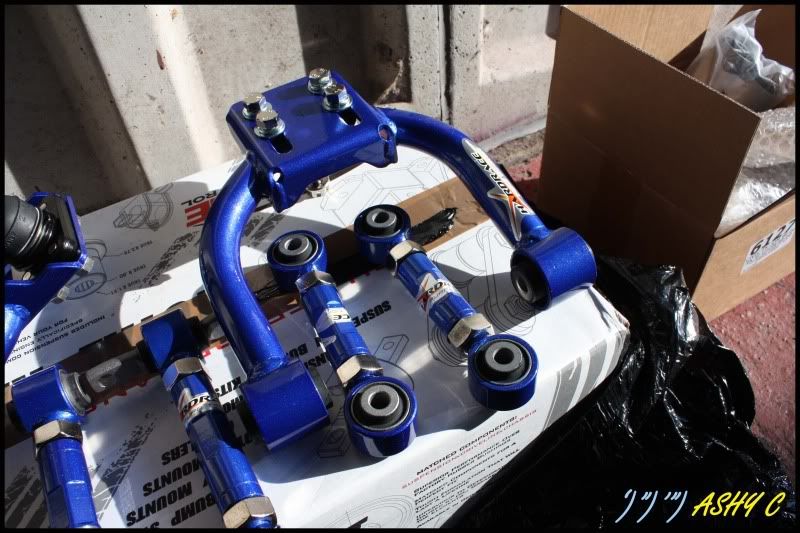
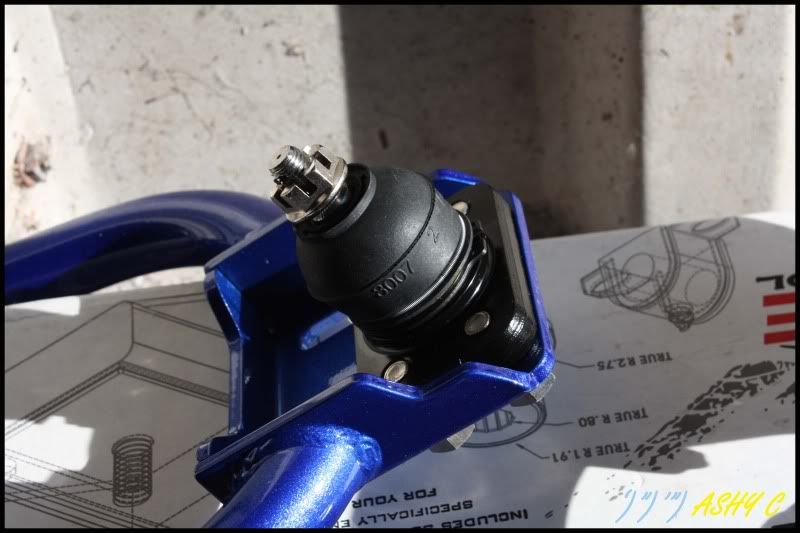
HARDRACE Camber Arms
Spoon Springs
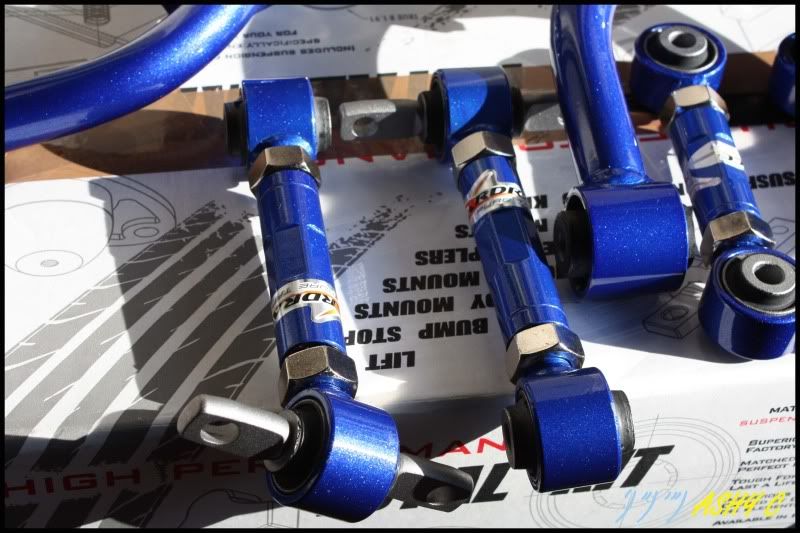
HARDRACE Anti Roll Bar Links
HARDRACE Anti Roll Bar Bushes
REAR:
HARDRACE Rebushed LCA
HARDRACE Toe Arms
HARDRACE Camber Arms
HARDRACE Anti roll bar drop links
Super Pro Anti Roll bar bushes
Spoon Springs
That will mean the rear is done and rebushed, along with the spoon springs fitted, hopefuly next week i can start on the front!!! Never attempted much work on the front, so i'm a little unsure on that, will see how it goes.
JOB DONE for today, Friday night beer in order!!!
The parts i painted yesterday had dried nicely
That should keep the rust at bay for another few years, underneath should be pretty clean, going to re underseal it all in the summer.
Rear trailing arm back on
Also painted the lip on the brake disk as it had gone rusty
The recently purchased calipers also got a lick of Black paint!
Joe Thompson Strut bar got a lick of silver paint too!
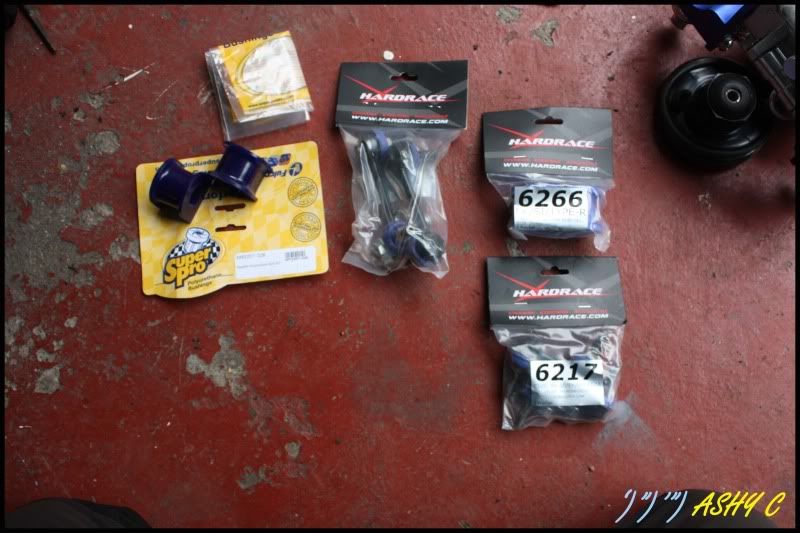
More goodies that need to be fitted
HARDRACE Front Anti Roll Bar Droplinks
HARDRACE Rear Anti Roll Bar Droplinks
HARDRACE Front Anti Roll Bushes
Super Pro Rear Anti Roll Bar Bushes
The HARDRACE anti roll bar drop links have a better design and do away with the allen key hole, instead they use two nuts , a fixed inner nut and seperate outer nut! No more rounded holes
Thats as much as i have done, passenger side is finished and just requires tightening up, the drivers side RTA arm is mounted but the brakes and the other bits need fitting. The anti roll bar also needs refitting.
Spec for the suspension will be as follows:
Spec is as Follows:
FRONT:
HARDRACE Rebushed
HARDRACE Camber Arms
Spoon Springs
HARDRACE Anti Roll Bar Links
HARDRACE Anti Roll Bar Bushes
REAR:
HARDRACE Rebushed LCA
HARDRACE Toe Arms
HARDRACE Camber Arms
HARDRACE Anti roll bar drop links
Super Pro Anti Roll bar bushes
Spoon Springs
That will mean the rear is done and rebushed, along with the spoon springs fitted, hopefuly next week i can start on the front!!! Never attempted much work on the front, so i'm a little unsure on that, will see how it goes.
JOB DONE for today, Friday night beer in order!!!
Last edited:
joe_thompson
Engineering Tech
- Joined
- May 21, 2010
- Messages
- 788
soo many good parts! you defo dont skimp on parts
offspringy
JDM DC2R
- Joined
- Sep 16, 2008
- Messages
- 33
This is such an awesome build, so jealous
Your not a million miles away from me either!
Where is the tuning guy located if you dont mind me asking?
And also where did you get the Hard Race Droplinks?
Your not a million miles away from me either!
Where is the tuning guy located if you dont mind me asking?
And also where did you get the Hard Race Droplinks?
This is such an awesome build, so jealous
Your not a million miles away from me either!
Where is the tuning guy located if you dont mind me asking?
And also where did you get the Hard Race Droplinks?
Will is based just off the M1, Doncaster way. -- RACE DYNO TUNING --
The droplinks came from America, nice saving compared to standard and blueprint parts :-D
So heres the last bit from the weekend, with a twist at the end too!
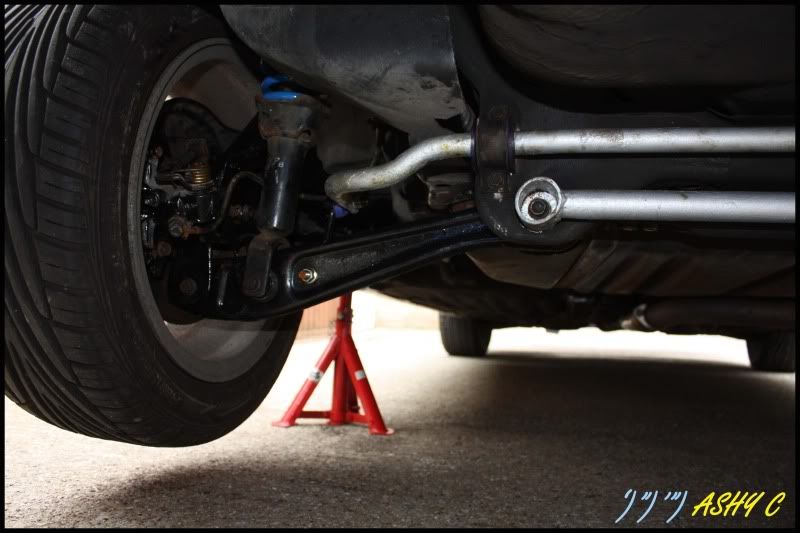
Anti roll bar refitted and drop links connected, but not tightened
Everything nipped up but not torqued/tight
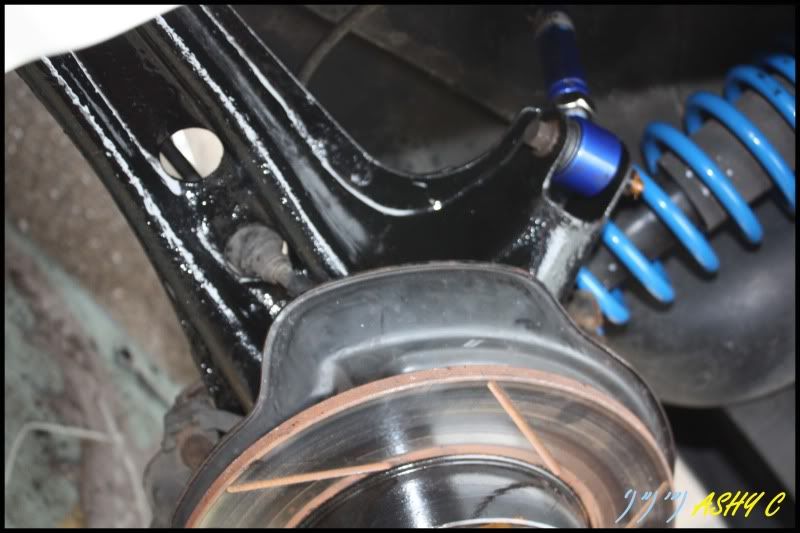
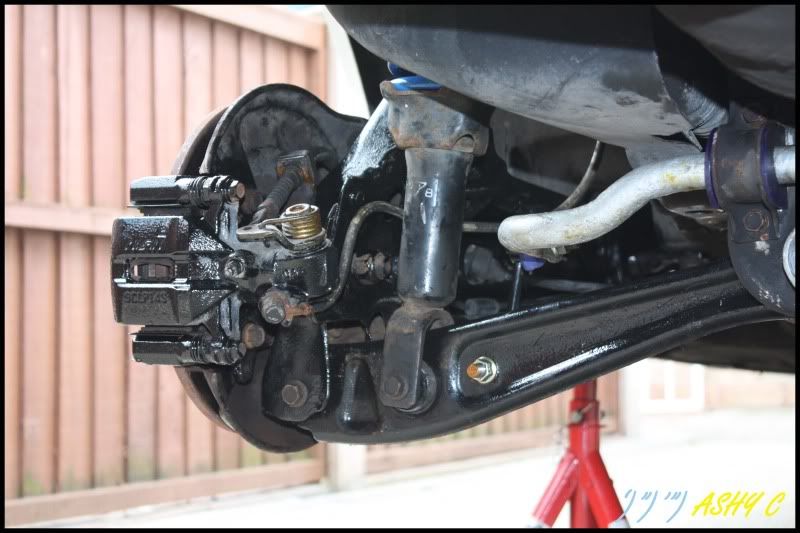
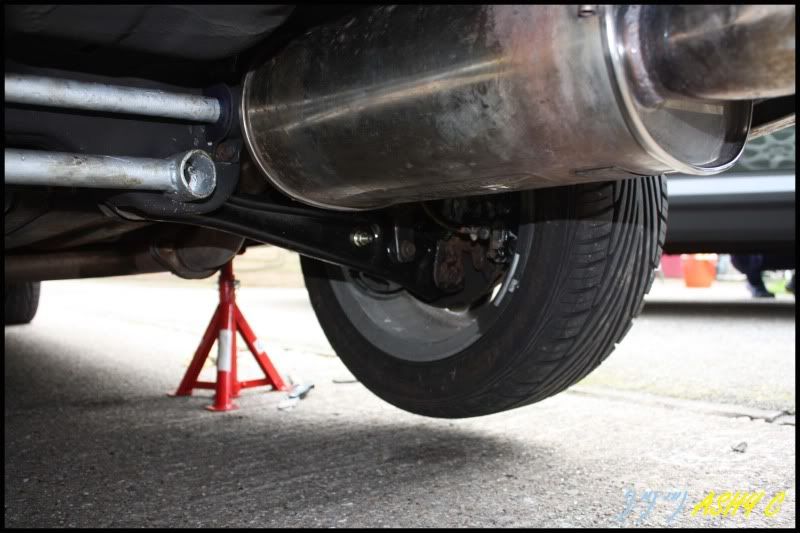
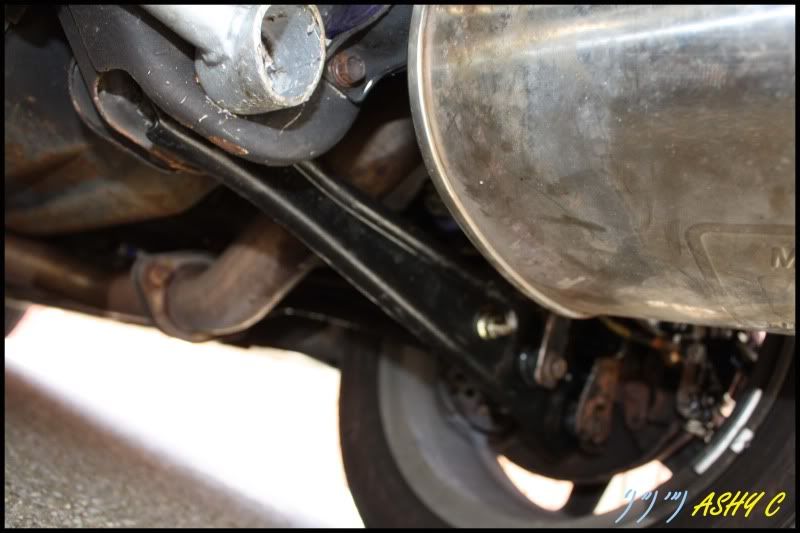
The LCA and RTA connected up on the drivers side!
With everything on i lowered the car and tightend everything up, trying to reduce any pretension on the arms etc.
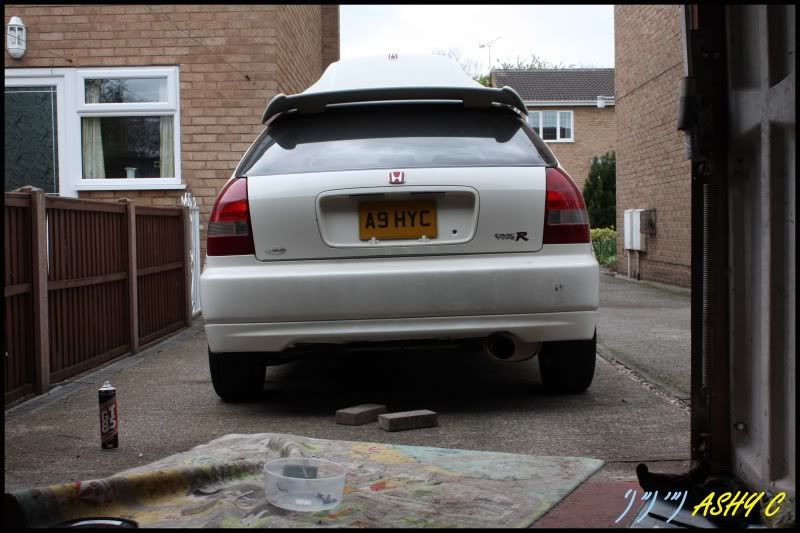
Now the above picture is important, when i lowered the car there was a height difference, at first i put this down to the previous side being built up the previous day or the fact the springs had settled more.
Thinking the job was done i tidied up and had a brew, whilst having i bre i logged onto my favourite website, EK9.org: JDM EK9 Honda Civic Type R Forum, did a little search out of curiosity to see how long it would be for the springs to settle. Upon reading i found a useful thread where a question had been asked about "Uneven ride height" to which on the 3rd page came the answer
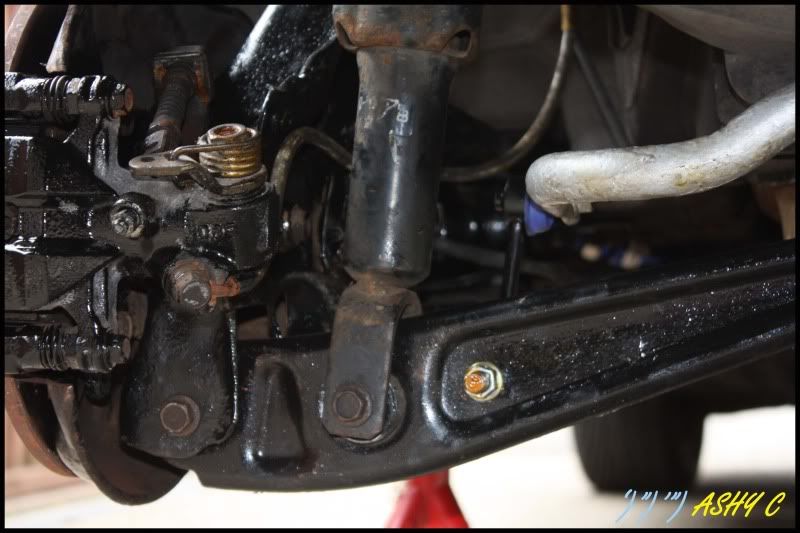
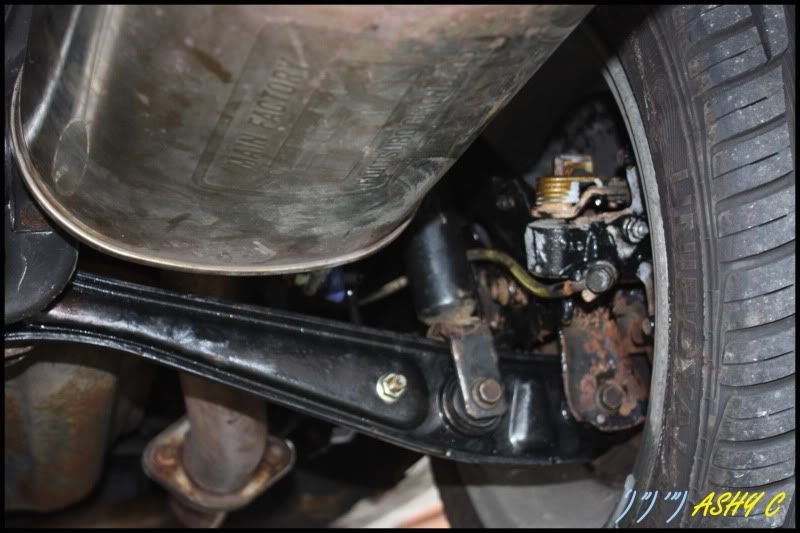
The drivers side LCA was fitted the wrong way round. BUT how, they look alright when they went on, there wasnt a big struggle to get it on??? Puzzled i still thought it was suspension settle.
The niggle never went for the next few hours, untill i decide to check the photos above for if this was my mistake.
IT WAS!!!! The drivers LCA was wrong
No biggy only 4 bolts to change it.
SUNDAY AFTERNOON
Still even height, had to be the arm
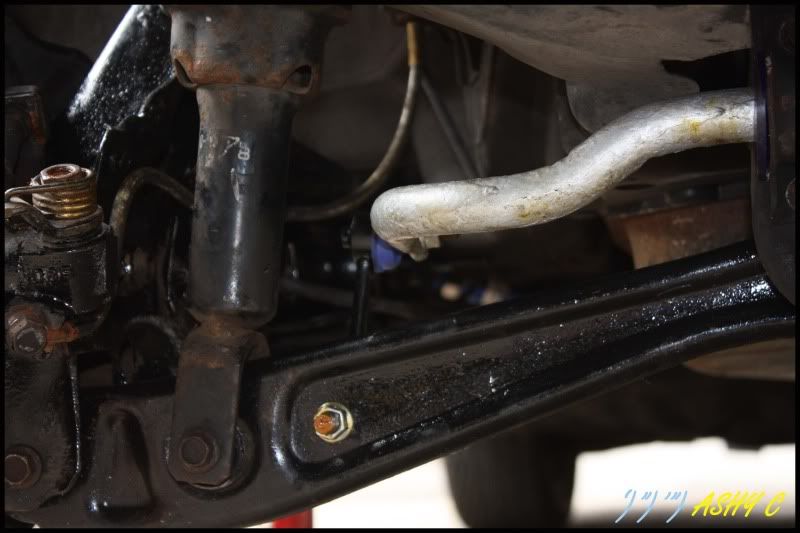
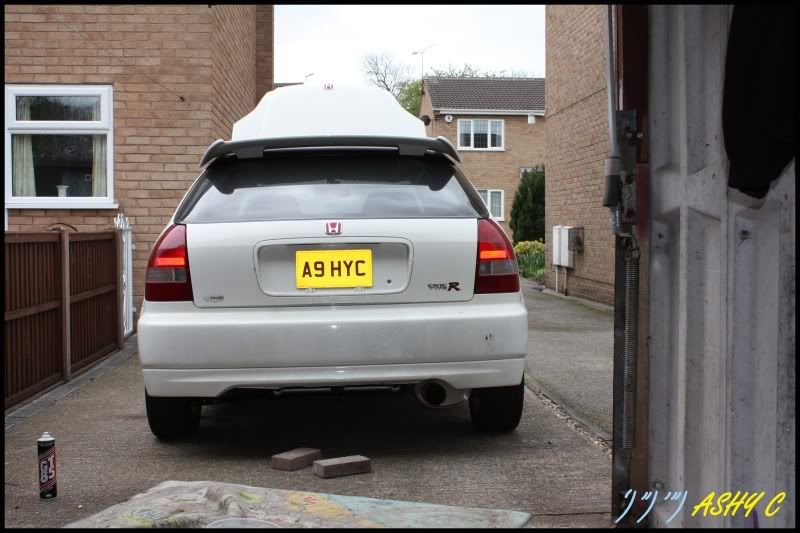
Notice how the passenger arm is smooth and nice towards the back of the car
And so was the drivers side, but this was the wrong way
Infact it should have looked like this

So a lesson learnt. This would also explain a few threads where people have swapped springs and the car is infact higher, as between the two sides was around 20mm difference in ride height!!
Anyway, job done for the back, took it for a spin and it has bags of oversteer due to the new bushes and the fact the rear springs are now stiffer than the fronts :O
Signing off for now
Anti roll bar refitted and drop links connected, but not tightened
Everything nipped up but not torqued/tight
The LCA and RTA connected up on the drivers side!
With everything on i lowered the car and tightend everything up, trying to reduce any pretension on the arms etc.
Now the above picture is important, when i lowered the car there was a height difference, at first i put this down to the previous side being built up the previous day or the fact the springs had settled more.
Thinking the job was done i tidied up and had a brew, whilst having i bre i logged onto my favourite website, EK9.org: JDM EK9 Honda Civic Type R Forum, did a little search out of curiosity to see how long it would be for the springs to settle. Upon reading i found a useful thread where a question had been asked about "Uneven ride height" to which on the 3rd page came the answer
The drivers side LCA was fitted the wrong way round. BUT how, they look alright when they went on, there wasnt a big struggle to get it on??? Puzzled i still thought it was suspension settle.
The niggle never went for the next few hours, untill i decide to check the photos above for if this was my mistake.
IT WAS!!!! The drivers LCA was wrong
No biggy only 4 bolts to change it.
SUNDAY AFTERNOON
Still even height, had to be the arm
Notice how the passenger arm is smooth and nice towards the back of the car
And so was the drivers side, but this was the wrong way
Infact it should have looked like this
So a lesson learnt. This would also explain a few threads where people have swapped springs and the car is infact higher, as between the two sides was around 20mm difference in ride height!!
Anyway, job done for the back, took it for a spin and it has bags of oversteer due to the new bushes and the fact the rear springs are now stiffer than the fronts :O
Signing off for now