
You are using an out of date browser. It may not display this or other websites correctly.
You should upgrade or use an alternative browser.
You should upgrade or use an alternative browser.
Project '9' (EK Na Na Niiiiiine)
- Thread starter Ashy C
- Start date
UPDATE :
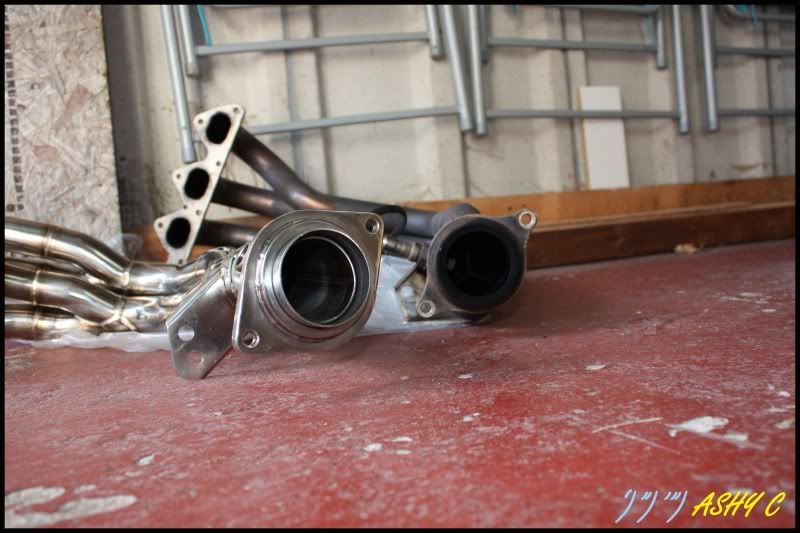
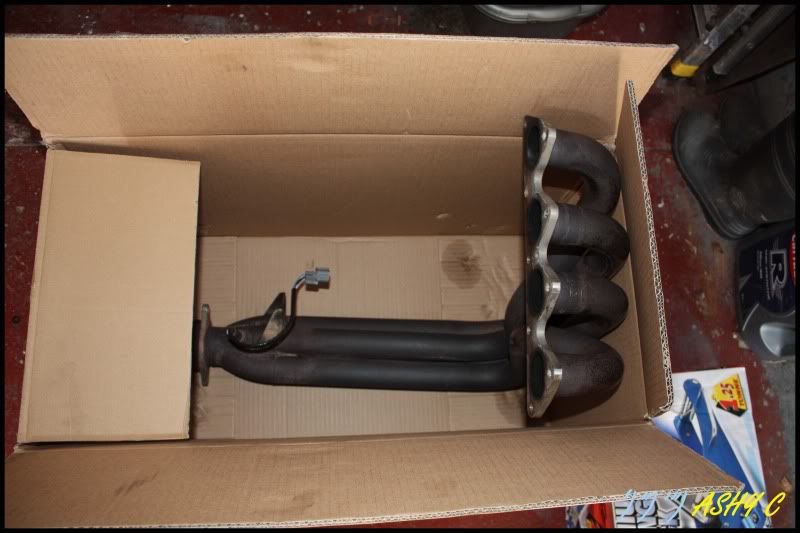
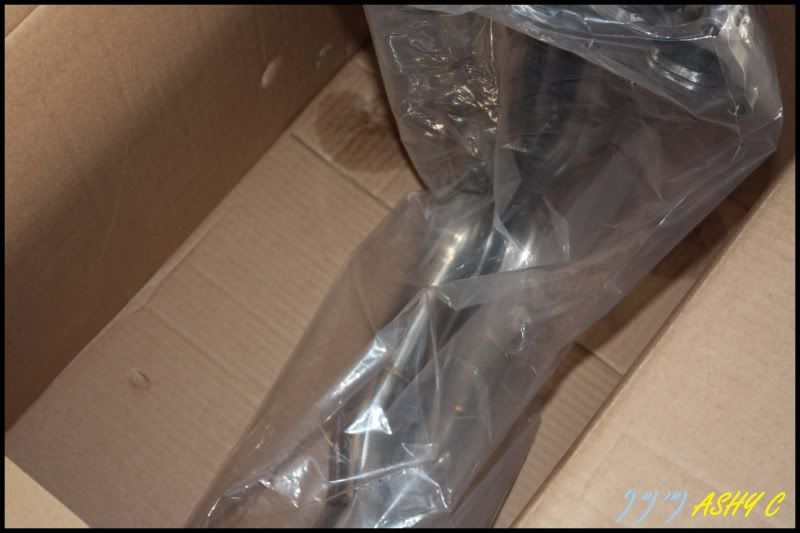
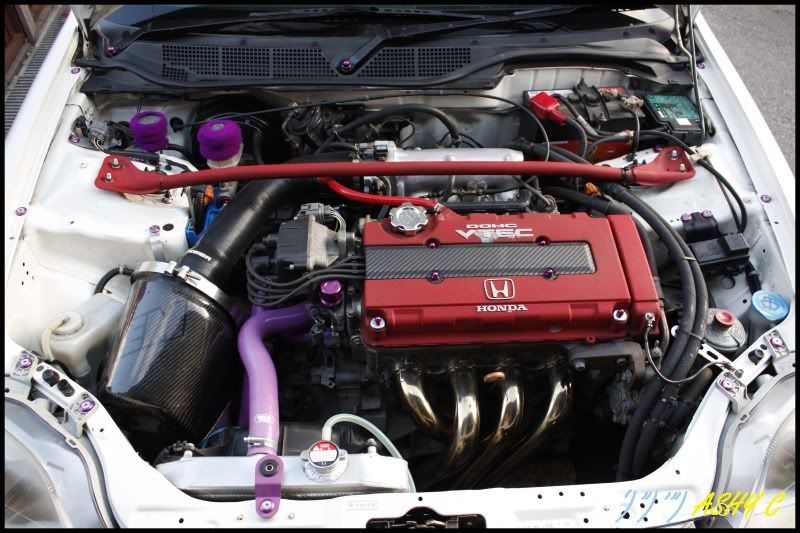
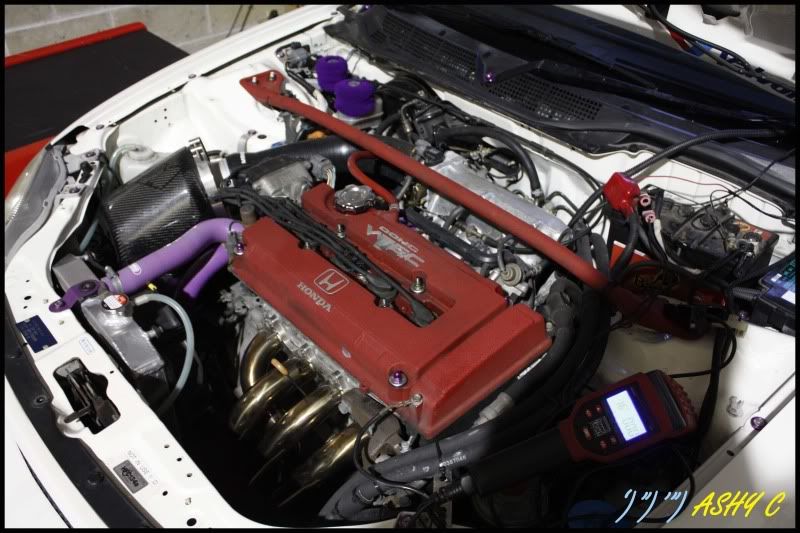
Sourced a new Tegiwa Exhaust Manifold
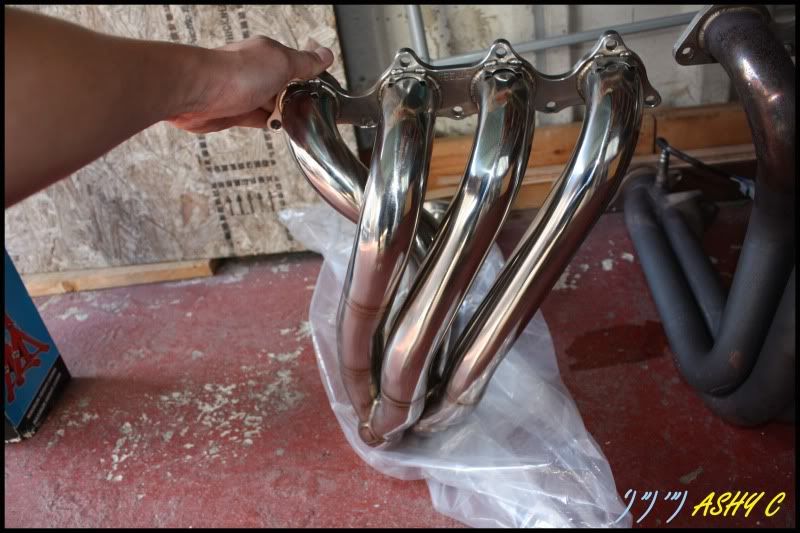
Before running, shiney silver
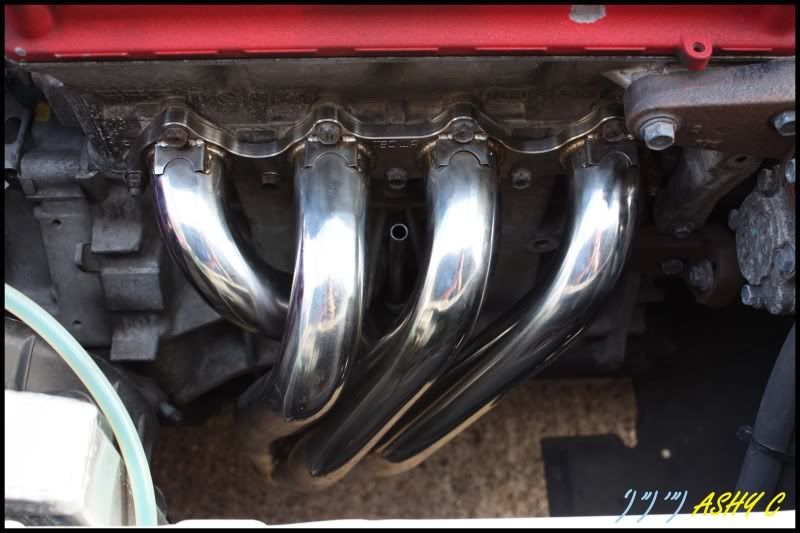
After a run, nice gold colour
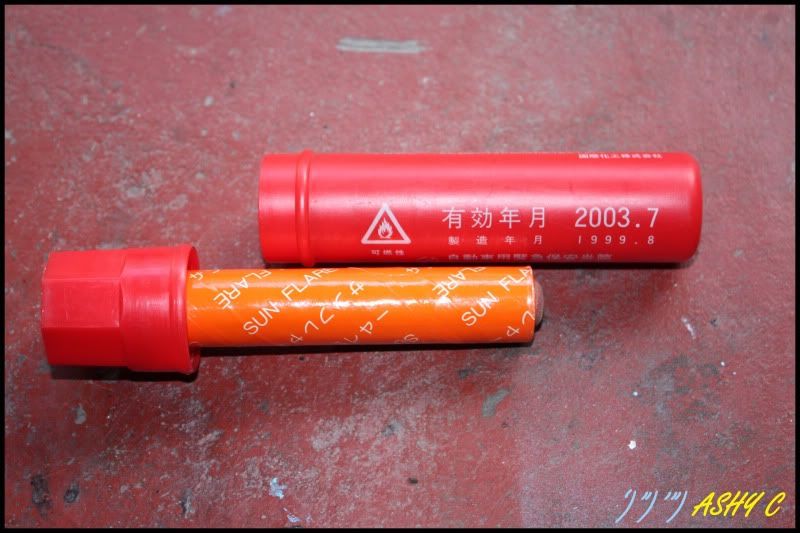
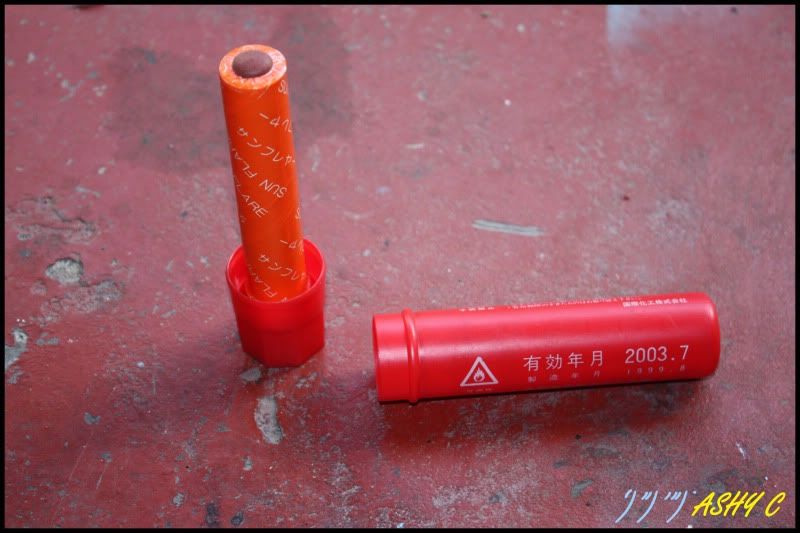
Nice flare i picked up today too")
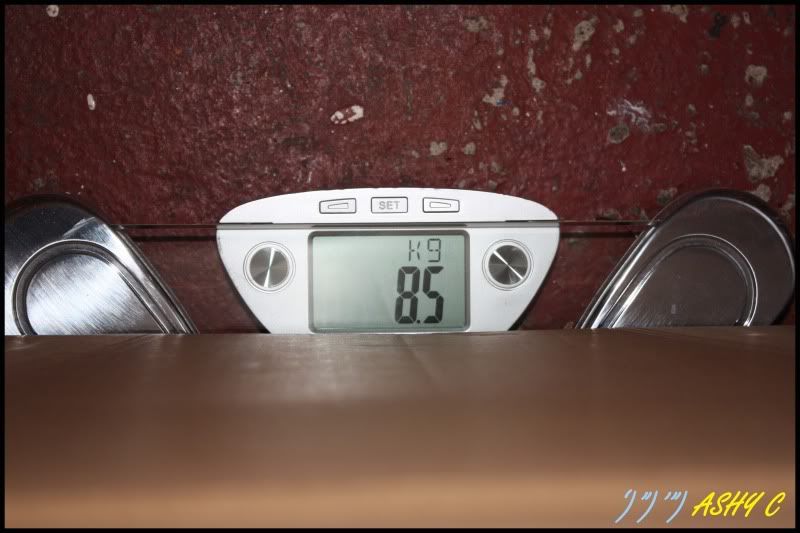
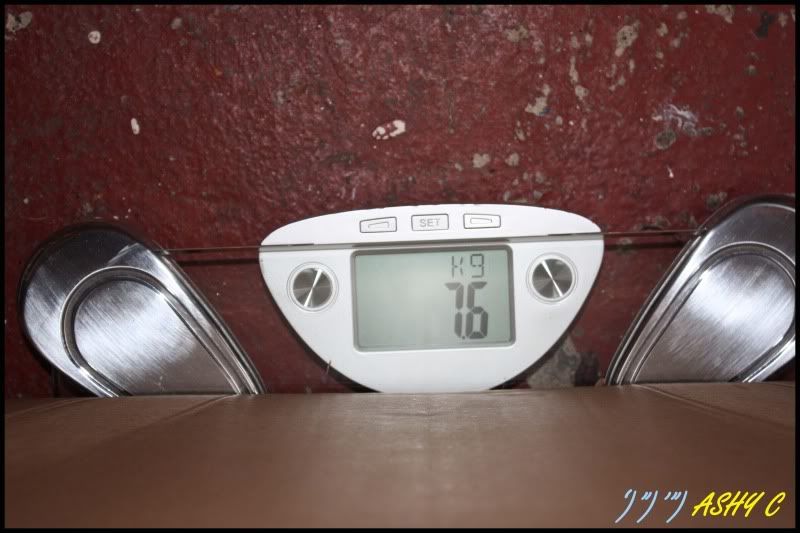
What surprised me was the Mugen being 2.25inch and the fact it was 900grams heavier, the box weighed 1kg btw, and for comparison, the standard manifold weighs 12.4kg! So Tegiwa Toda rep is 5.8kg lighter!
I had no fitment issues unlike some of the earlier manifolds, made the car quieter on idle too!
Hopefully of to RDT.tv soon to get my S300 mapped
Over and Out
Sourced a new Tegiwa Exhaust Manifold
Before running, shiney silver
After a run, nice gold colour
Nice flare i picked up today too
What surprised me was the Mugen being 2.25inch and the fact it was 900grams heavier, the box weighed 1kg btw, and for comparison, the standard manifold weighs 12.4kg! So Tegiwa Toda rep is 5.8kg lighter!
I had no fitment issues unlike some of the earlier manifolds, made the car quieter on idle too!
Hopefully of to RDT.tv soon to get my S300 mapped
Over and Out
Knightryder
New Member
- Joined
- May 1, 2009
- Messages
- 318
So you ditched a Mugen manifold for a Tegiwa one..... and it's lighter too, that suprised me! But after having used a Toda manifold I can understand why!
Really do watch out for the Mocal barbed fittings you have used on the oil cooler. I would take your lines to a hydrolics place ASAP and have propper ends put on. Learn from my fail. I ran the same lines and they have been nothing but a ball ache. One let go at Oulton and pissed all my oil out (was lucky it didnt seize the engine!). I blamed it on a crap jubillee clip so got some really strong jubillees and all seemed fine. Untill 3 weeks later out of the blue.... POP it happened again on the M6 leaving me stranded for 3 hours with a huge recovery bill and a massive mess once again.
EK9 looks great though bud.
EK9 looks great though bud
.So I finally managed to get my S300 mapped, lifes been busy and its been put off for a few months now due to work and social life commitments.
After speaking to Will and meeting him a few times, I felt sure he was the man for the job! So many good reviews and such a great reputation on forums regarding his work, he has so much time for his “clients” and explains everything in great detail. His knowledge is phenomenal and he answered every question and myth I could think of.
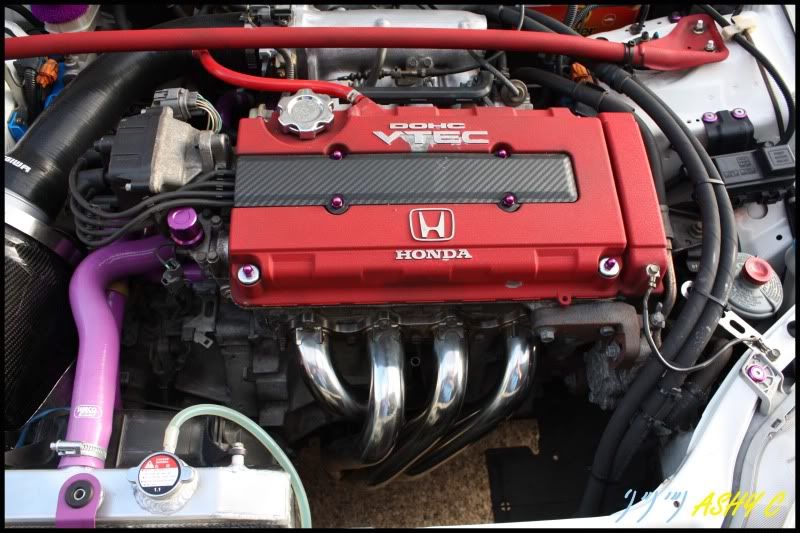
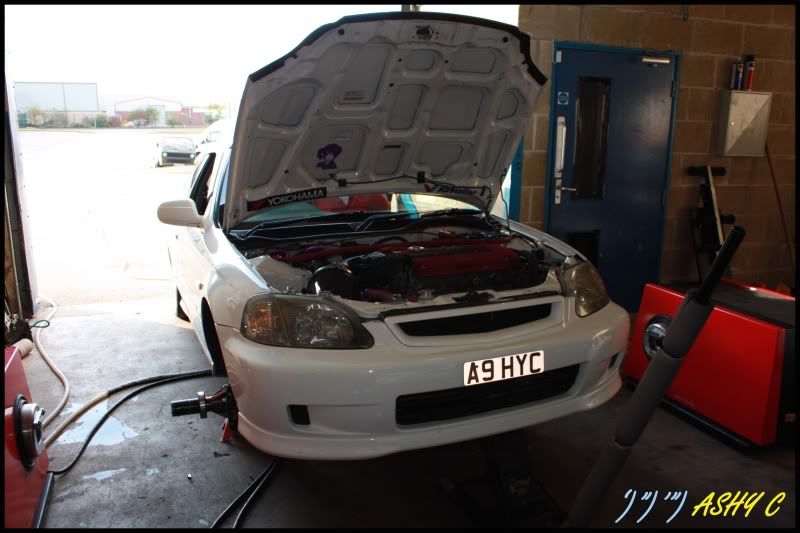
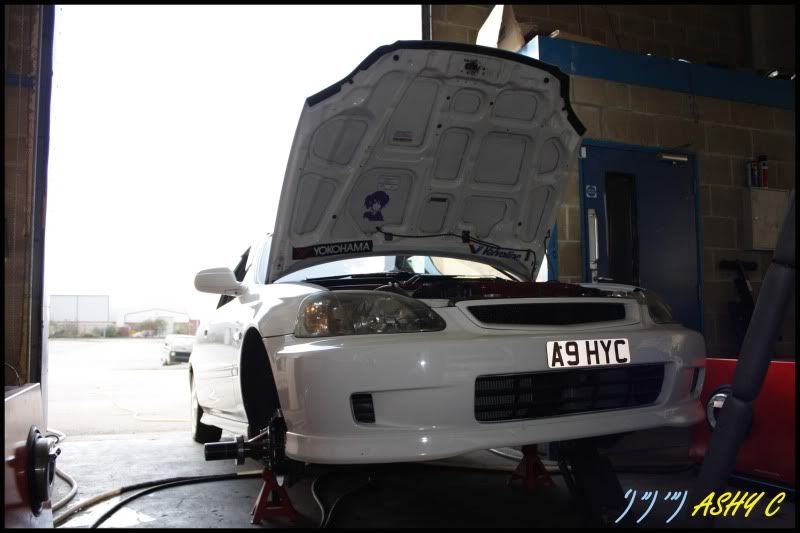
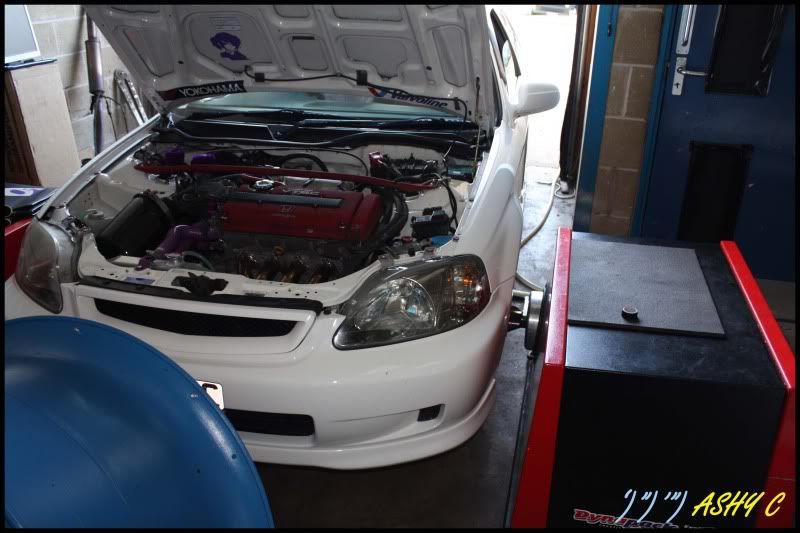
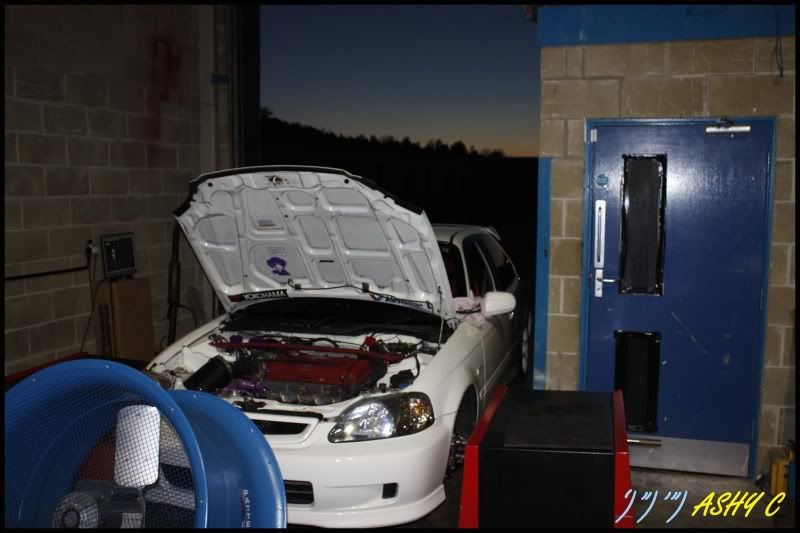
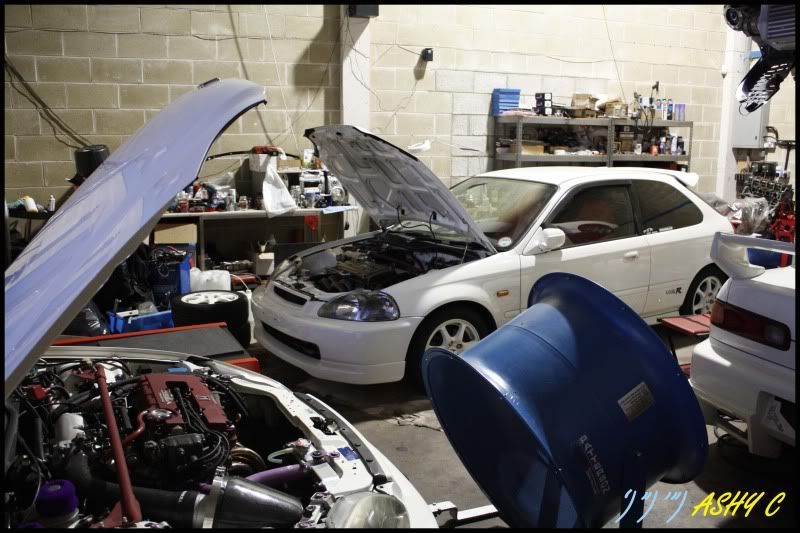
I’d booked the car in on Sunday 16th Oct and arranged to meet around noon time, upon arrival, he checked over the car, and carried out his pre dyno inspection, comprising of, compression test, timing checks, and a baseline figure (3 of, which he took the best figure)
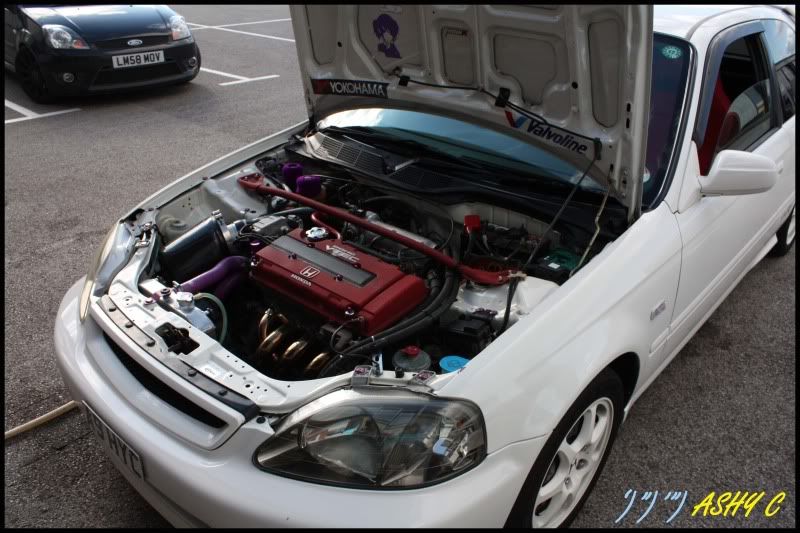
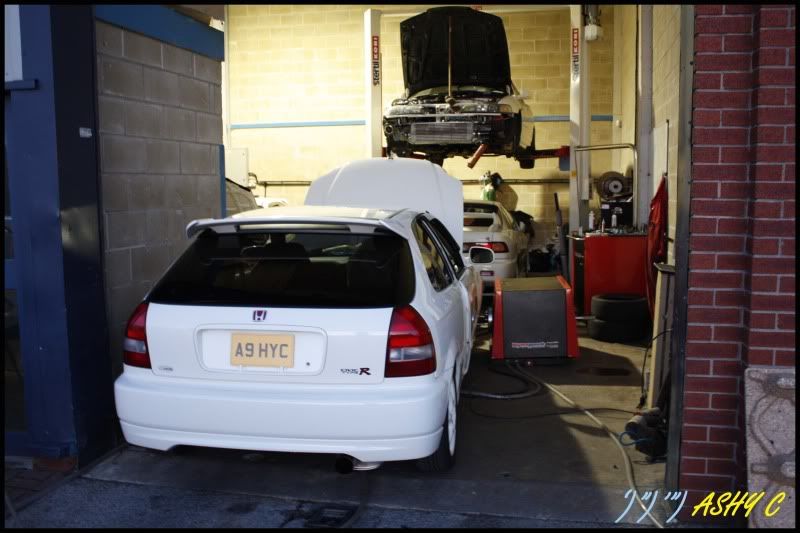
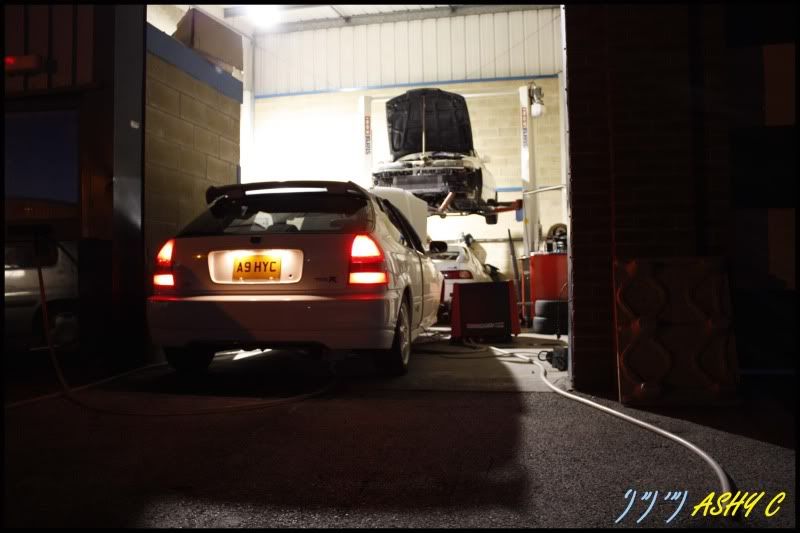
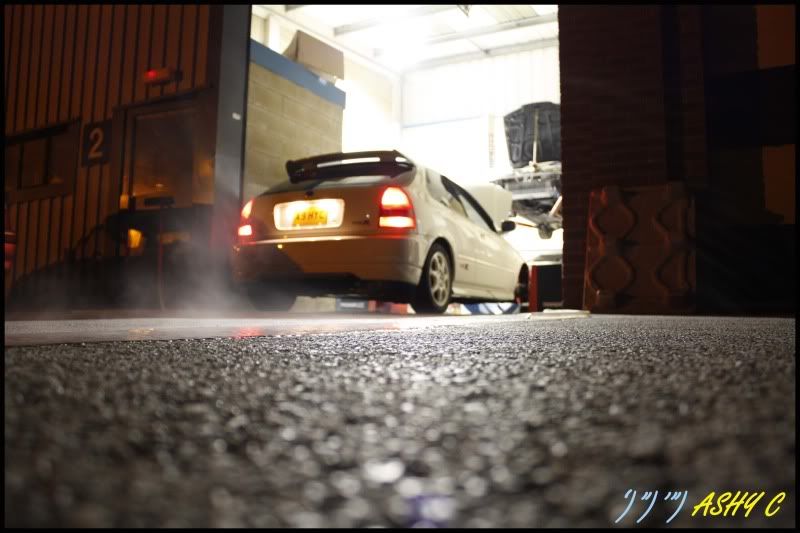
A few pics of the car and setting up
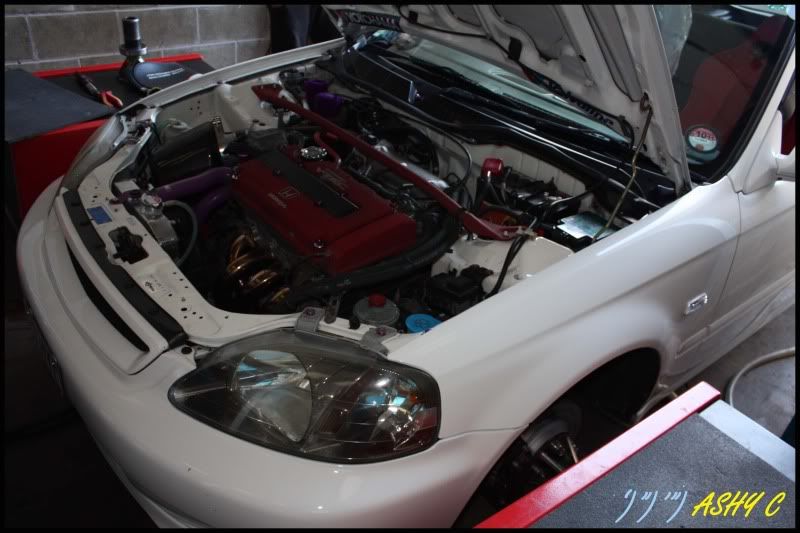
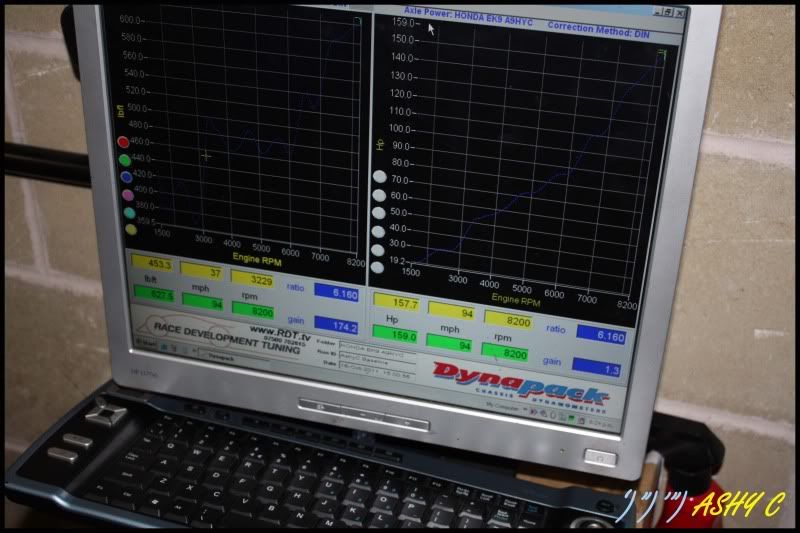
This is where the surprise came, the highest figure was 159 whp!!!!!Quite a bit more than what was expected, I always believed the engine to be healthy and this proved it again, coupled with the almost identical 210psi compression across the 4 cylinders. There seems to be something different about the engine, a set of cams was hinted at, but with no way to be sure we cant say for definite, but it made a lot more than most for a base run. Hopefully good midrange figures could be made on the map.
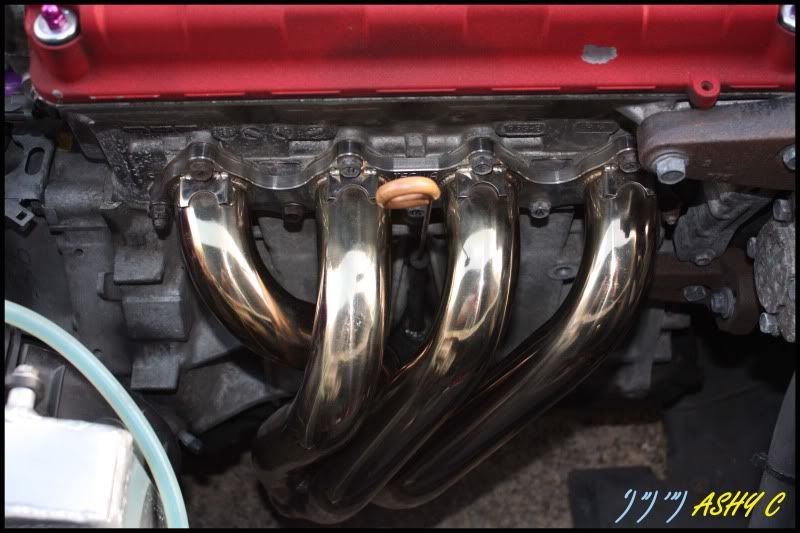
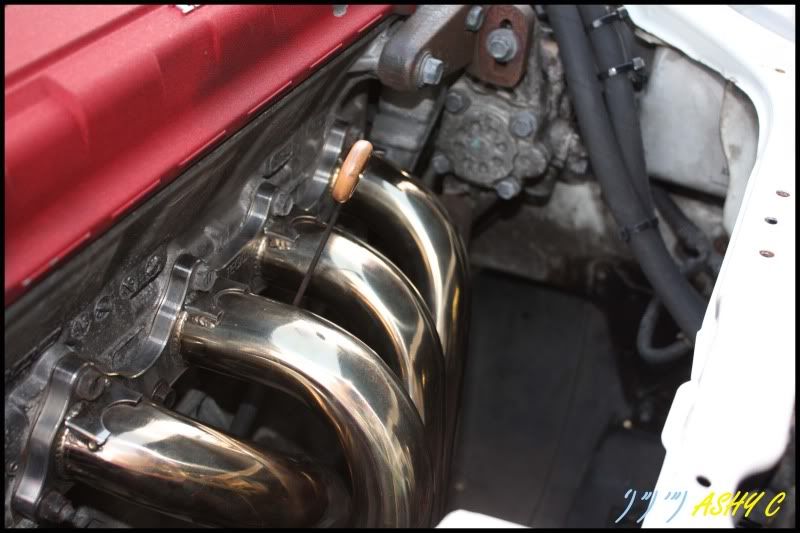
The next step was to install a wideband into the exhaust, which meant removing the O2 sensor in the exhaust, a mammoth task as it was seized tight, due to a trio of issues,
1 – Not lubricated when seated into the boss
2 – Slighty over enthusiasm by myself when changing the manifold a few weeks ago
3 – The manifold having a stainless boss and not a mild steel one like most manifold manufacturers use
After an hours struggling we decided to take the manifold off so we (Will) could get a better angle. …………………Success, it was out. Time to put it back together and start with the mapping,
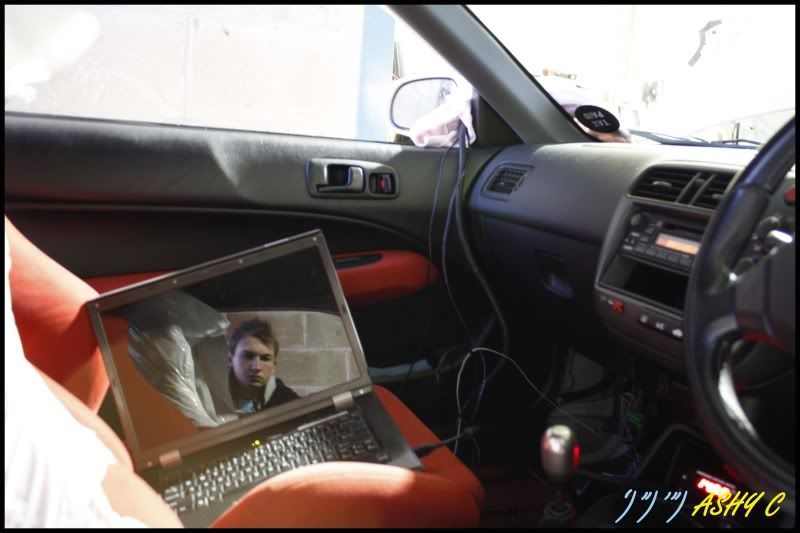
I tried to leave Will to himself and let him crack on with the task of mapping, but his customer service kept me entertained, as he explained everything he was doing at each step. I’ve seen mapping done before behind closed doors, and without an insight into what is happening with your car.
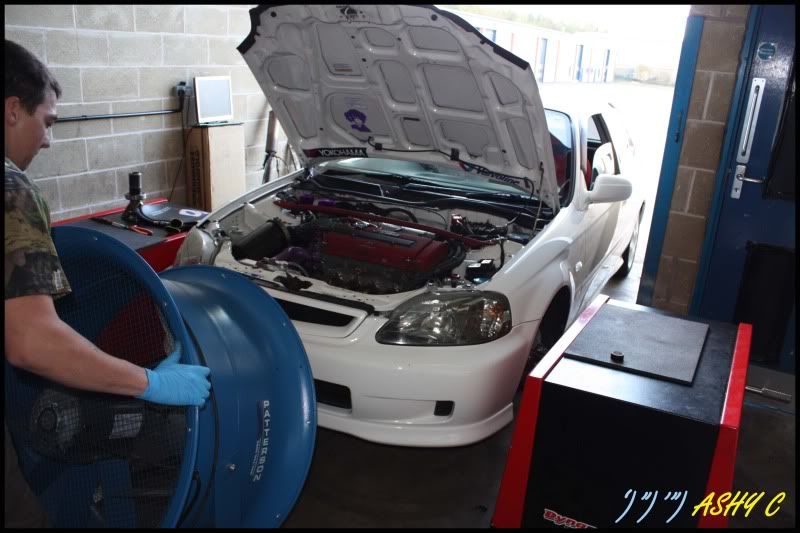
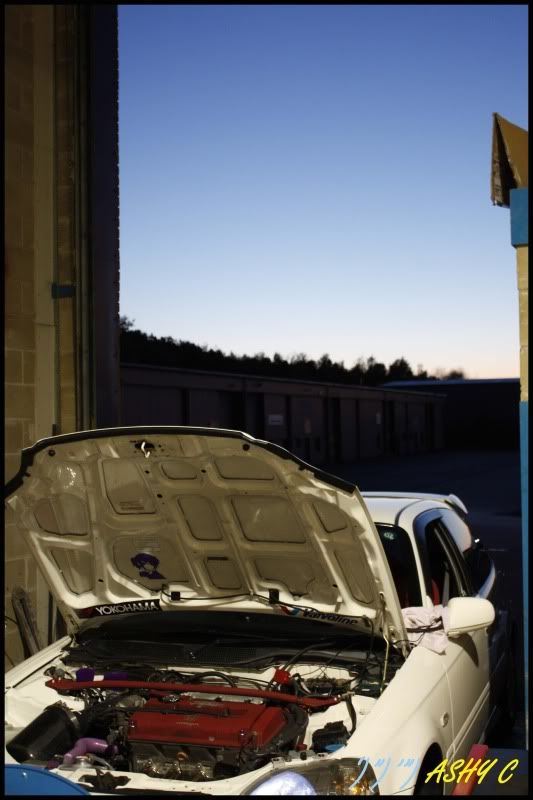
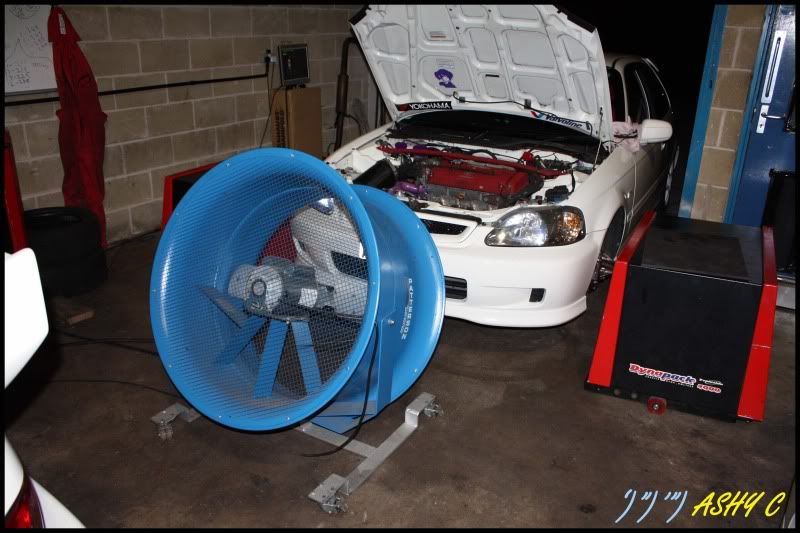
The day was getting on and daylight started to disappear and became dusk, and still the dyno roared up and the industrial estate was showered in the noise of a B16B revving loudly on a dynapack dyno.
The boiling water out of the dyno, helping to keep the dyno cool.
Will made some great gains midrange and took care every step of the way to ensure everything was correct and tweaked to perfection.
Vtec crossover was set and the graph was almost complete, a few more tweaks to smooth the dips and it was complete.
Peak power was 163WHP and I got good gains across the revs range from 4700 onwards, in some places 20whp!
Summary
163 WHP
Unsure on torque, Will is sending me the graphs
Shift light at 7700rpm
Limiter at 8400rpm
Launch control at 4700rpm
The throttle response is so good, no jerkyness, smooth like silk, and when the accelerator is punched the car responds with zero lag. The shift light is a great touch and launch control works well, definitely helps on standing starts
If I’ve forgotten anything I’ll add it, soon as I get the graphs I will upload them.
10 / 10 for Will , I cant recommend him enough!!!!! You wont regret it!
THANKS WILL
This is all!
After speaking to Will and meeting him a few times, I felt sure he was the man for the job! So many good reviews and such a great reputation on forums regarding his work, he has so much time for his “clients” and explains everything in great detail. His knowledge is phenomenal and he answered every question and myth I could think of.
I’d booked the car in on Sunday 16th Oct and arranged to meet around noon time, upon arrival, he checked over the car, and carried out his pre dyno inspection, comprising of, compression test, timing checks, and a baseline figure (3 of, which he took the best figure)
A few pics of the car and setting up
This is where the surprise came, the highest figure was 159 whp!!!!!Quite a bit more than what was expected, I always believed the engine to be healthy and this proved it again, coupled with the almost identical 210psi compression across the 4 cylinders. There seems to be something different about the engine, a set of cams was hinted at, but with no way to be sure we cant say for definite, but it made a lot more than most for a base run. Hopefully good midrange figures could be made on the map.
The next step was to install a wideband into the exhaust, which meant removing the O2 sensor in the exhaust, a mammoth task as it was seized tight, due to a trio of issues,
1 – Not lubricated when seated into the boss
2 – Slighty over enthusiasm by myself when changing the manifold a few weeks ago
3 – The manifold having a stainless boss and not a mild steel one like most manifold manufacturers use
After an hours struggling we decided to take the manifold off so we (Will) could get a better angle. …………………Success, it was out. Time to put it back together and start with the mapping,
I tried to leave Will to himself and let him crack on with the task of mapping, but his customer service kept me entertained, as he explained everything he was doing at each step. I’ve seen mapping done before behind closed doors, and without an insight into what is happening with your car.
The day was getting on and daylight started to disappear and became dusk, and still the dyno roared up and the industrial estate was showered in the noise of a B16B revving loudly on a dynapack dyno.
The boiling water out of the dyno, helping to keep the dyno cool.
Will made some great gains midrange and took care every step of the way to ensure everything was correct and tweaked to perfection.
Vtec crossover was set and the graph was almost complete, a few more tweaks to smooth the dips and it was complete.
Peak power was 163WHP and I got good gains across the revs range from 4700 onwards, in some places 20whp!
Summary
163 WHP
Unsure on torque, Will is sending me the graphs
Shift light at 7700rpm
Limiter at 8400rpm
Launch control at 4700rpm
The throttle response is so good, no jerkyness, smooth like silk, and when the accelerator is punched the car responds with zero lag. The shift light is a great touch and launch control works well, definitely helps on standing starts
If I’ve forgotten anything I’ll add it, soon as I get the graphs I will upload them.
10 / 10 for Will , I cant recommend him enough!!!!! You wont regret it!
THANKS WILL
This is all!
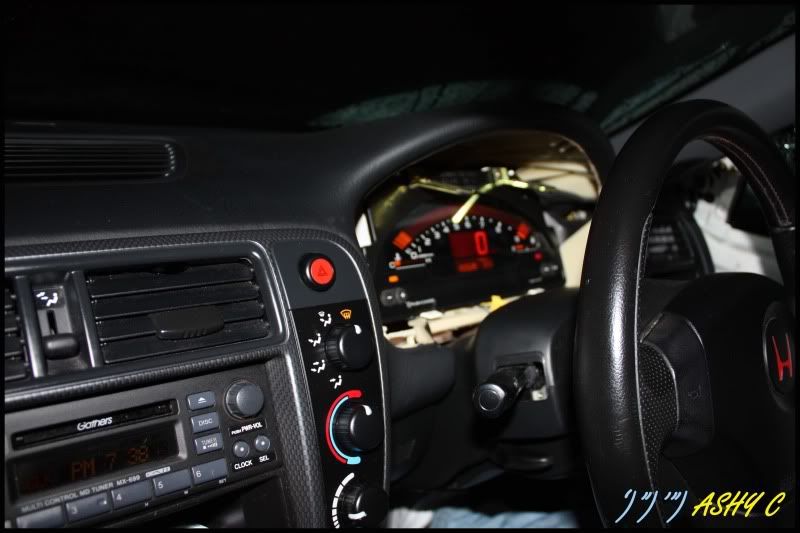
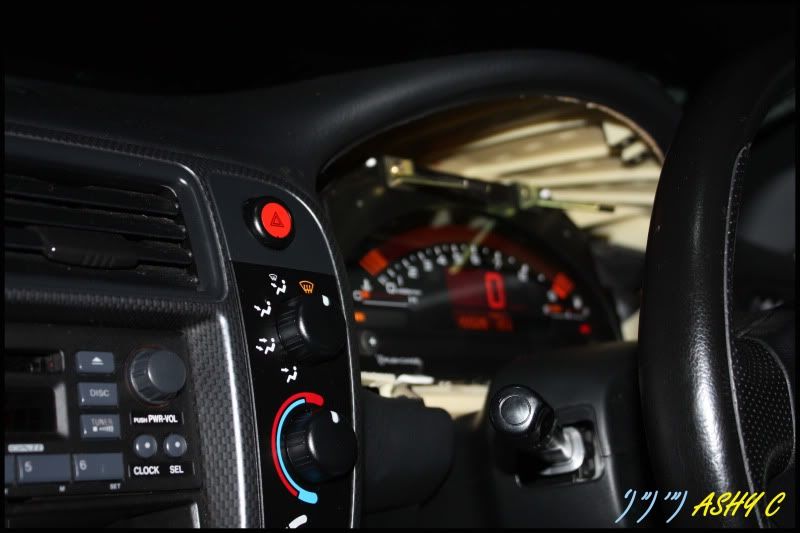
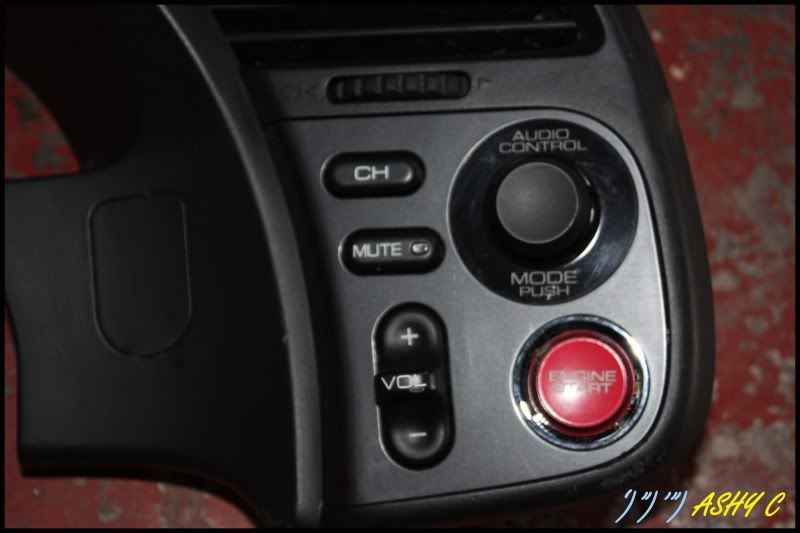
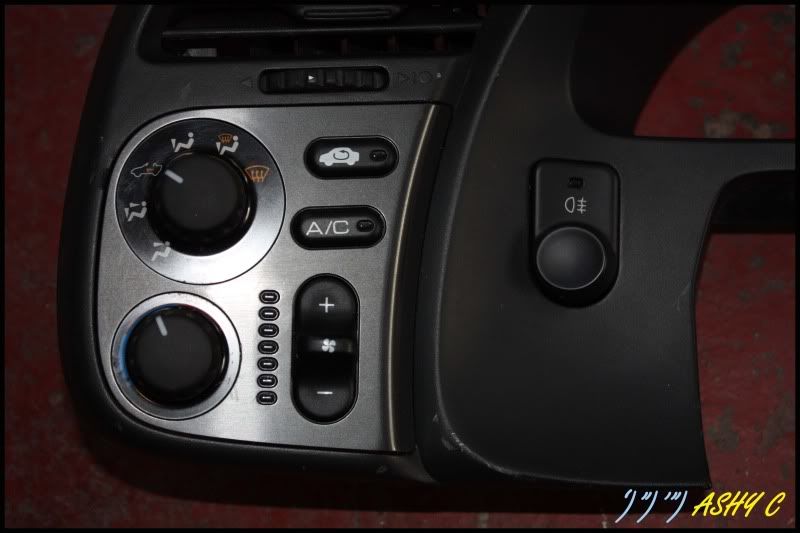
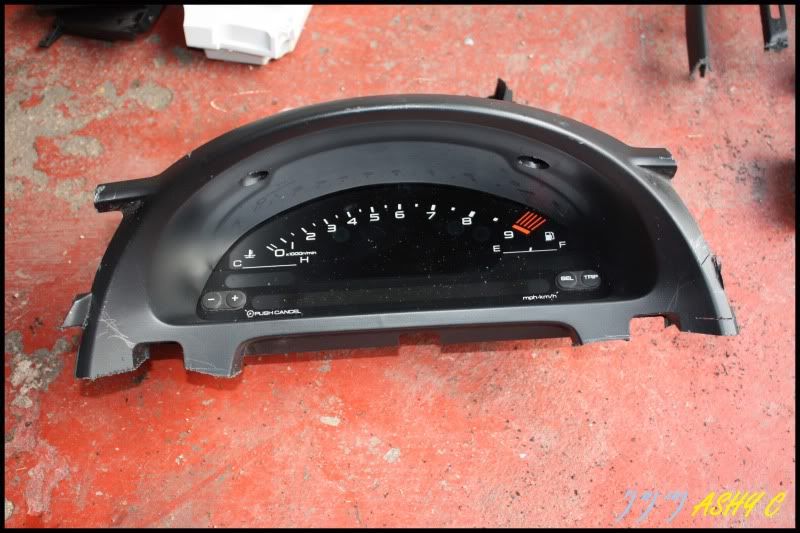
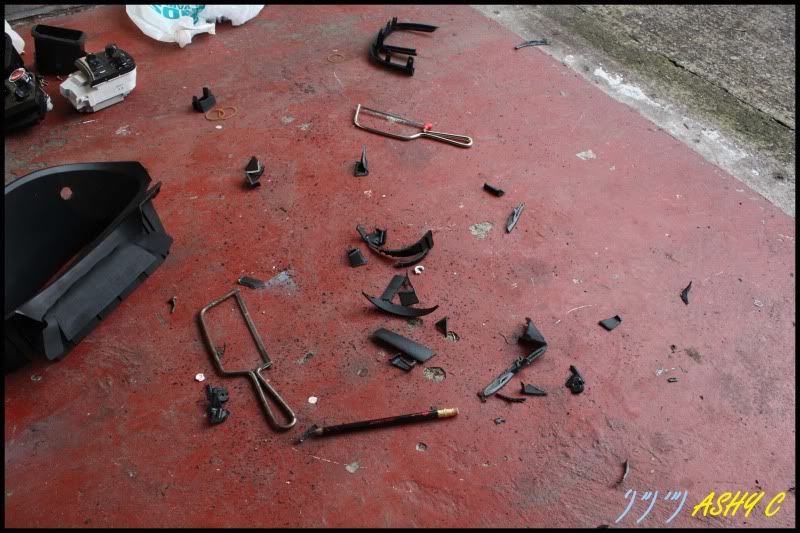
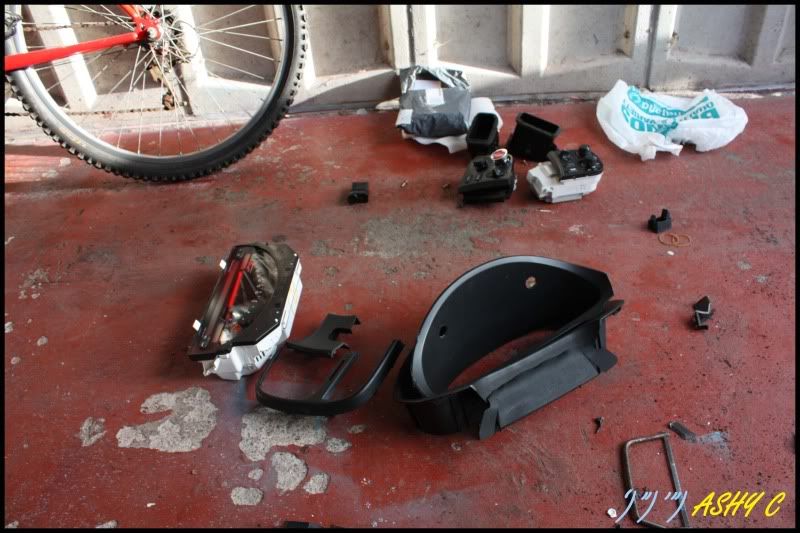
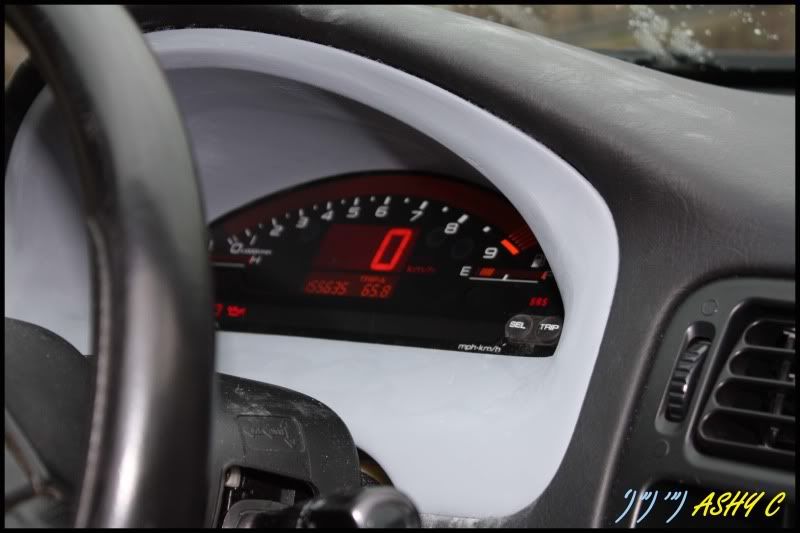
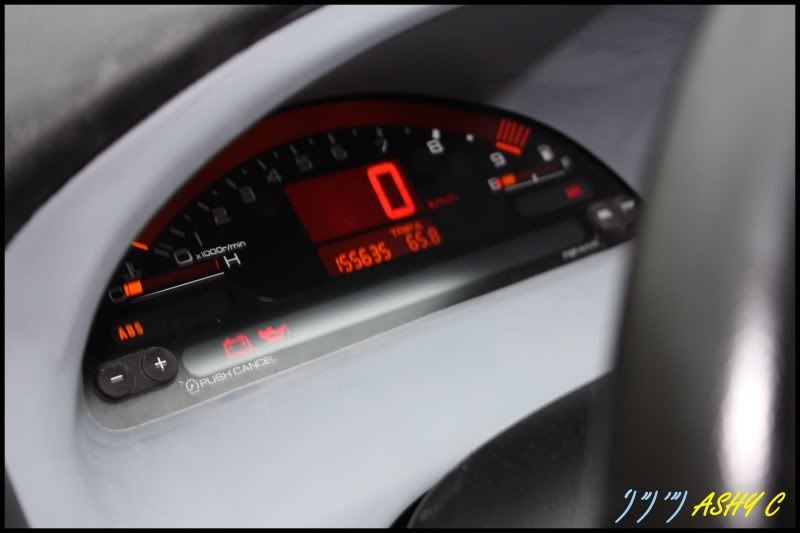
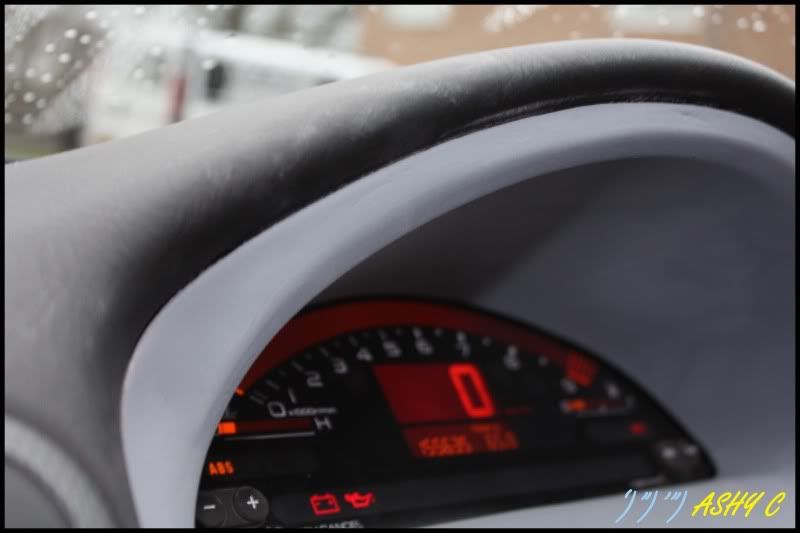
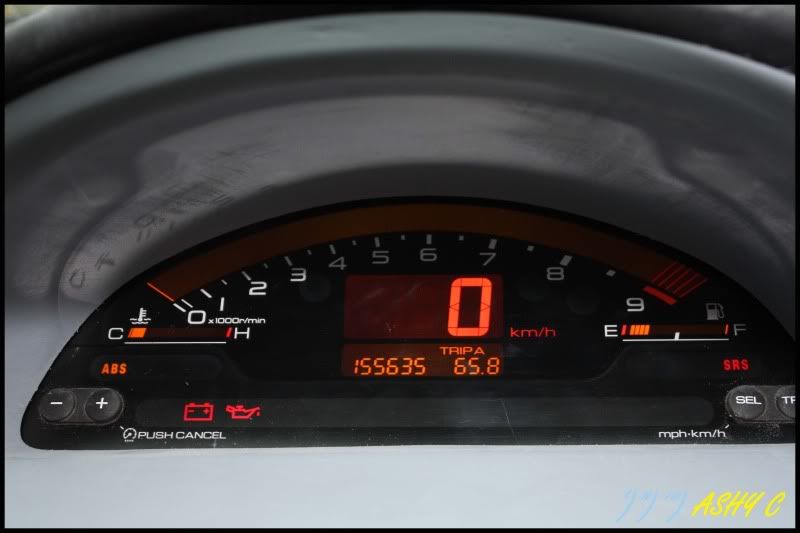
Heres a little snippet into my dash conversion S2000 dials/speedo/clusterinto my EK9.
After some research i decided i probably could pull this off, a few concerns were:
Would the speedo and revs read properly?
Would the trip computer work?
Fuel and Temp levels, would these be reliable?
Also would my shift light still work on them thats prog through my Hondata
I tried to source a good set of clocks, there was 2 versions
AP1 or AP2 the earlier AP1 version has a larger rev counter and can be reprogrammed to any mileage
The layout was also different on these and in my opinion the AP1 cluster looks better.
The clocks were fetching circa £150 -£200 with an extra £25-100 for the connectors on the rear or the full interior loom. I need approx 6 inch of loom from the rear of the dials to make all the necessary connections.
SUCCESS ...... I managed to get hold of a set for £100 delivered with the all import loom on them).gif ":)) :))")

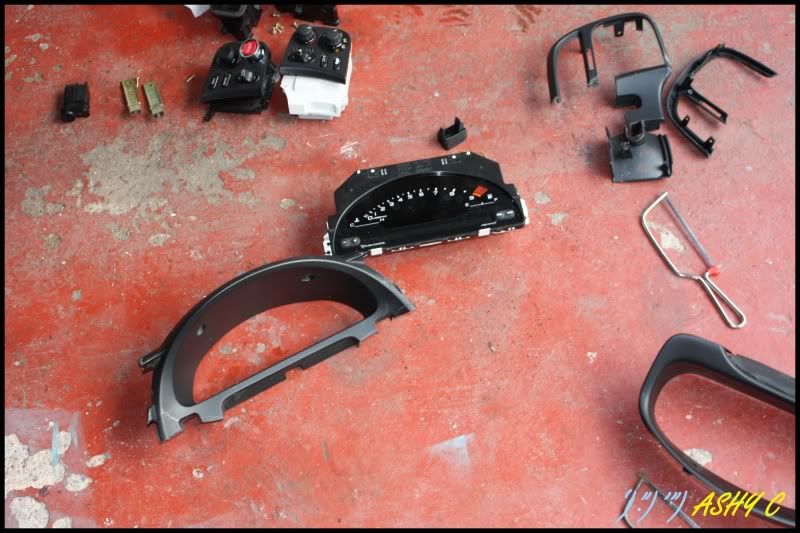
Next came the conversion module, the little black box to make it all work, this box would make the revs, speedo, fuel and temp gauges read properly, fortunately i got hold of a lad that makes them and he sent me one out , along with a bit of a wiring diagram to connect them up. Although this was missing a few wires and the colours and positions were incorrect, a little online research and also the use of my multimeter i worked out how it should go.
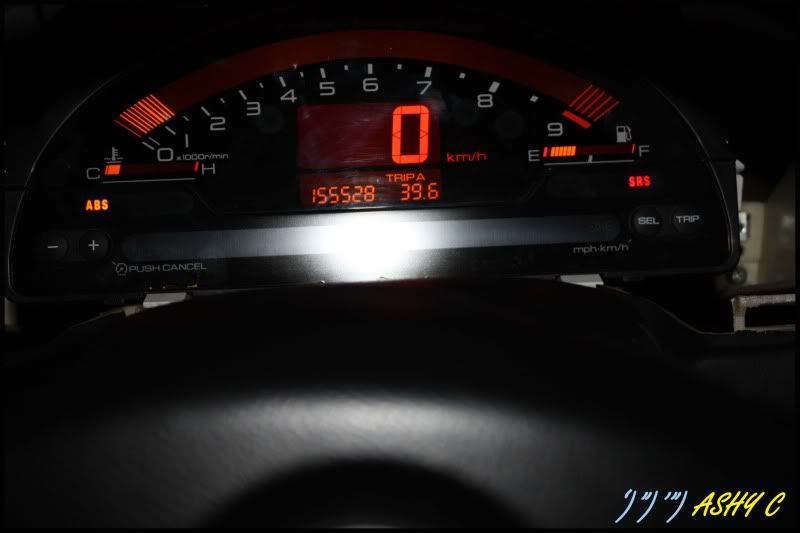
A saturday afternoon passed and the dials where working, although the speedo was reading incorrectly, an hours puzzling passed and i realised in may have something to do with the speedo conversion chip on the gearbox. I switched the dials to kph and magically they began reading in MPH correctly, (i needed to remove the chip)
Pic of them in rough and testing
After some research i decided i probably could pull this off, a few concerns were:
Would the speedo and revs read properly?
Would the trip computer work?
Fuel and Temp levels, would these be reliable?
Also would my shift light still work on them thats prog through my Hondata
I tried to source a good set of clocks, there was 2 versions
AP1 or AP2 the earlier AP1 version has a larger rev counter and can be reprogrammed to any mileage
The layout was also different on these and in my opinion the AP1 cluster looks better.
The clocks were fetching circa £150 -£200 with an extra £25-100 for the connectors on the rear or the full interior loom. I need approx 6 inch of loom from the rear of the dials to make all the necessary connections.
SUCCESS ...... I managed to get hold of a set for £100 delivered with the all import loom on them
Next came the conversion module, the little black box to make it all work, this box would make the revs, speedo, fuel and temp gauges read properly, fortunately i got hold of a lad that makes them and he sent me one out , along with a bit of a wiring diagram to connect them up. Although this was missing a few wires and the colours and positions were incorrect, a little online research and also the use of my multimeter i worked out how it should go.
A saturday afternoon passed and the dials where working, although the speedo was reading incorrectly, an hours puzzling passed and i realised in may have something to do with the speedo conversion chip on the gearbox. I switched the dials to kph and magically they began reading in MPH correctly, (i needed to remove the chip)
Pic of them in rough and testing
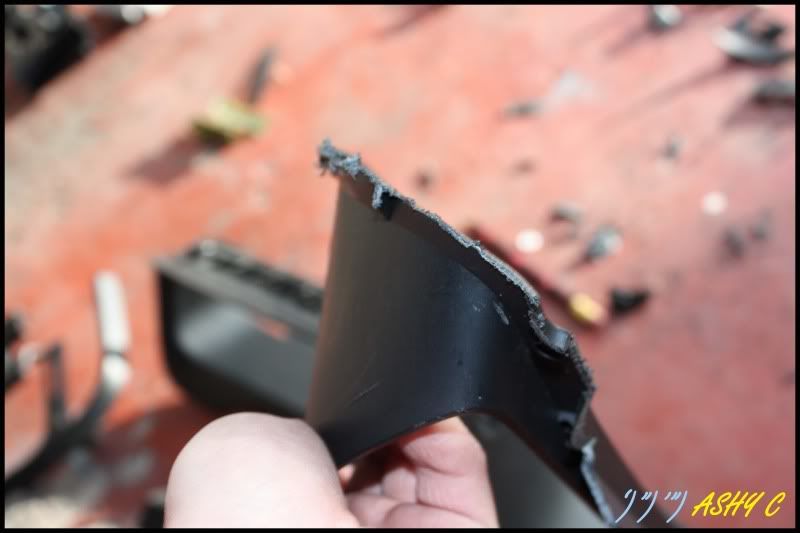
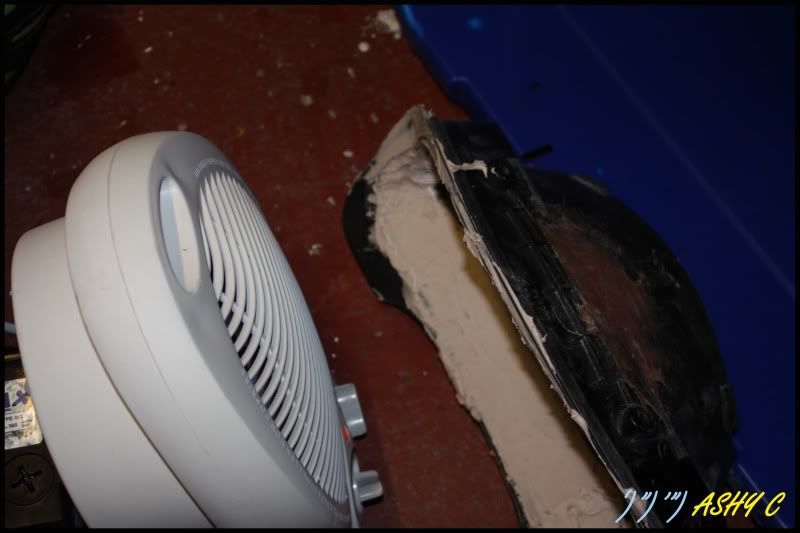
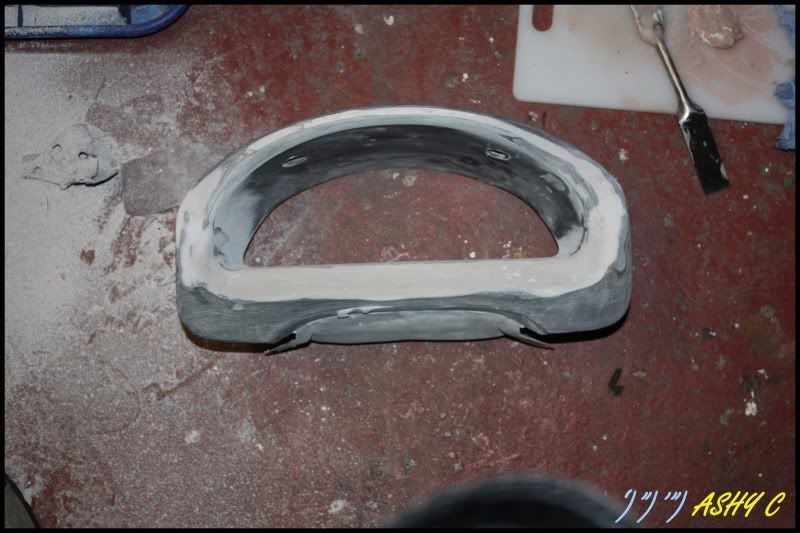
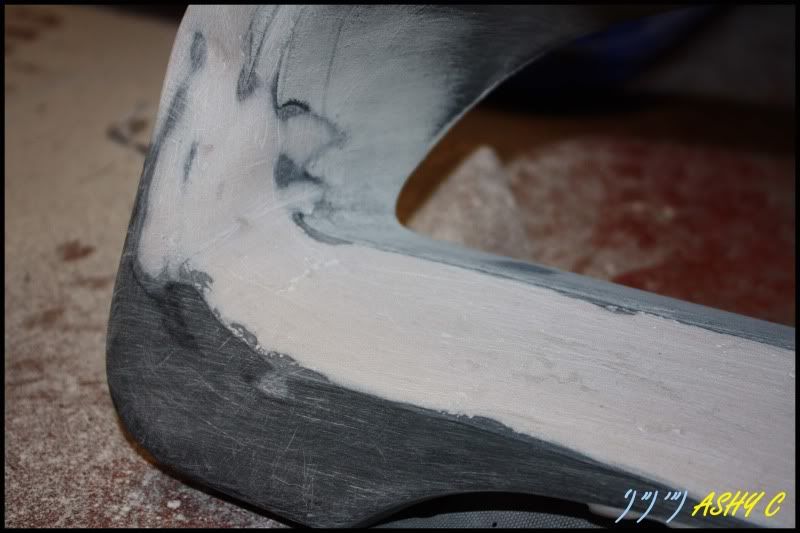
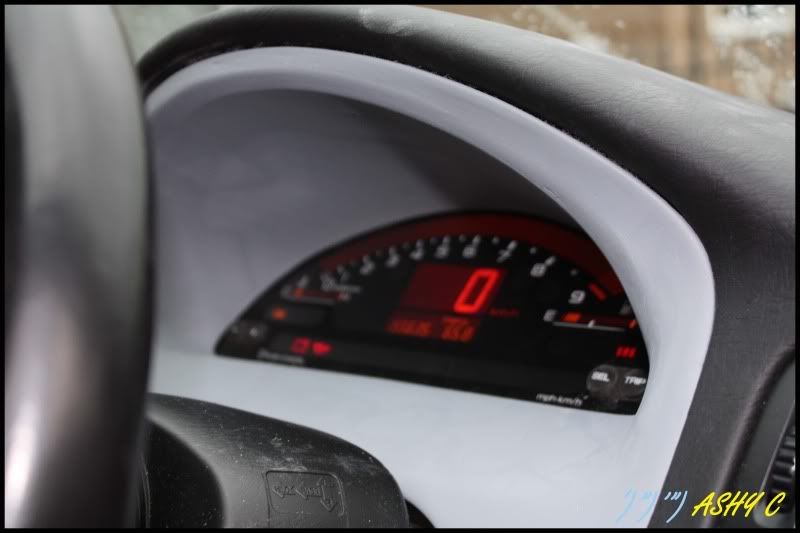
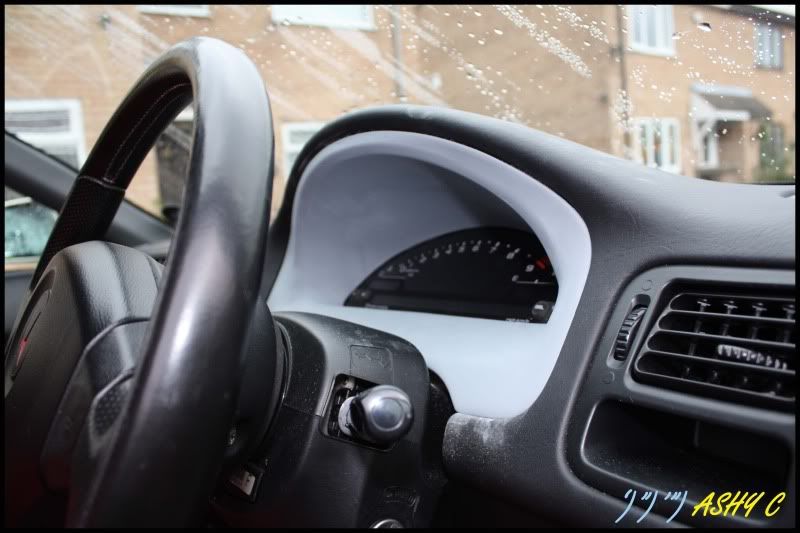
So now they worked i need to work out how to make them fit and look OEM, i couldnt find much infor on this online, only poorly fitting clocks with a homemade bezel. My plan was to make a custom housing for them.
I thought the best way would be to use an S2000 bezel and make it fit on the EK housing. Another ebay search and more money led to me buying the S2000 dash, complete with switches etc, these fetch about £75, a bit of bartering later and i had them delivered for £20 plus another £12 for a spare EK surround
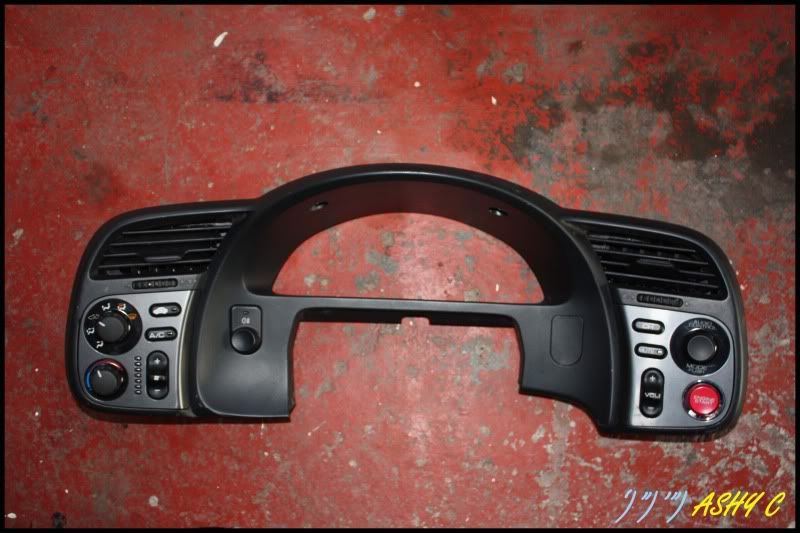
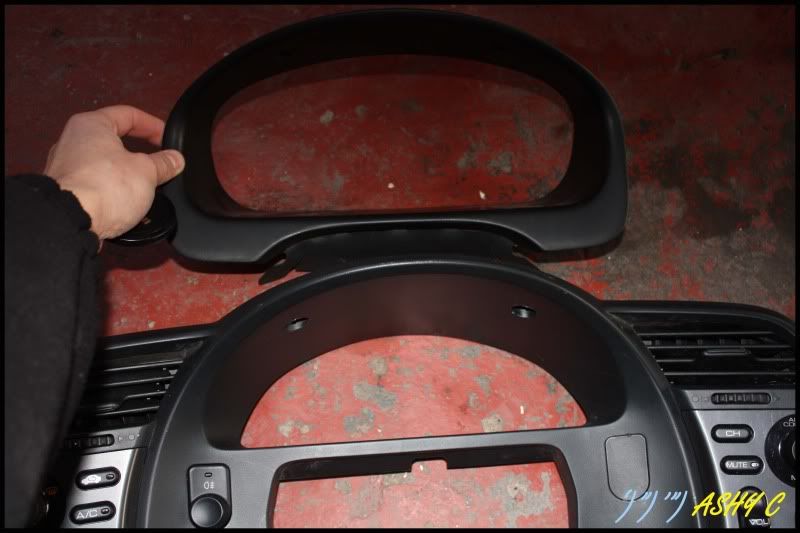
Time to butcher both bezels and make the surround, i started by removing the unwanted plastic from the S2000 surround and securing it into the EK surround.
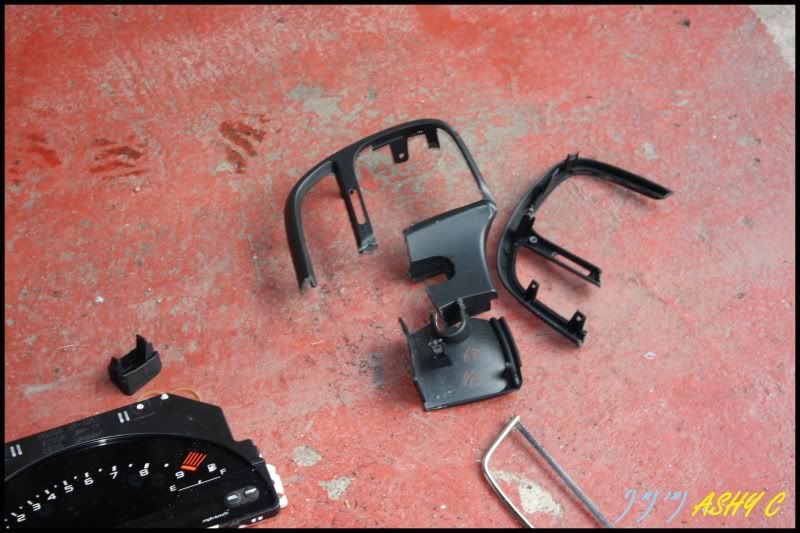
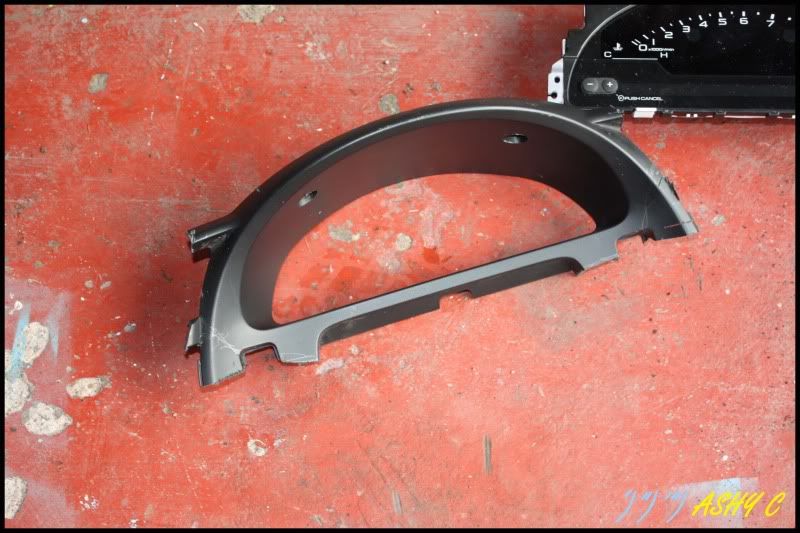
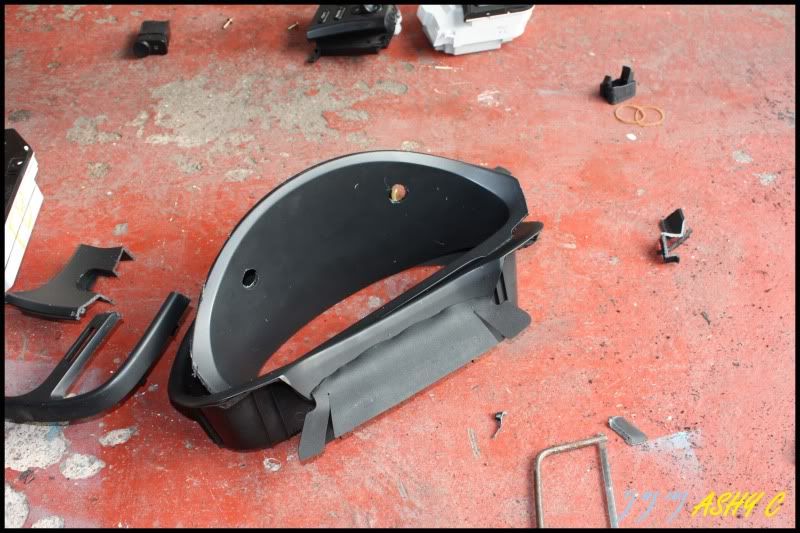
Lots of trimmed plastic
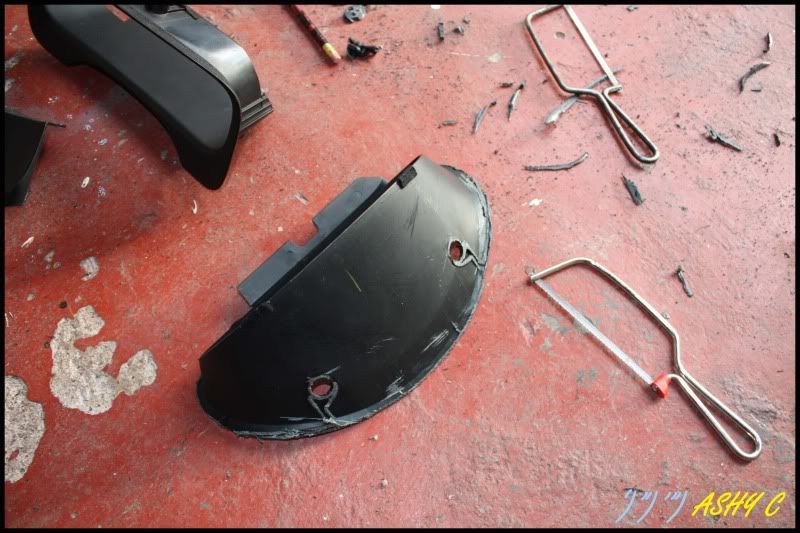
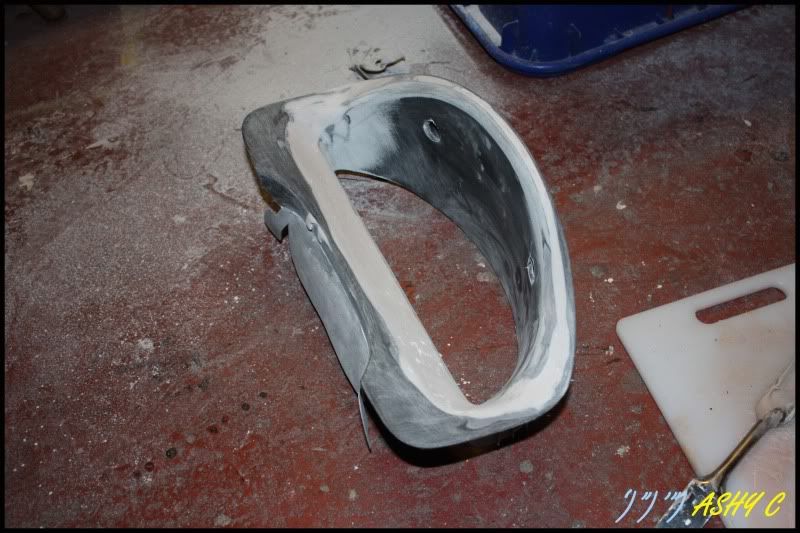
Once i had a rough fitting i fibreglassed them in place then used filler to sculpt it further. (I'll let the pics do the talking)
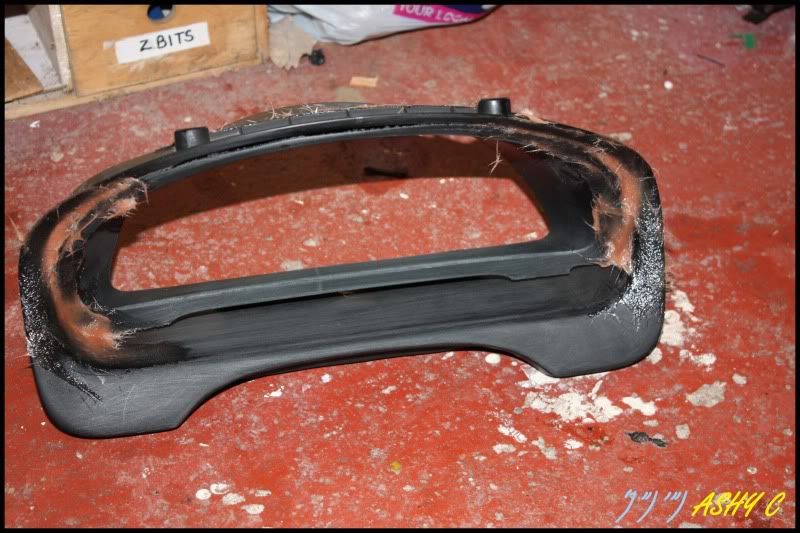
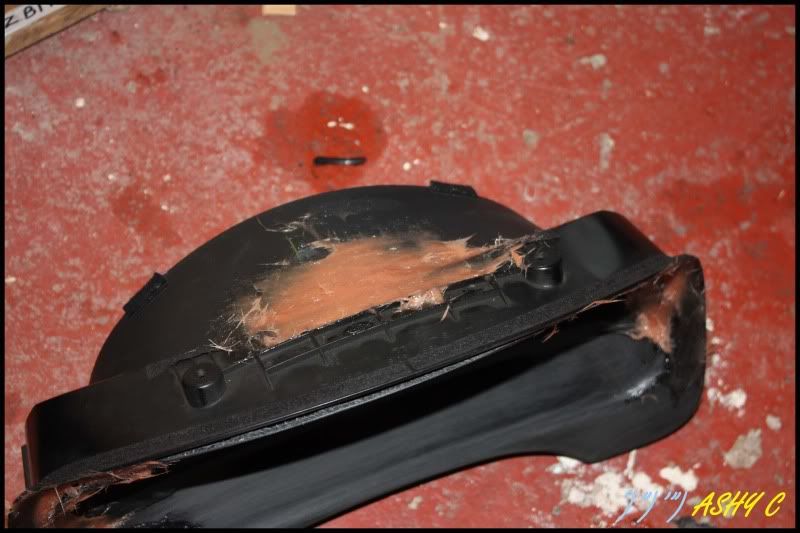
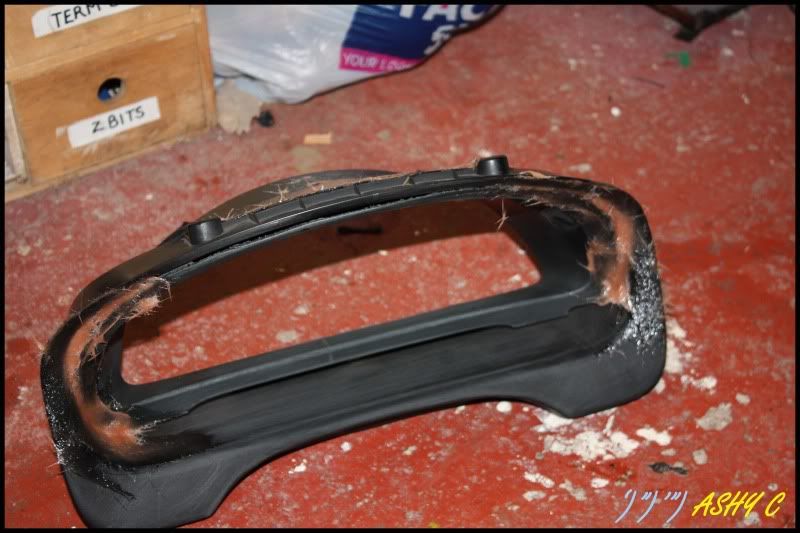
Working in the garage the temps were still a chilly 3 degrees celcius so i used an old recylcing box and fan heater to creat a nice little oven to bake the fibreglass and filler as it was taking too long for them to set
Old puntosportsclub fleece providing insulation
Put plenty of filler on it

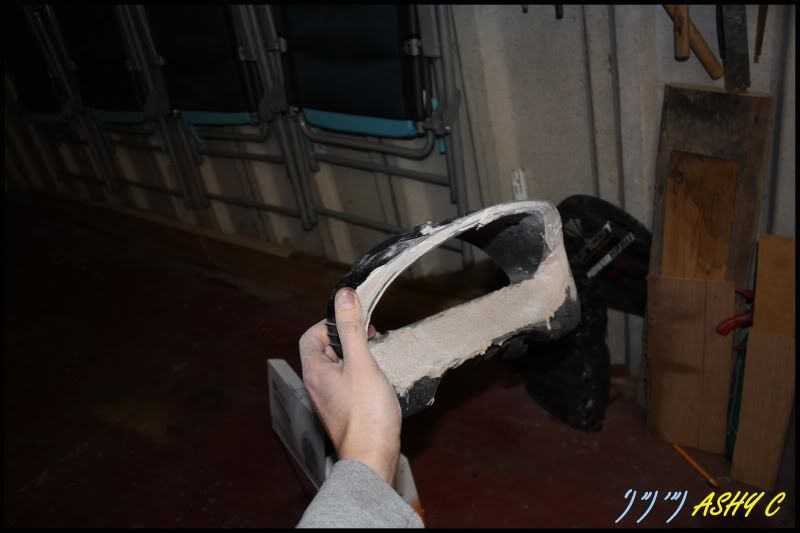
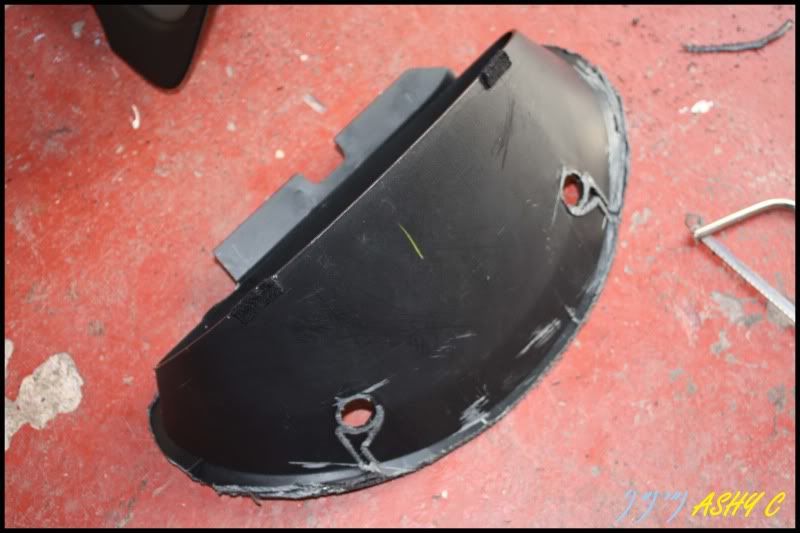
Next came the sanding and sculpting

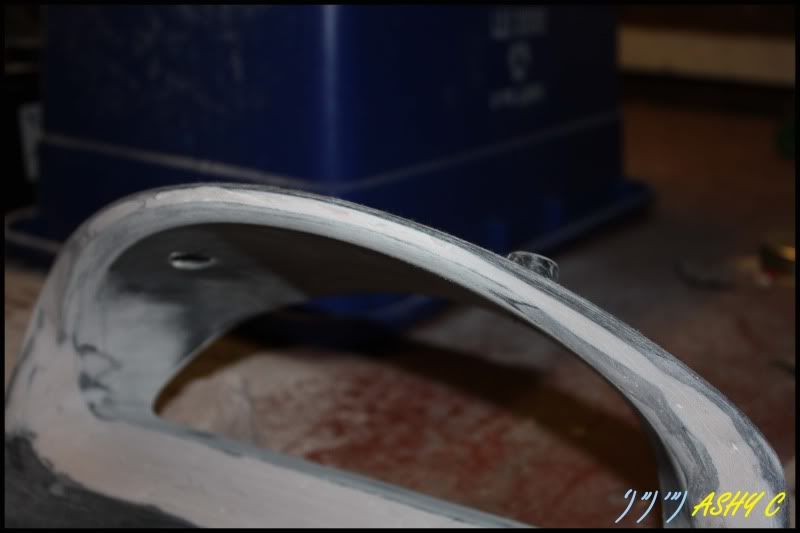
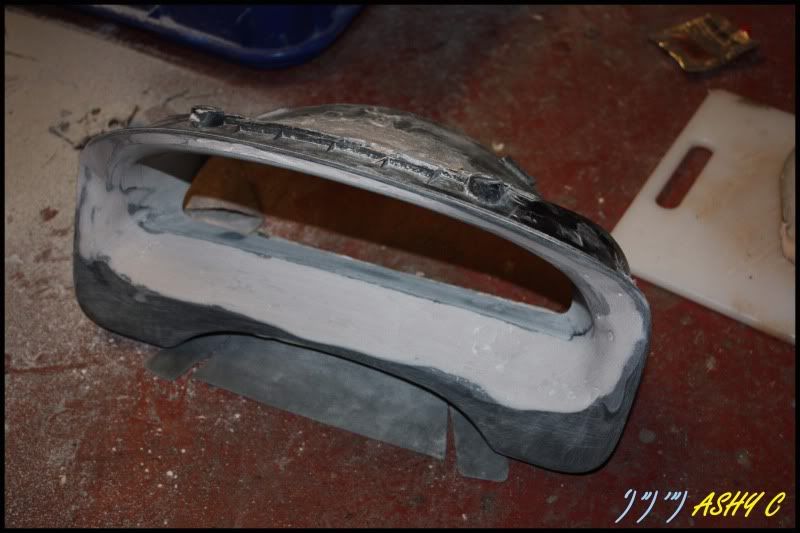
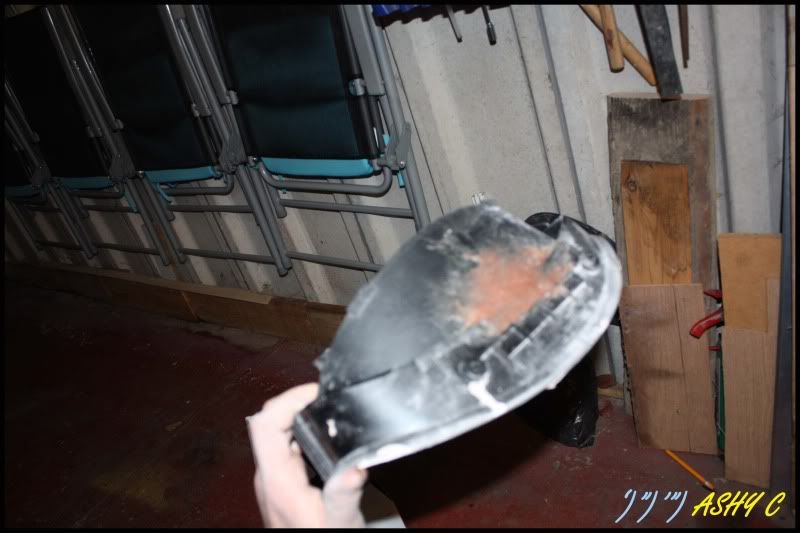
It seemed to look pretty good, a few pin holes etc, i smoothed them out and my impatient nature got the best of me and i decided to primer it.
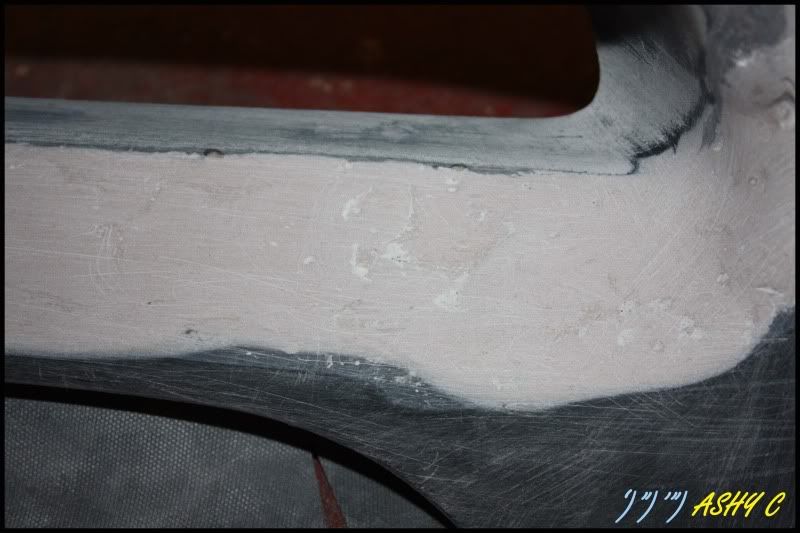
Pictures of it in primer and test fitting

I was unsure how to paint or finish it, matt black, gloss black, champ white, carbon fibre kit/wrap it, then someone suggested flocking it........ hmmmm an idea turned into an impulsive ebay purchase.... 1x DIY flocking kit
For some reason i have lost the pics of me flocking the item...... all i can say is you get a black adhesive which you paint on folowed by a squeezey bottle of flocking fibres which you blow on use the bottle. ( What a ballache)
1st attempt - Too much adhesive, so it ran
2nd attempt - Not enough of adhesive or flock
3 rd attempt - Spray adhesive/upholstery glue and layered with flock, then glue, flock, glue flock
This seemed to work nicely
Will load some pics of the finished flocked item fitted.
Costs
S2000 Clocks £100
Convertor box £120
S2000 Surround £20
EK Surround £15
Flock £20
Filler fibreglass £10
TOTAL £285
I'm happy with the finished article, something special about a digital gauge
Comments welcome
Old puntosportsclub fleece providing insulation
Put plenty of filler on it
Next came the sanding and sculpting
It seemed to look pretty good, a few pin holes etc, i smoothed them out and my impatient nature got the best of me and i decided to primer it.
Pictures of it in primer and test fitting
I was unsure how to paint or finish it, matt black, gloss black, champ white, carbon fibre kit/wrap it, then someone suggested flocking it........ hmmmm an idea turned into an impulsive ebay purchase.... 1x DIY flocking kit
For some reason i have lost the pics of me flocking the item...... all i can say is you get a black adhesive which you paint on folowed by a squeezey bottle of flocking fibres which you blow on use the bottle. ( What a ballache)
1st attempt - Too much adhesive, so it ran
2nd attempt - Not enough of adhesive or flock
3 rd attempt - Spray adhesive/upholstery glue and layered with flock, then glue, flock, glue flock
This seemed to work nicely
Will load some pics of the finished flocked item fitted.
Costs
S2000 Clocks £100
Convertor box £120
S2000 Surround £20
EK Surround £15
Flock £20
Filler fibreglass £10
TOTAL £285
I'm happy with the finished article, something special about a digital gauge
Comments welcome
Had a sticky rear caliper for a while, decided the best thing to do would be to replace both rear calipers with refurbed ones. Found them on this site, Wanapart - The UK's Number 1 supplier of highly discounted OE spec Car Parts Online. All Car Parts NEW with 12 month warranty's , far cheaper than brakes inc etc.
Speedy delivery
Now the calipers had caused damage to the rear passenger pads and discs, so i decided to purchase all new, coupled with a very unused 2nd hand set of Dixcel FCR brake discs for the front
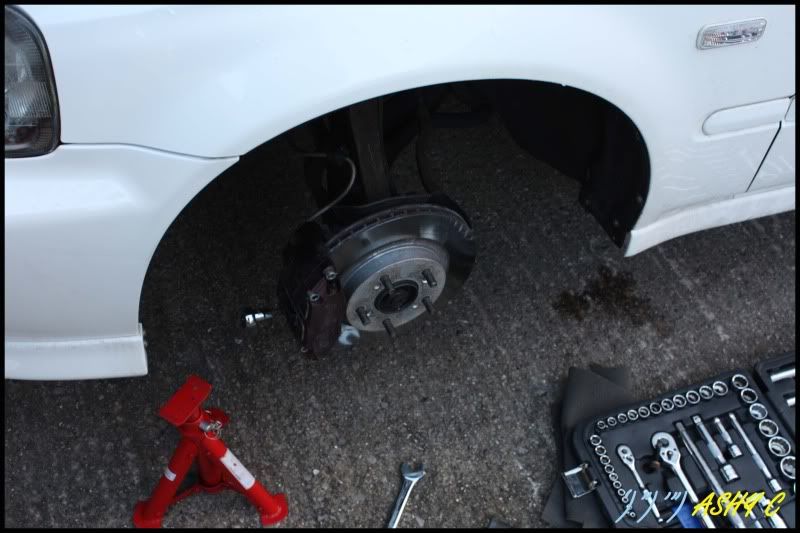
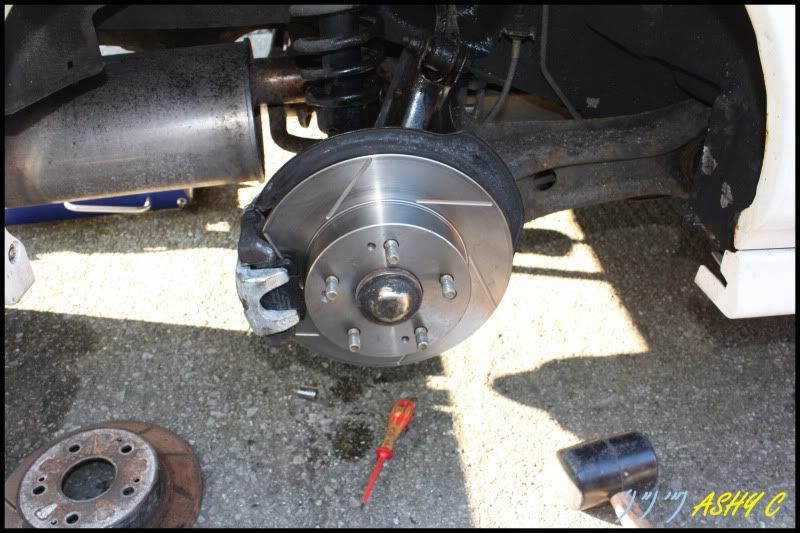
With temps down to -4 this weekend i decided to set about changing the discs as i am at Donington Park for a track day in 2 weeks time.
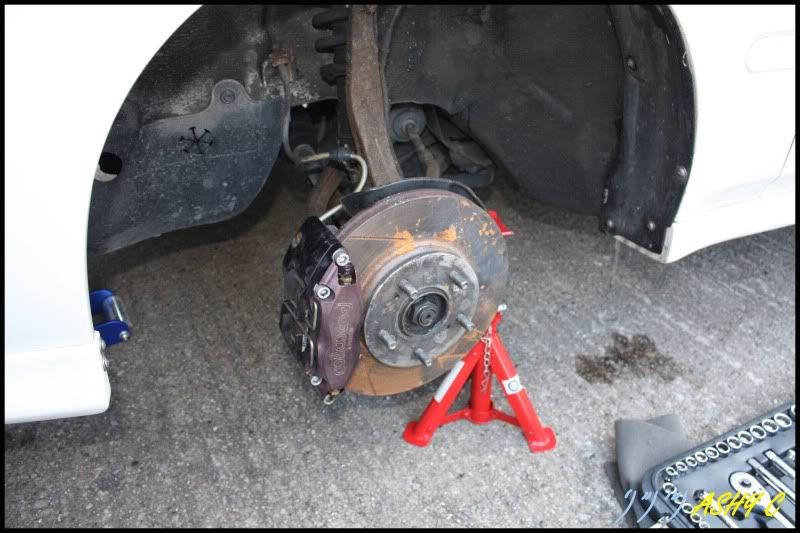
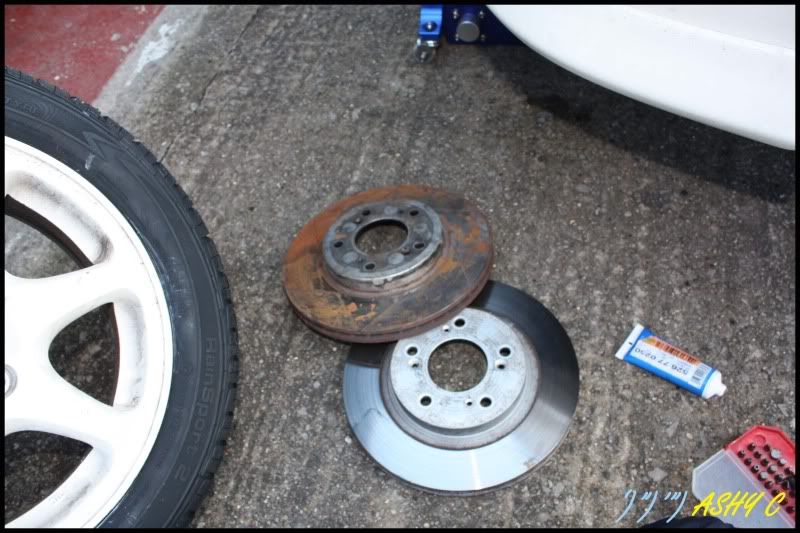
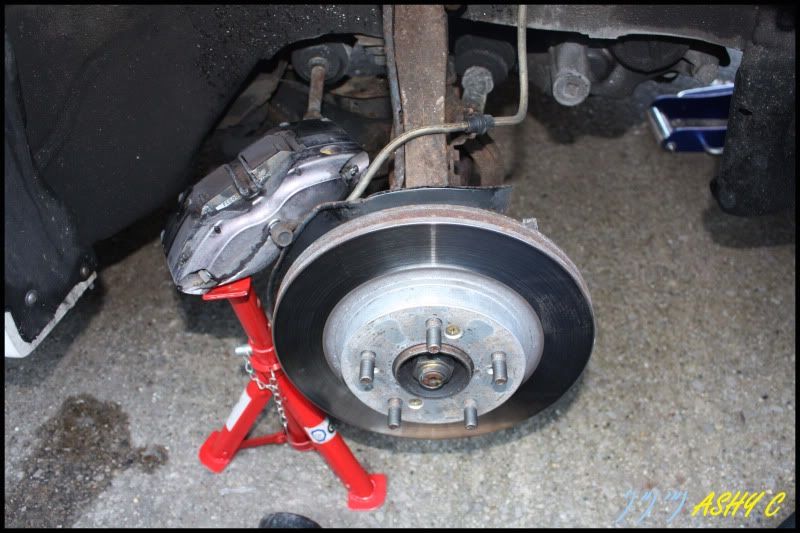
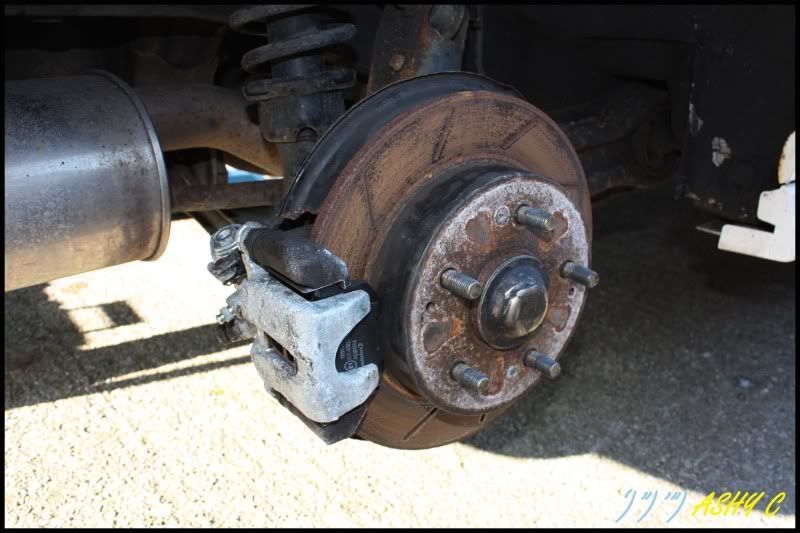
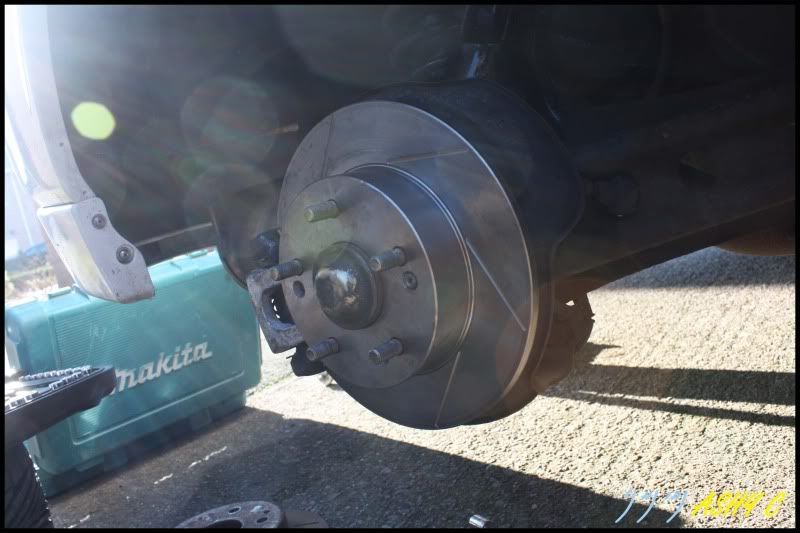
Wheel off and old Pagid discs, only covered 500 miles
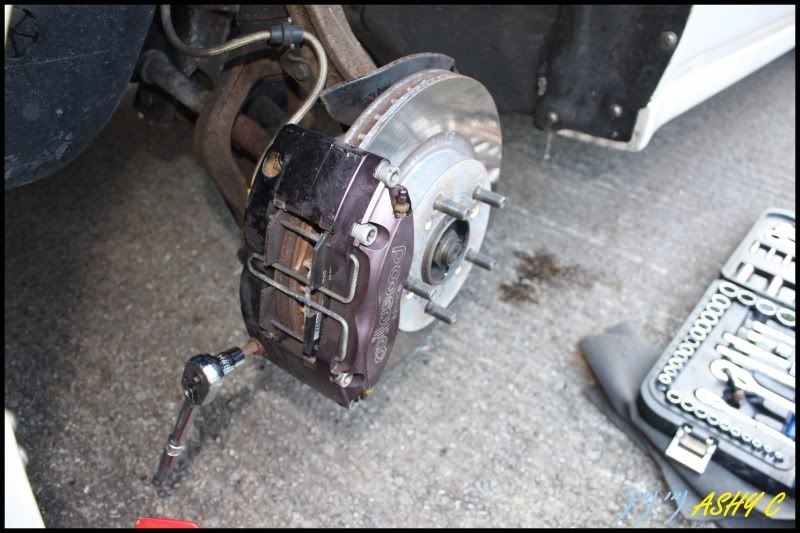
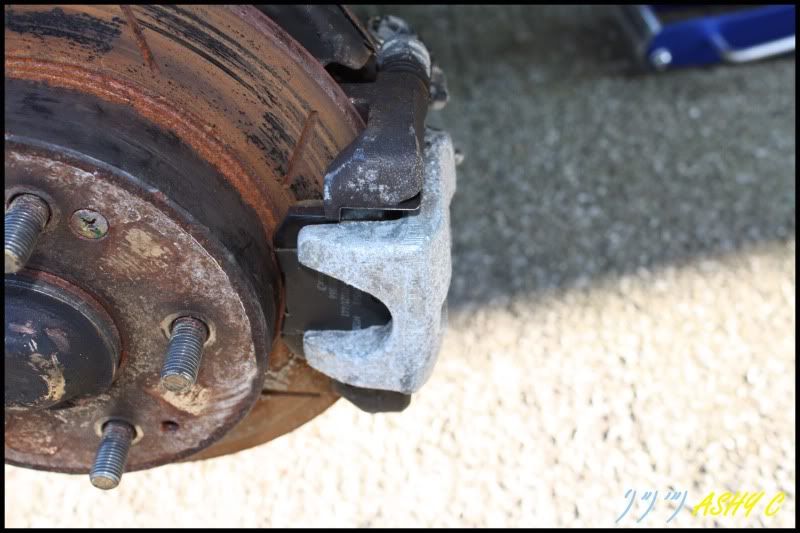
Custom Ferodo DS2500 pads to fit Wilwood calipers, (precise engineering by me with a hacksaw)
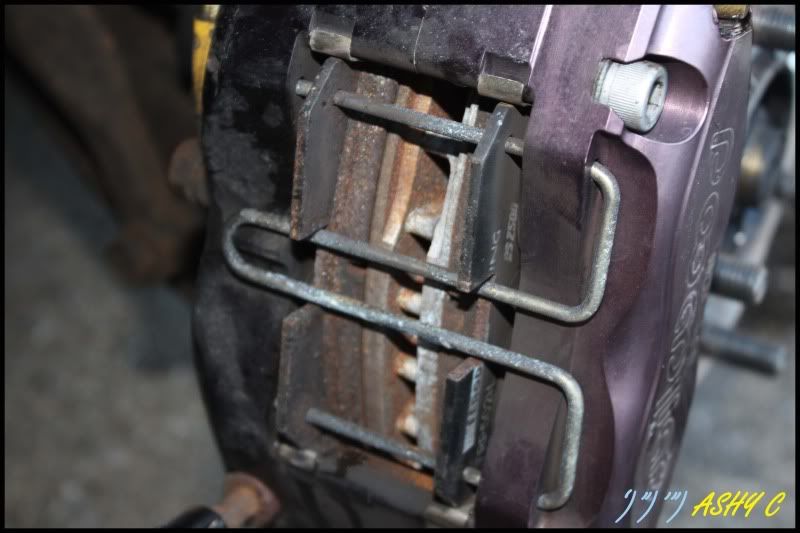
Discoloured Wilwood (Not very impressed :?)
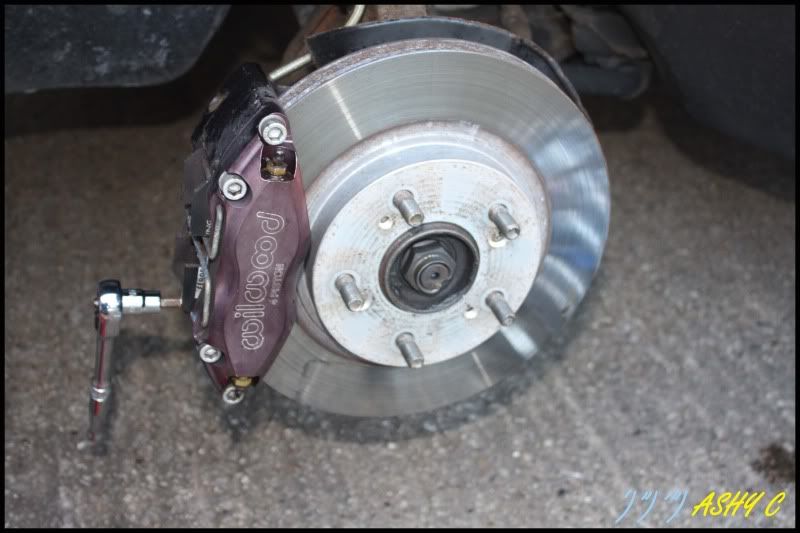
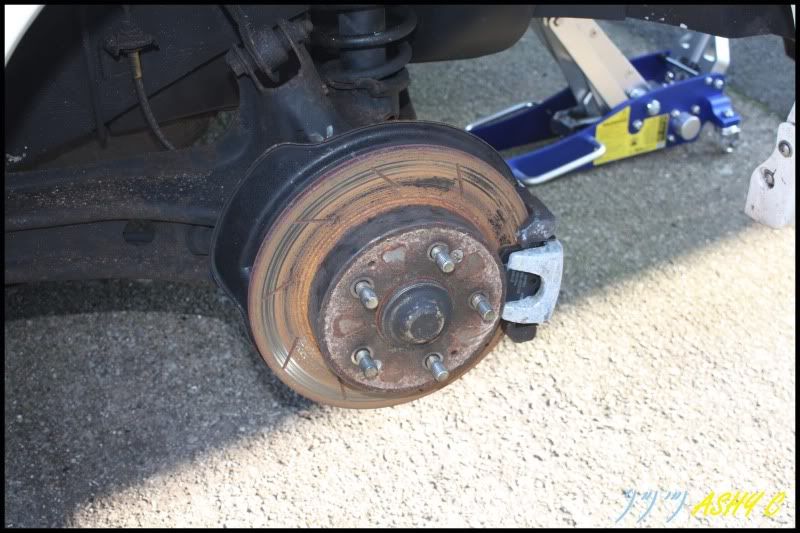
2nd hand Dixcel disc, been sat going rusty in the shed for 2 months
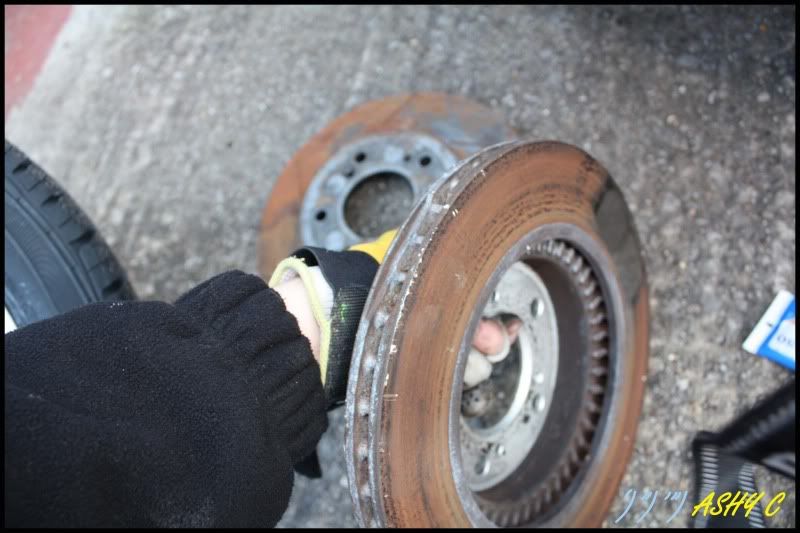
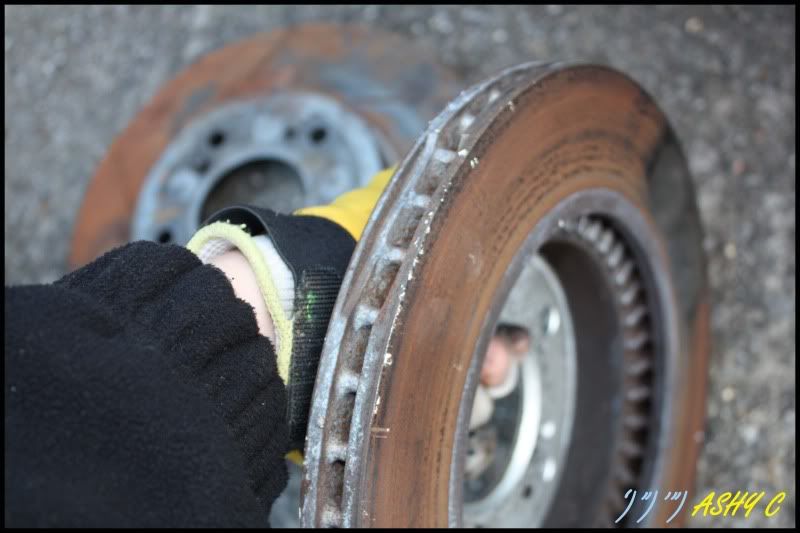
Balancing marks on the Pagid disc
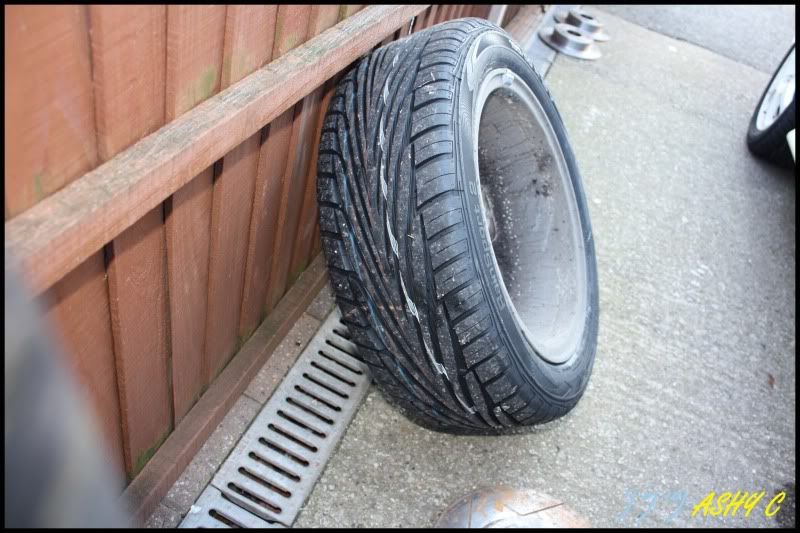
Also had 4 x Uniroyal Rainsport 2 tyres fitted this weekend, thought they would make great Wet track day tyres
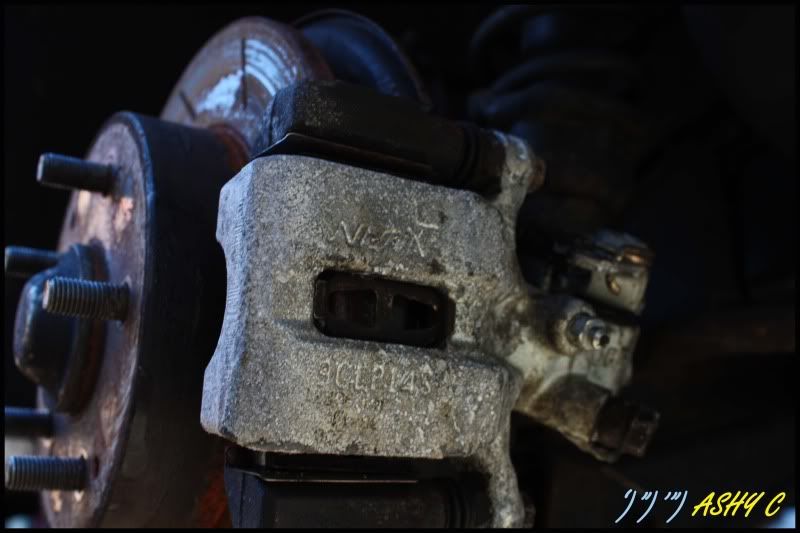
New caliper as fitted a few weekends ago
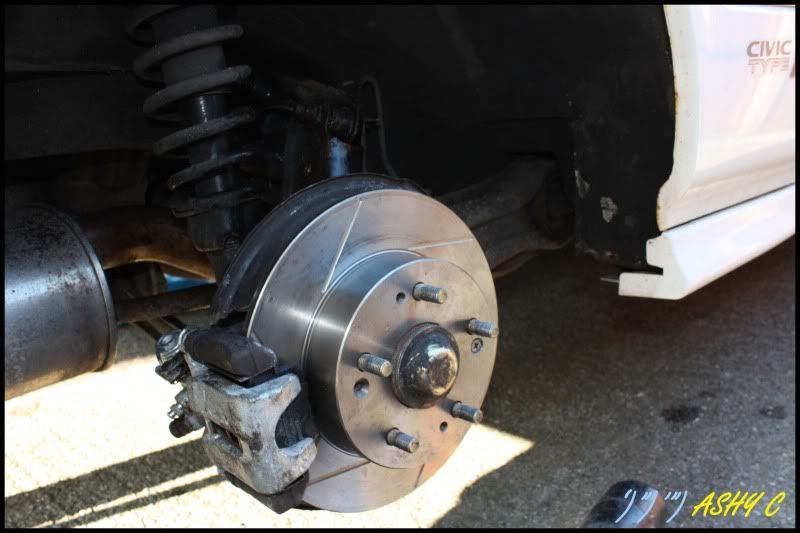
Had the rear discs grooved to match the Dixcel front ones
Had to drill 2 of the brake locating screws out
Rebled the brakes and fitted and reset the handbrake today, the brakes feel amazing, in the whole of the last 12 months of ownership they havent felt this good!!! Handbrake grabs on 1 click and by 2 clicks it aint going no where!!!!!
A chilly weekend but a good one!
Speedy delivery
Now the calipers had caused damage to the rear passenger pads and discs, so i decided to purchase all new, coupled with a very unused 2nd hand set of Dixcel FCR brake discs for the front
With temps down to -4 this weekend i decided to set about changing the discs as i am at Donington Park for a track day in 2 weeks time.
Wheel off and old Pagid discs, only covered 500 miles
Custom Ferodo DS2500 pads to fit Wilwood calipers, (precise engineering by me with a hacksaw)
Discoloured Wilwood (Not very impressed :?)
2nd hand Dixcel disc, been sat going rusty in the shed for 2 months
Balancing marks on the Pagid disc
Also had 4 x Uniroyal Rainsport 2 tyres fitted this weekend, thought they would make great Wet track day tyres
New caliper as fitted a few weekends ago
Had the rear discs grooved to match the Dixcel front ones
Had to drill 2 of the brake locating screws out
Rebled the brakes and fitted and reset the handbrake today, the brakes feel amazing, in the whole of the last 12 months of ownership they havent felt this good!!! Handbrake grabs on 1 click and by 2 clicks it aint going no where!!!!!
A chilly weekend but a good one!
Nah i have fitted them that way on purpose, i have tried both ways and i prefer the chopping into the pad action, it gives a better braking experience IMO
Although the pads do wear quicker!!! Although at £50 a set for the DS2500 pads they aint bank busting
Although the pads do wear quicker!!! Although at £50 a set for the DS2500 pads they aint bank busting