Matt's Jordan 26 build


foxyboy333

Member
Joined
Mar 22, 2013
Messages
96
Here is my Jordan (026/500) Bought in June 2012.

When i first bought it there was a fair bit done to it and the previous owner must of spent alot of money at it.

It gave me a nice base to build upon


IMAG0095 by foxyboy333, on Flickr


IMAG0086 by foxyboy333, on Flickr


$(KGrHqZHJCgE-edmB9lLBPqrE,dez!~~60_12 by foxyboy333, on Flickr


Now onto my touches

First things first i had to jack it up 30mm, love the slammed look but it ain't convenient where i live


IMAG0204 by foxyboy333, on Flickr

Just after that i performed:

New lower ball joints
Full underbody waxoil and hammerite
Repaired both back brakes (seized)
Replaced both Tie rod ends
Cleaned up under the bonnet, rivetted holes in wheel arch.
Adjusted handbrake lever
Flush and refill of hydro clutch fluid
Flush and bleeding of all brakes, cleaned res pot out too
Replaced all upper rear bumper black push clips (where tailgate shuts)
Top up and inspection of gearbox oil
Top up and inspection of radiator
Had all wheels tracked
Fitted correct spigot rings (63.4mm OD - 56.1mm ID)
Replaced snapped wheel stud and D1 race nut


Shortly after that my handbrake start playing up again - raaaaaaaah

I decided to buy brand new Calipers and treat myself to some new braided lines too :cheers:


vti-calipers-lucas7 by foxyboy333, on Flickr


IMAG0220 by foxyboy333, on Flickr


IMAG0223 by foxyboy333, on Flickr


Thank god my brakes are all mint again and the handbrake holds like brand new

Whilst they are working mint again i decided to colour some parts in yellow to match the body


IMAG0221 by foxyboy333, on Flickr


IMAG0202 by foxyboy333, on Flickr

Decided to treat myself to a rear tow hook and front tow strap with Japfest 2's Tracktime approaching fast i needed to act swiftly

and just as luck has it a friend of mine decided to flog me his JDM foggies just at the perfect time


IMAG0205 by foxyboy333, on Flickr


IMAG0196 by foxyboy333, on Flickr


IMAG0206 by foxyboy333, on Flickr


A few shots whilst out cruising


IMAG0216 by foxyboy333, on Flickr


IMAG0217 by foxyboy333, on Flickr


Thought i would add a few cheeky decals on her too :mrgreen:


IMAG0226 by foxyboy333, on Flickr


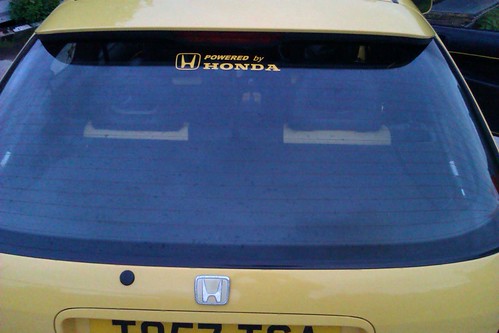
IMAG0228 by foxyboy333, on Flickr


and my little Japanese mascot Pikachu :p


IMAG0225 by foxyboy333, on Flickr
 
Then i thought, i want more power so i ordered a shite load of parts from H-Tune and also bought a used B18C4 engine to rebuild from the ground up.

This picture is when 60% of my parts were at the shop 8)

31b46c39.jpg
 
A week later it all arrived :p

457c1bc2.jpg


2960fc5e.jpg


9d4ad47a.jpg


Honda Oil Pump
GMB Water Pump
CP 81.5mm 9:0:1 CR Forged Pistons
Manley H-Beam Con-Rods
ACL Full Engine Bearing Kit
ARP Head Studs
ARP Main Studs
Continental Timing Belt
GMB/Koyo Tensioner
Brian Crower Stage 2 Turbo Camshafts
Brian Crower Dual valve Springs
Brian Crower Valve spring retainers
Supertech Valve Guides
Supertech Valve Seals
Brian Crower Gold adjustable Cam Gears


I was then waiting on the full engine gasket kit, Brian Crower SS valves and the B18C4 engine itself.
 
I then got myself to Machine Mart to pick up a new 280KG engine stand.

Got the engine on the stand ready, and also had my vlaves and gasket kit delivered.

Gasket kit and valves

IMAG0441.jpg


Engine just before i mounted it on the stand

IMAG0440.jpg


IMAG0439.jpg


IMAG0437.jpg
 
First things first, engine is securely mounted to the stand and its off with the rocker cover.

IMAG0442.jpg


Then off with the inlet manifold.

IMAG0446.jpg


IMAG0448.jpg


IMAG0449.jpg


Then after numbering the camshaft supports it was off with the camshaft's

IMAG0452.jpg


IMAG0453.jpg


IMAG0443.jpg


IMAG0456.jpg


and pop goes the head and valvetrain!

IMAG0457.jpg


IMAG0458.jpg


IMAG0459.jpg


IMAG0460.jpg


Now we going upside down, off comes the sump tin.

IMAG0463.jpg


IMAG0465.jpg


Off with the oil sender

IMAG0466.jpg


Same goes for the splash tray

IMAG0467.jpg


Then off with the crank guide for the middle cylinders

IMAG0468.jpg


Off with the 1st and fourth cylinder crank guides

IMAG0469.jpg


Now to the journals, we piston poppin' :guns:

First piston dropped, the rest followed.

IMAG0471.jpg


IMAG0472.jpg


IMAG0473.jpg


Dont think ill be needing these anymore :wink:

IMAG0477.jpg


Now its time to remove the water and oil pumps

IMAG0474.jpg


and out comes the crankshaft

IMAG0475.jpg


and im left with a block thats now ready to go to the machinist :)

IMAG0480.jpg


Not bad for 5 hours work is it 8)
 
Hi-ho Hi-ho it's off to the Machinist we go, with some brand new Valves and some Brand new Guides Hi-ho HII-HO

IMAG0484.jpg


IMAG0489.jpg


IMAG0488.jpg


IMAG0490.jpg


IMAG0491.jpg
 
Got my block back from the machinist a week or so later. It has been bored/decked/honed.


Decided to give it a good degrease and scrub.


IMAG0500_zpsc599a38b.jpg


IMAG0498_zps76699d8c.jpg


IMAG0497_zps98073461.jpg


IMAG0502_zps0980ff0e.jpg


IMAG0503_zpsfcce78bf.jpg


Also Santa brought me a Fidanza lightened flywheel. Nice one Santa


IMAG0504_zps58de5a23.jpg


IMAG0505_zps50a21a6c.jpg


Next up;


Reassembly of the engine and respray.
 
After having a further look at the engine just sat there still stained with oil i decided i was not happy with the degreased n scubbed finish.


Went out and bought a wire brush drill bit set and went to town with it (not perfect but at least its silver-ish)


IMAG0510_zps2d73b880.jpg


IMAG0512_zps0817ad68.jpg


IMAG0511_zps85f4abec.jpg


Then i was all over gauging the new shell clearances on both the crank and rods with Plastigauge


IMAG0508_zps1f4a4820.jpg


IMAG0507_zps0970320c.jpg


IMAG0506_zpsd9340b45.jpg


IMAG0524_zps39475d00.jpg


IMAG0509_zps975179d6.jpg


With the shell clearances at a tolerance it was time to assemble the rod and pistons.


IMAG0515_zpsf304f088.jpg


IMAG0517_zpsbc4baf21.jpg


IMAG0516_zps494e555c.jpg


IMAG0518_zps479898c0.jpg


Gudgeon pins in, it was time to gap the rings and gauge it all up with the feeler's


IMAG0514_zpsbb357104.jpg


IMAG0513_zps15ae47ab.jpg


With the rings gapped and labelled for each cylinder wall it was time to fit the rings and drop the pistons in


IMAG0519_zpsd9ab8ff8.jpg


IMAG0521_zpsbd2ed45a.jpg


IMAG0520_zpsaacf28fb.jpg


IMAG0522_zps29bf5024.jpg


IMAG0523_zpsd0b70ab8.jpg


Pistons in there new home, now back to the bottom to connect the rod caps and stud up!


IMAG0524_zps39475d00.jpg


IMAG0527_zpsbefb475d.jpg


IMAG0526_zps8ed0cf5c.jpg


Crank bridge refitted


IMAG0528_zpsee73ccb4.jpg


Brand new Oil Pump fitted


IMAG0529_zps3c0e9079.jpg


IMAG0530_zps47a44cd0.jpg


With a brand spankers Oil Pump comes a brand spanking Water Pump


IMAG0531_zpsf178152b.jpg


Last thing for the bottom end internals, splash tray and oil sender refitted.


IMAG0532_zps40991f24.jpg


IMAG0533_zps569a02fc.jpg


Next up;


Sand blasting of ancil brackets, refitting the head and painting of the engine
 
Got my Cylinder head back with all brand new uprated components.


IMAG0541_zps8f6edf2e.jpg


Valves fitted all ready to go!


IMAG0542_zps8cbf42b2.jpg


IMAG0543_zps4d69fb6c.jpg


IMAG0544_zps4f417300.jpg


Gave it a good degreasings.


Before -


IMAG0546_zpsb0e79c72.jpg


After -


IMAG0547_zpsef2b8274.jpg


Then it was on with the paint


IMAG0549_zpsbc4e5360.jpg


IMAG0550_zpse016c36c.jpg


Thats it until the weekend, when the whole block gets mated and the deal is sealed!
 
A little more progress on this engine build.


Got the head painted to match the block, the valve train is fully assembled, rocker and lockers in place it's time to bolt it down to the block.


IMAG0552_zps7fd09f2d.jpg


IMAG0555_zpsd4be67d4.jpg


With the head on it's time for the turbo cams


IMAG0551_zpsde7d9cb2.jpg


IMAG0556_zpsbf06d71f.jpg


IMAG0557_zps3fa0d401.jpg


Then the adjustable Camgears to go on


IMAG0558_zps791a1b60.jpg


IMAG0559_zpsf89cfe3f.jpg


Then the timing belt was dropped on


IMAG0562_zps04d29aca.jpg


IMAG0564_zps6a33d6a0.jpg


Thats it for now, next up:


Painting of crown wheel and ancil brackets, touching up of the engine, rocker cover painting and valve clearances setup
 
Small update Folks.


Got the valve timing absolutely spot-on


IMAG0565_zps374c2c84.jpg


IMAG0566_zps14ffe87f.jpg


and just for some extra added value to the money shot


IMAG0568_zpsddb4928c.jpg


Went nuts with the 4'' holesaw, slightly off centre but what the hell whats done is done.


Lastly for now, welded the sump baffle in place.


IMAG0570_zps2b3816d0.jpg
 
Been busy with the paint again today.


Decided to paint the baffle to make it look more OEM and that its meant to be there.


IMAG0572_zps307b0956.jpg


Sprayed the plug cover too.


IMAG0571_zpsfaf210ca.jpg


IMAG0573_zps4948cfd2.jpg


Then i thought why not colour code the timing belt cover


IMAG0574_zpsb8b2fd7f.jpg


IMAG0575_zps9ae4e47e.jpg


Then i finished the engine off by touching little patches up and appyling some Milano red to the oil pump that was visibly silver on previous photos


IMAG0576_zps2f4201de.jpg


Up next:


Rocker cover spray job and final fitment and who knows what will follow.
 
Been busy welding and blasting today. Quite a productive day


IMAG0579_zps96c1e3b3.jpg


IMAG0578_zps68808990.jpg


Gave the rocker cover a good blasting in Nitro-Mors too


IMAG0581_zps88d8f37d.jpg


Thought id get the shot blaster out to clean some bits and bobs up


IMAG0580_zpsa3b1d85b.jpg


Blasted the distributor 1st


IMAG0584_zps3acd2e25.jpg


Then the dipstick, thermostat housing and some other random bits


IMAG0582_zps8eb57d9a.jpg


IMAG0587_zps34df5a05.jpg


Must set the spray gun up next and get some spraying done :)


Also got the last two of three pieces to the puzzle arriving sometime soon.
 
Had the spray gun out.


IMAG0589_zpsc06cdab2.jpg


IMAG0591_zpsef7d1e5c.jpg


IMAG0597_zps140a0359.jpg


IMAG0600_zpsbfb69328.jpg


IMAG0601_zpsf8449a32.jpg


IMAG0604_zps1d97faa2.jpg


IMAG0606_zpsbbb023bf.jpg


Mounted the induction on just for the laugh


IMAG0607_zps2eac4660.jpg


So glad its nearly done, the fun part will start when i go to put it in the car. It will be like a jigsaw puzzle
 
Had the spray gun and brush out again today, painting the final odd parts to the engine yellow


IMAG0609_zps5a0fb999.jpg


The dipstick was gagging for it.


IMAG0610_zpsb4764580.jpg
 
Got a few more bits and bobs done.


Alternator brackets fitted


IMAG0616_zpsc590a8e9.jpg


Brand new alternator (its a four pin one and my loom is a three pin one, sort that out when i find out how to)


IMAG0614_zps10f5fd39.jpg


Red MSD 8.5mm ignition leads


IMAG0620_zps4f929b86.jpg


Just picked up a S9B LSD gearbox today too.


IMAG0619_zps04580b14.jpg


IMAG0618_zps02711657.jpg


IMAG0617_zps332d7db5.jpg


Got the gearbox rebuild kit coming soon from Synchro-tech in the states, along with two more un-announced goodies :)
 
been waiting for some goodies arriving from the states, been waiting for 7 weeks now so hopefully wont be a deal longer.


In the meantime ive been very busy with the spray gun again, taking a massive risk, took me six attempts and i can honestly say i never want to do it again.


So this is a partial reveal of the risk i have took, im doing something else but wont reveal that just yet.


IMAG0621_zpsd593426d.jpg


Thats it for now until my goodies arrive from America
 
SHIPMENT HAS ARRIVED


Looks like it could be from the states, hmmm


IMAG0624_zpsc22377a5.jpg


Wonder what could be in it?????


Lets have a look!


Oh ello


IMAG0625_zpse063dcfb.jpg


Anything else in the box?


IMAG0626_zpsf4275585.jpg


Haah another box, whats inside this one?


Looks like a pizza in a fancy box!


IMAG0627_zps59e6ea89.jpg


Stage 4 clutch niiiiice


IMAG0629_zpsb7386adb.jpg


Bless ya Victor


IMAG0630_zps819ca484.jpg
 
Hello hello hello what do we have here?


Looks like another box from the states.


IMAG0631_zps8be54cad.jpg


What the hells inside this one


IMAG0632_zpsfa4b51b9.jpg


Looks like a S9B full rebuild kit, sweeet


IMAG0633_zpse7b4b657.jpg
 
Back
Top