
keithiesbig1
EAT SLEEP BOOST RPT
- Joined
- Jun 15, 2010
- Messages
- 1,279
Hey Folks, after suffering with this for a long time i thought i would get it fixed and make a How-to. So here we go. 
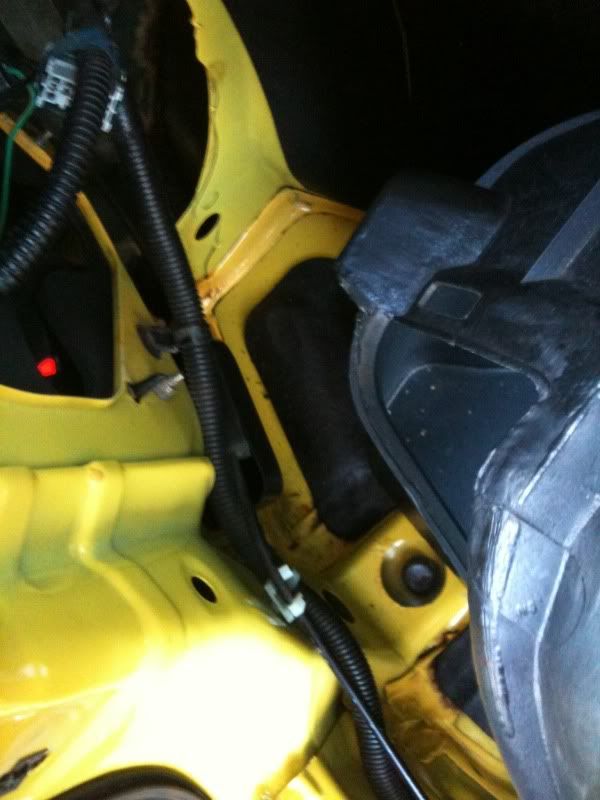
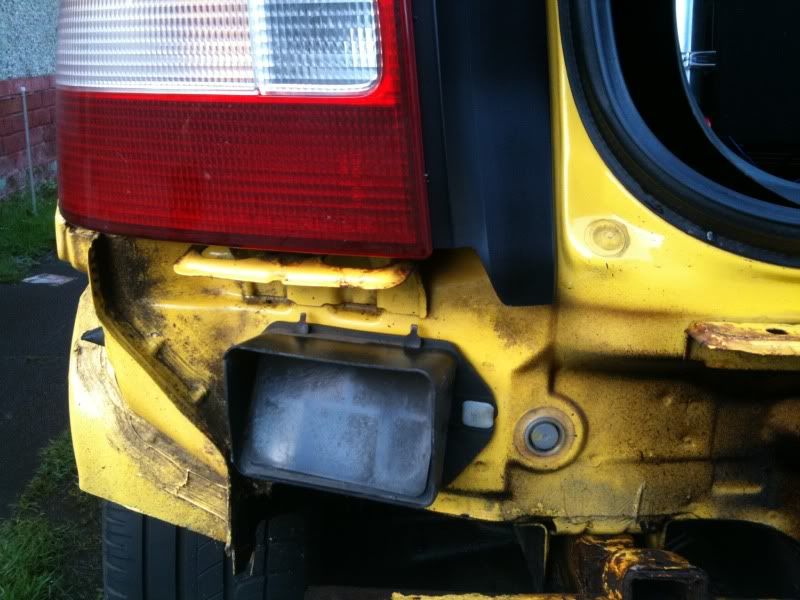
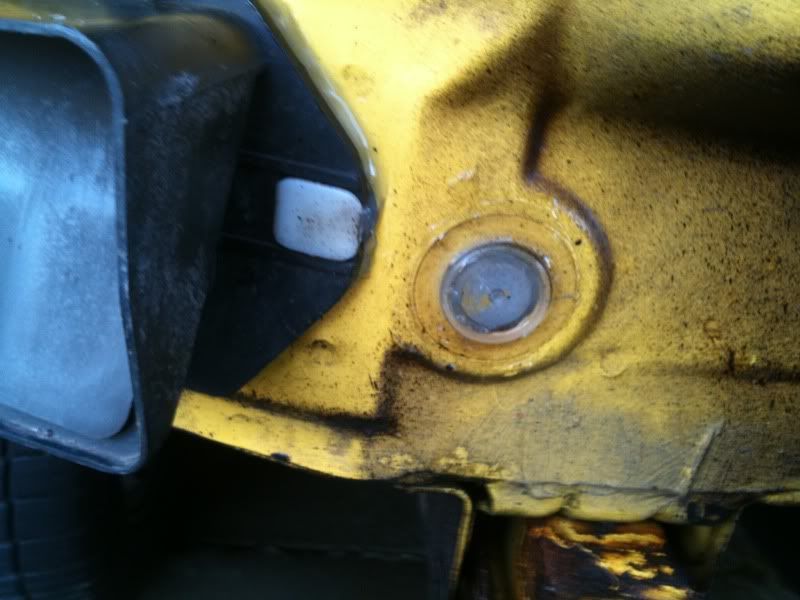
I was getting water lying in this area and in the hole where the bolt is in the picture below. This would then run down into the spare wheel well.
REAR LIGHT SEAL
A quick run through on what to do for the Rear lights first (sorry no pics)
1. Buy some new seals from Honda (or where ever you can get)
2. Remove Rear Lights
3. Discard old seals
4. Clean the area of the car (painted metal work behind light)
5. Get some Mildew resistant clear silicone
6. Put silicone around the car side of the new seal
7. Replace seal making sure to align it properly
8. Allow silicone to set fully (couple of hours, the more the better)
9. Replace rear lights
That should be the rear lights solved.
VENT SEALS
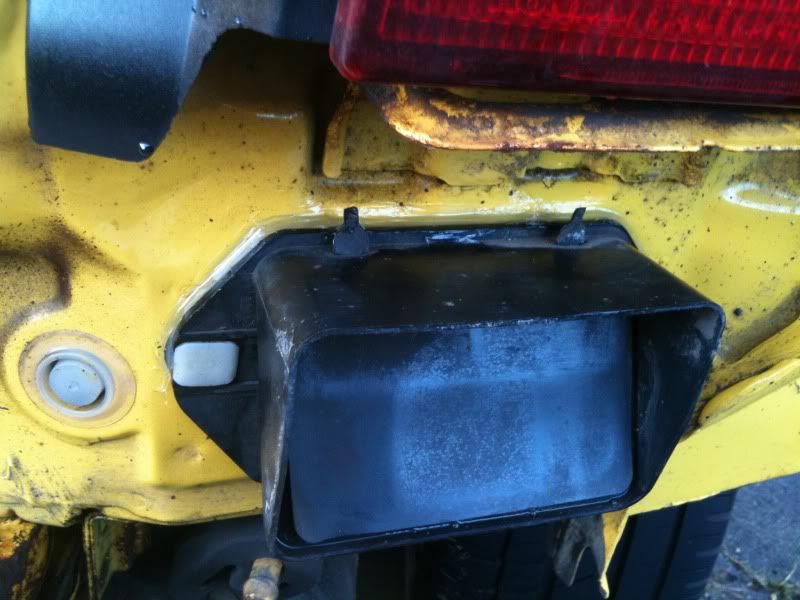
Now for the Vents BEHIND the rear bumper:
1. Remove the clips along the top of the bumper using a small flat head screwdriver (carefully!!!). The middle bit should pop up allowing you to remove the full thing.
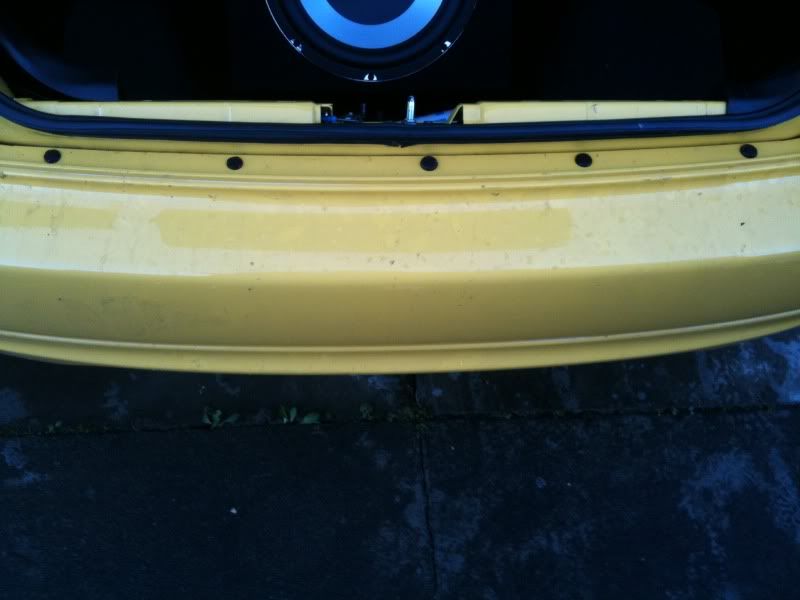
2. Remove the 2 clips under the car as shown below. Same method.
3. Remove the 2no Screws from the connection in the rear arches (1no in each arch)
4. Remove bumper taking care not to scratch rear quarter panels at each side.
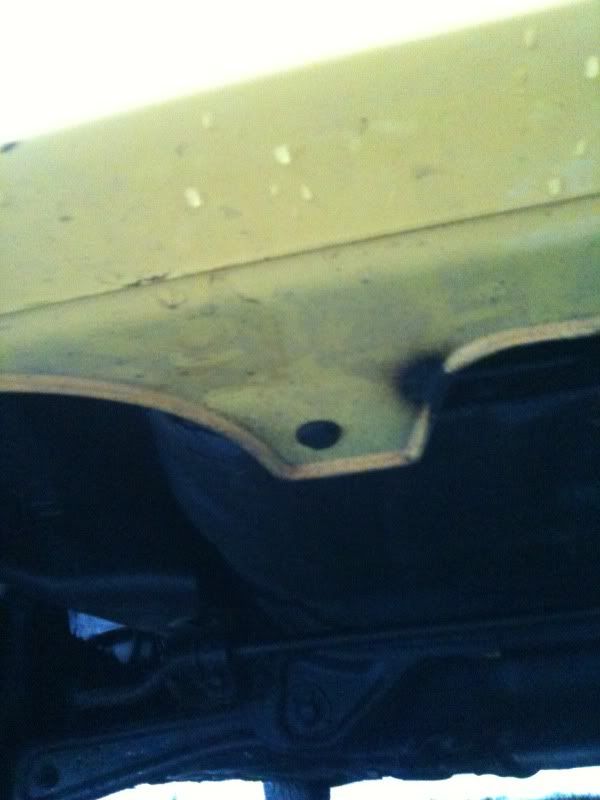
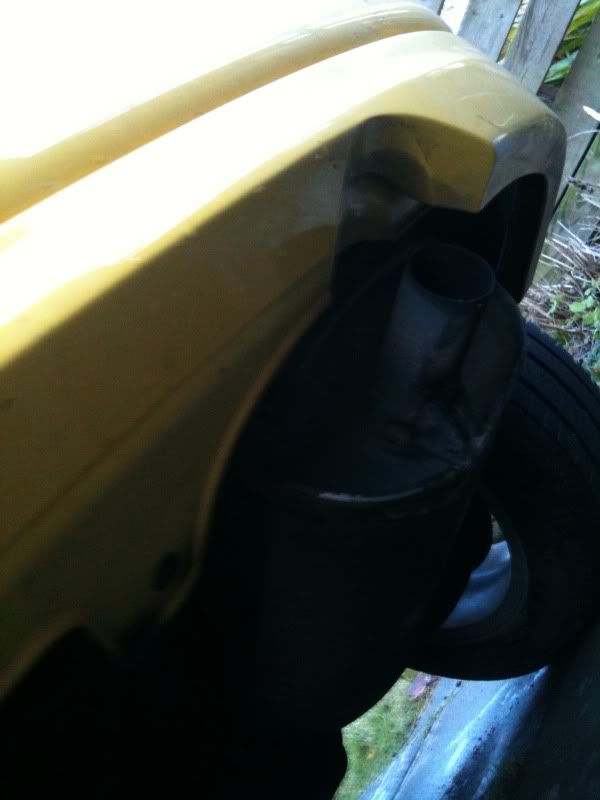
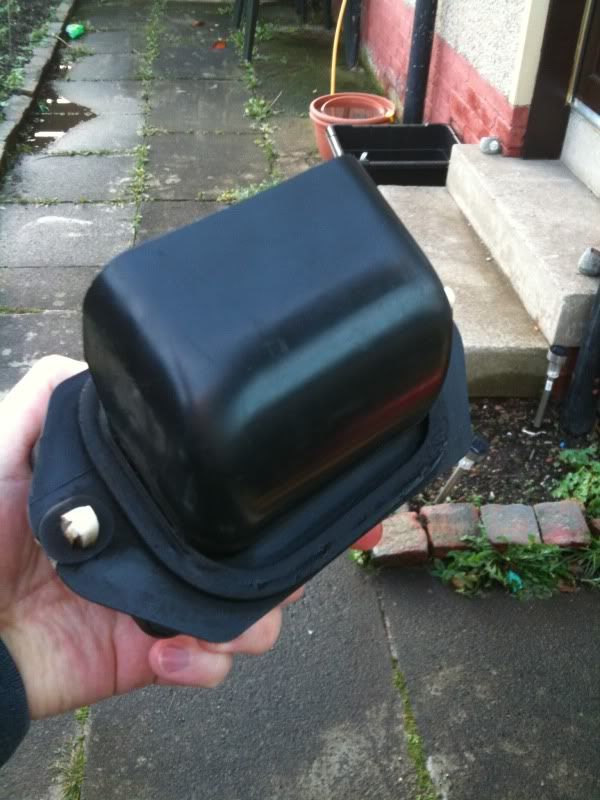
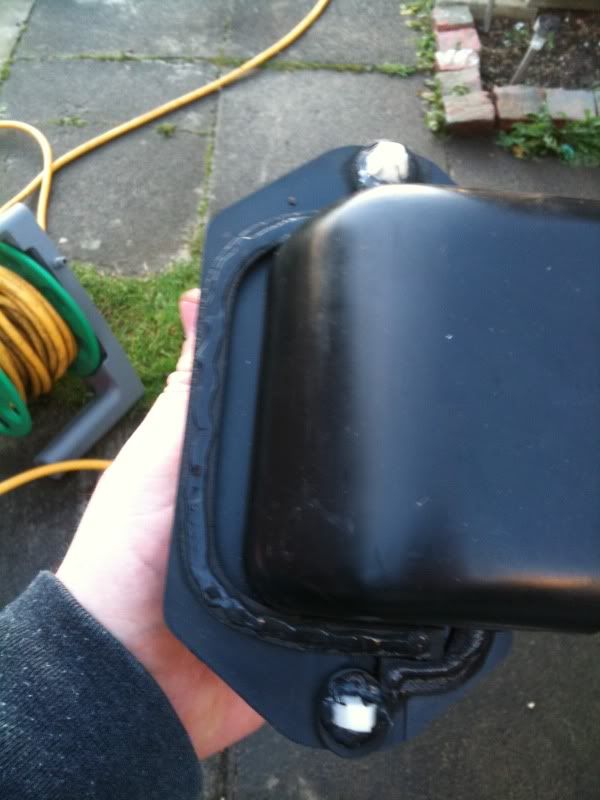
5. Pictures of the 2no vents below for your information:
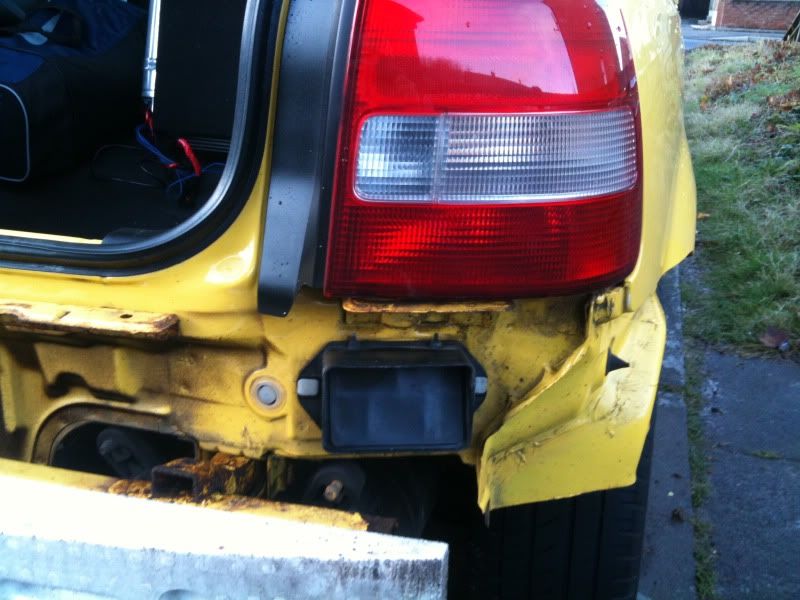
6. Give the car and the seal on the vent a real good clean and check for any damage which may cause the leak. Pictures below for information:
7. Put mildew resistant clear silicone around the seal on the vent and also the seals around the fixings for best results.
8. Fit vent again and run some silicone around the top and sides of the vent to help keep the water out.
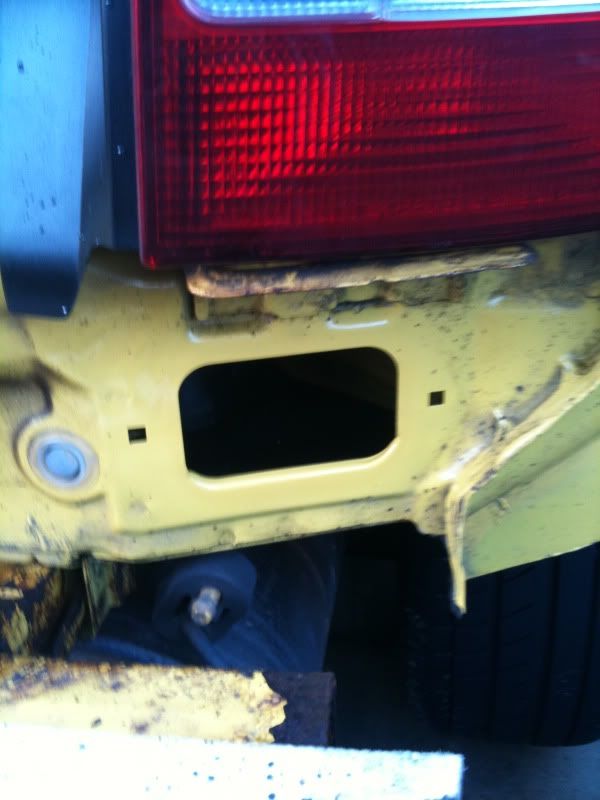
9. (OPTIONAL) seal the grommet below if you are getting water in the hole where the bolt is as described above. This is the only way I could see it getting in.
10. Now put bumper back on and put all fixings back on and that should be it.

I was getting water lying in this area and in the hole where the bolt is in the picture below. This would then run down into the spare wheel well.
REAR LIGHT SEAL
A quick run through on what to do for the Rear lights first (sorry no pics)
1. Buy some new seals from Honda (or where ever you can get)
2. Remove Rear Lights
3. Discard old seals
4. Clean the area of the car (painted metal work behind light)
5. Get some Mildew resistant clear silicone
6. Put silicone around the car side of the new seal
7. Replace seal making sure to align it properly
8. Allow silicone to set fully (couple of hours, the more the better)
9. Replace rear lights
That should be the rear lights solved.
VENT SEALS
Now for the Vents BEHIND the rear bumper:
1. Remove the clips along the top of the bumper using a small flat head screwdriver (carefully!!!). The middle bit should pop up allowing you to remove the full thing.
2. Remove the 2 clips under the car as shown below. Same method.
3. Remove the 2no Screws from the connection in the rear arches (1no in each arch)
4. Remove bumper taking care not to scratch rear quarter panels at each side.
5. Pictures of the 2no vents below for your information:
6. Give the car and the seal on the vent a real good clean and check for any damage which may cause the leak. Pictures below for information:
7. Put mildew resistant clear silicone around the seal on the vent and also the seals around the fixings for best results.
8. Fit vent again and run some silicone around the top and sides of the vent to help keep the water out.
9. (OPTIONAL) seal the grommet below if you are getting water in the hole where the bolt is as described above. This is the only way I could see it getting in.
10. Now put bumper back on and put all fixings back on and that should be it.
")


 save a lot of cash