
- Joined
- Oct 16, 2012
- Messages
- 8,917
Thought it was about time I made one of these since I've made a couple of changes.
So story begins.... Lol
After seeing jake(civictyper89)'s car on a what's it worth thread I knew I was going to buy his one once my poxy s2k had sold.
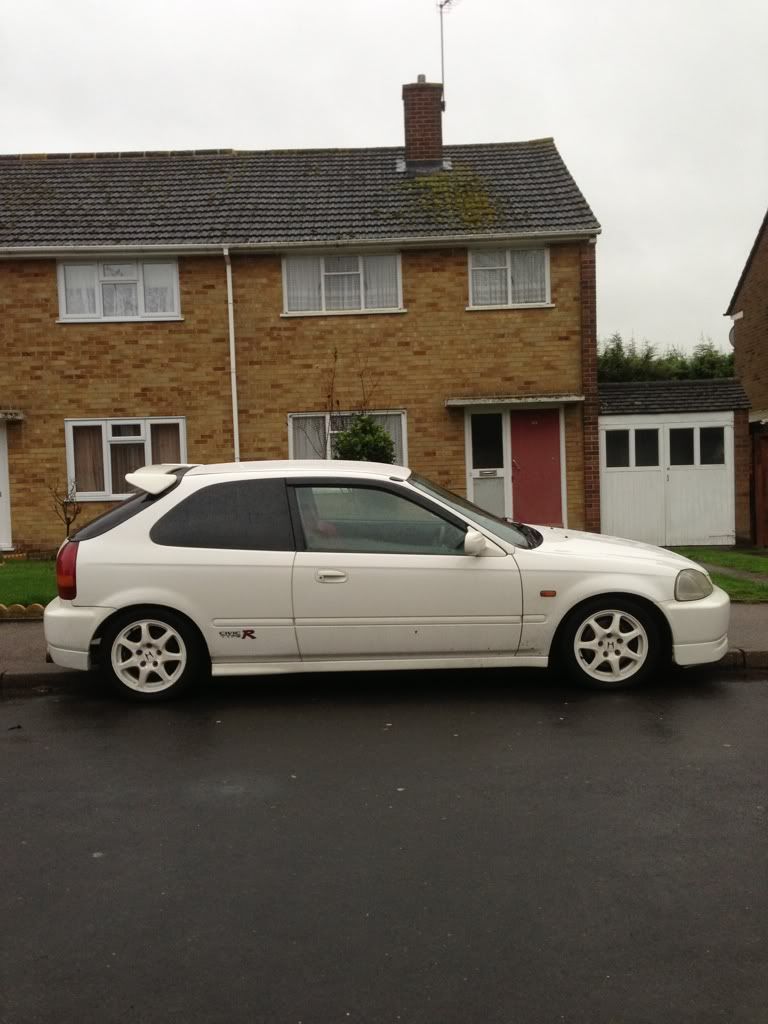
So one Saturday in December I went to have a look and obviously brought it home with me. Cars a 98 preface lift in cw.
The cars spec as it stands ATM:
Engine:
B18c6
Feels exhaust manifold
Custom 2.5" ID thin wall catback exhaust with carbon fibre back box
90cell sports cat
Dc2 air box with spoon drop in filter
Rc 310 injectors
B16b inlet manifold
Jdm b18 70mm throttle body
Hondata s300 with launch control
Mapped by endless horizon
Avid racing steel engine mounts
HKS Superfire Spark Plugs
Magnacore 8.5mm HT leads
Spoon oil cap
Skunk2 magnetic drain plug
HKS earthing kit
Walbro 255l/ph fuel pump
Tegiwa thermal intake gasket
ARC prestige R radiator with cap
203 hp & 131 ft/lbs
Gearbox:
Ek9 s4c
Fidenza lightweight flywheel
Exedy stage 1 clutch
Mfactory 4.9 final drive
ATS 1.5 way carbon plate LSD
Skunk2 Magnetic drain plug
Skunk2 heavy billet shift knob
Solid shifter bushings
Feels braided clutch line
Chassis:
Meister r zeta r coilovers
Dc2 rear upper strut brace
Feels rear brake pads
Rsr front brake pads
Custom splitter (track only)
Interior/exterior:
Pair of Feels lower seat rails
Muteki Titanium Anodised Purple Wheel Nuts
Aerial Delete
Aero Flat Wipers
Honda Wind Deflectors
6k HIDs
So here's a picture once I got her home.
My track buddy and person to blame for all the on coming madness later in this build, Matt (mattek9) came straight over to help me with a few problems I had found with the car whilst I was viewing it.
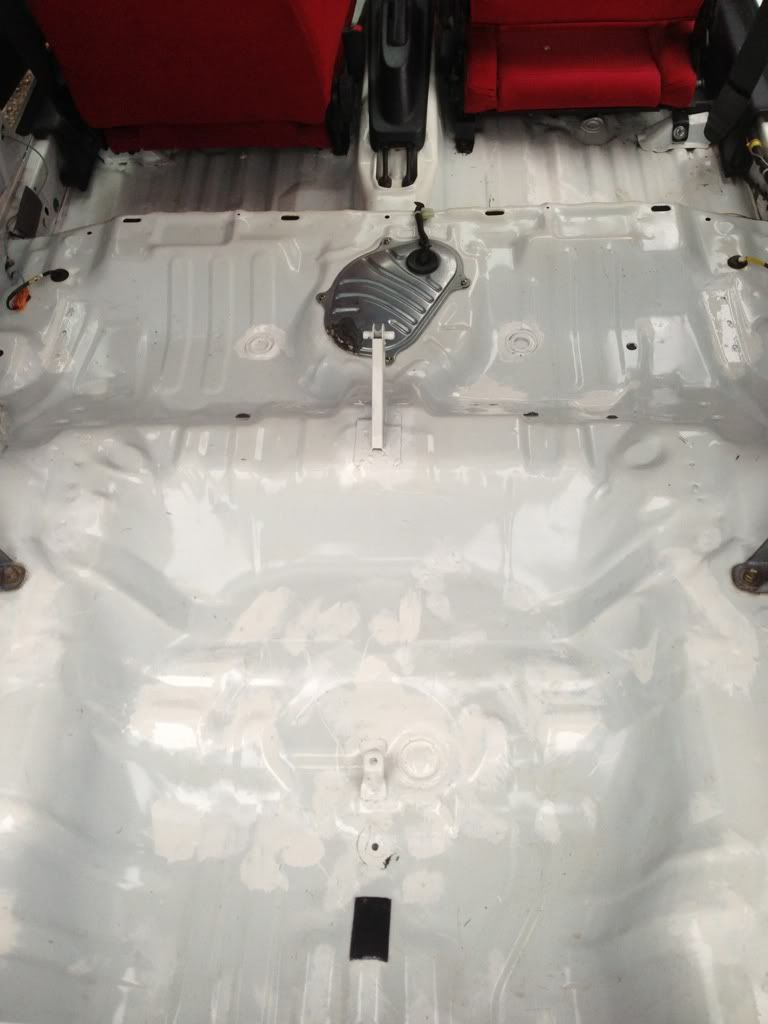
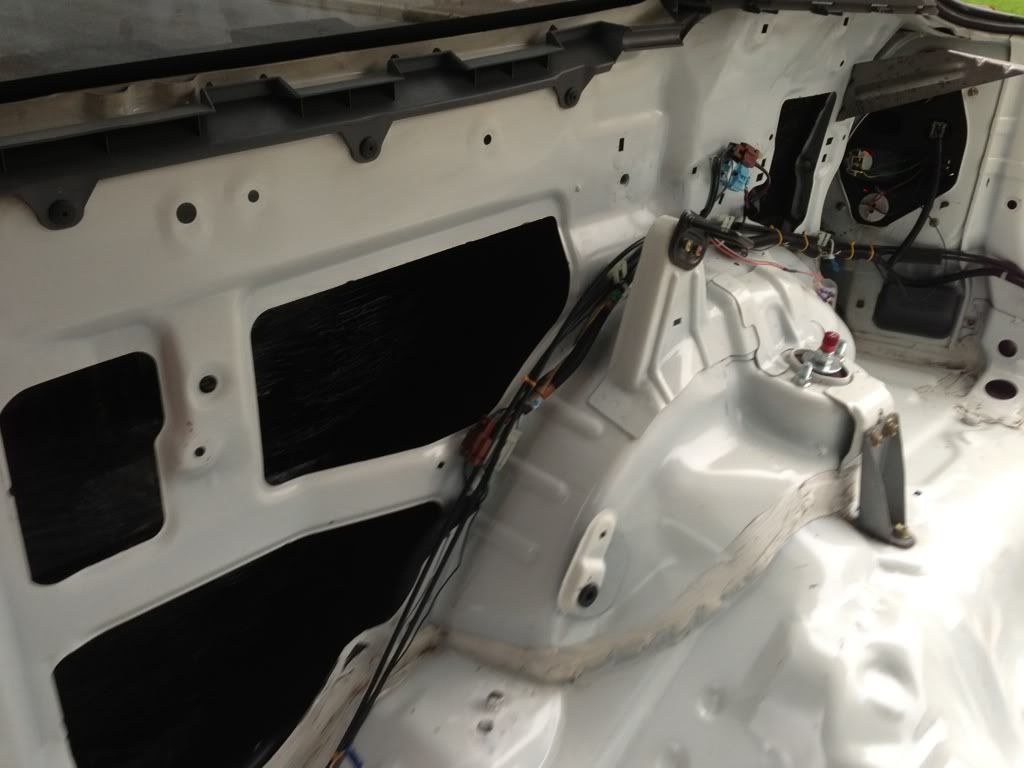
These included a wet footwell and thus a slightly rusted floor pan, and some tegiwa bits lol
We got straight to work finding the leak which turned out to be the scuttle panel letting water seep into the passenger well some how. We also got the carpet up and Matt kindly donated his stock shifter so I could lose the tegiwa one. He worked 2 evenings with me on this dispite lashings from the missus. So thumbs up for that!
Few more pics. Befor shifter
After shifter

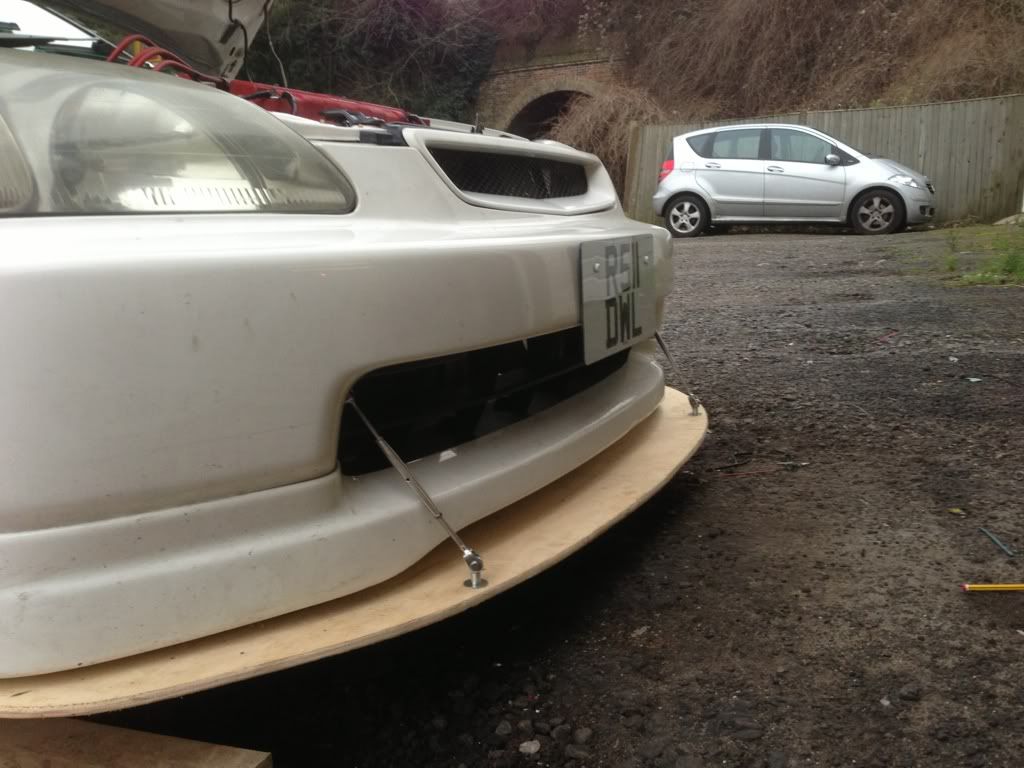
Now I was obviously abit poor after that purchase so I got too work on a little project I had been talking about for a while, needs and airdam now but getting ther with it(don't flame me until I've tested it with track times)
^ that's me btw lol
Painted the top half black today whilst I was getting on with some more bits.
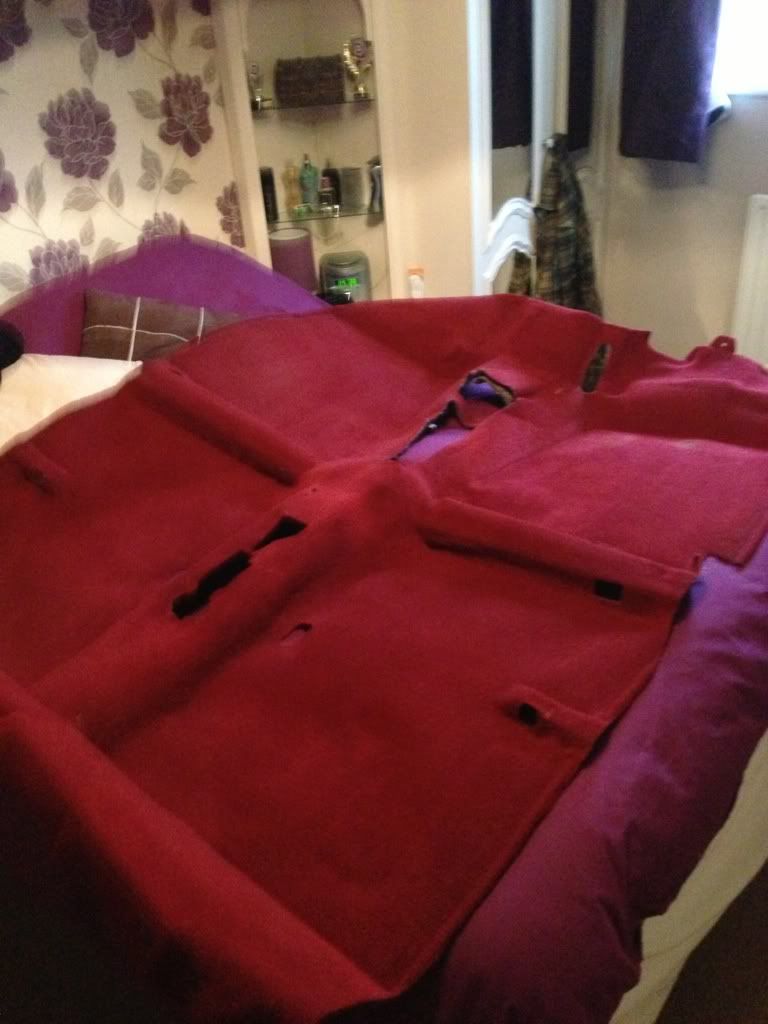
Whilst carpet was out I have it some jet wash
Befor
No after as its still drying but watch this space
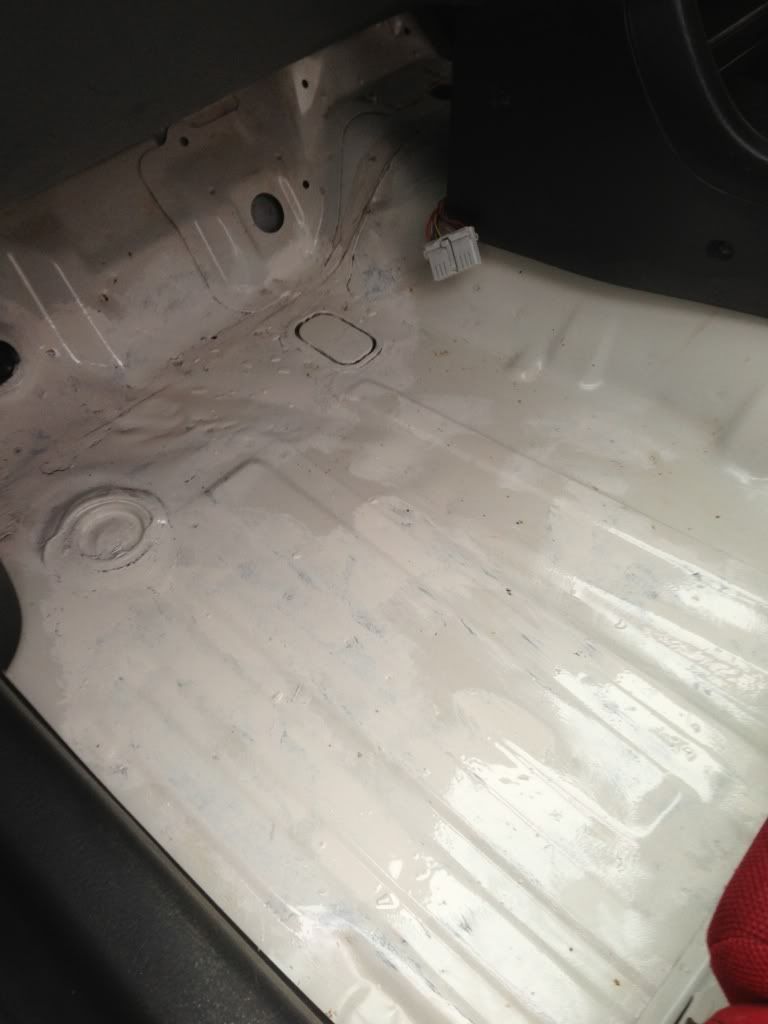
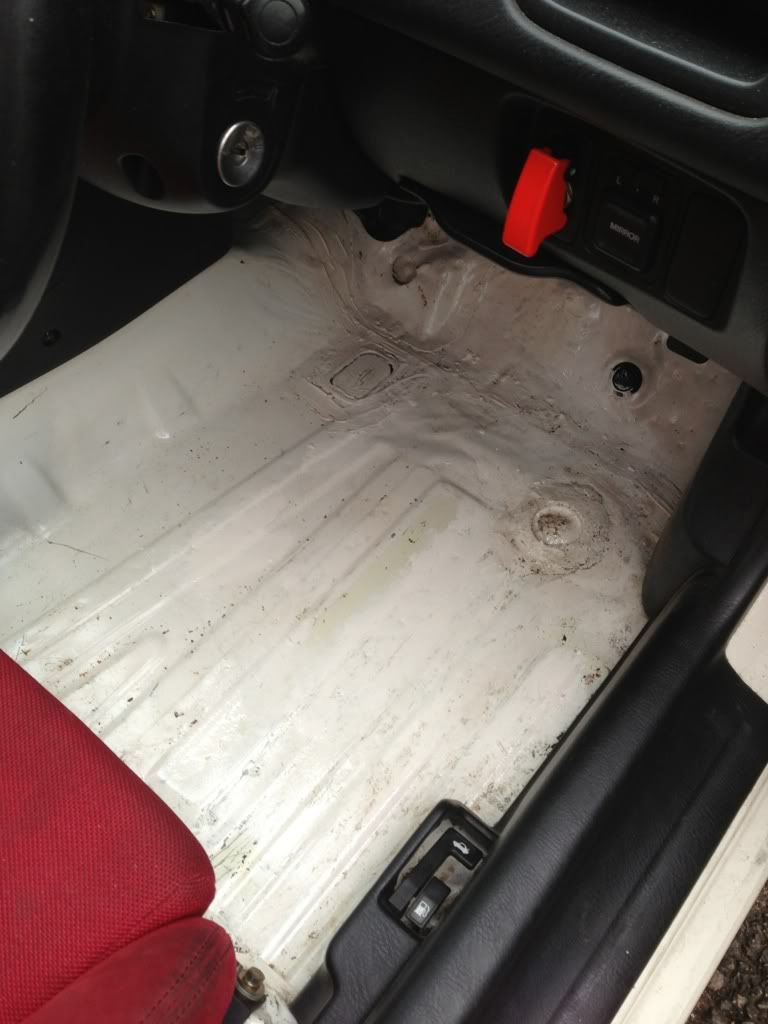
Then got to that rust I said about
Majority of it sanded back
Unfortunately I didn't get a picture of the worst area( passenger footwell)
And then I got to painting up the bare spots with some hammerite smooth.
Pictures to come of that once I've finished And then I'll be respraying the inside so its all fresh again.
6/01/13
Okay so didn't get much done today but here's how it finished
I ran out of white hammerite right at the end. But it's covered for now.
Check out the rust that had collected behind the passenger seat! Lucky it was all just surface and lifted straight off.
Also all the bright white paint in the passenger footwell was the rusty spots.
Ohh and my carpet is now dry! Passenger seat next to come.
7/01/13
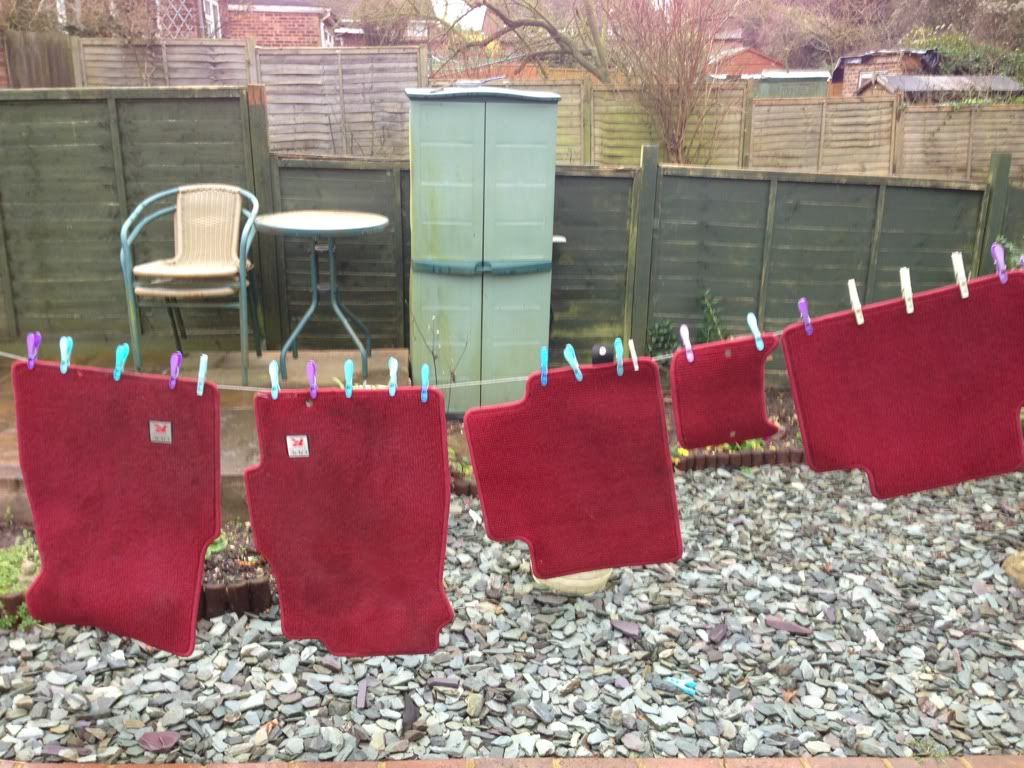
So got the passenger seat out today and also got the matts ready for a clean with the jetwash.
^seat looks pink in that pic but it is still red lol
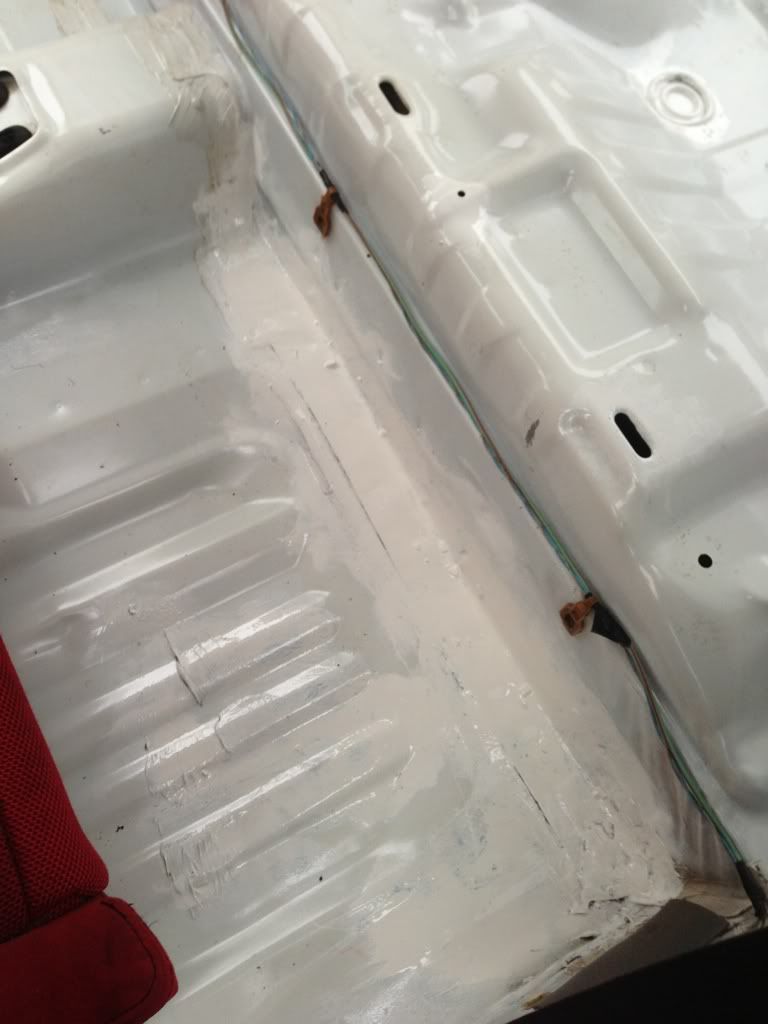
While I had that lot soaked and drying I got some underseal out and stuffed it down the inside of the quarter panels and arch area. Not sure if this is nessesary but after seeing the floor rust I thought I whack some In ther anyway. Plus it looks alittle more tidy when I've got the interior out.
Will update again once ther passenger seat and matts are dry.
8/01/13
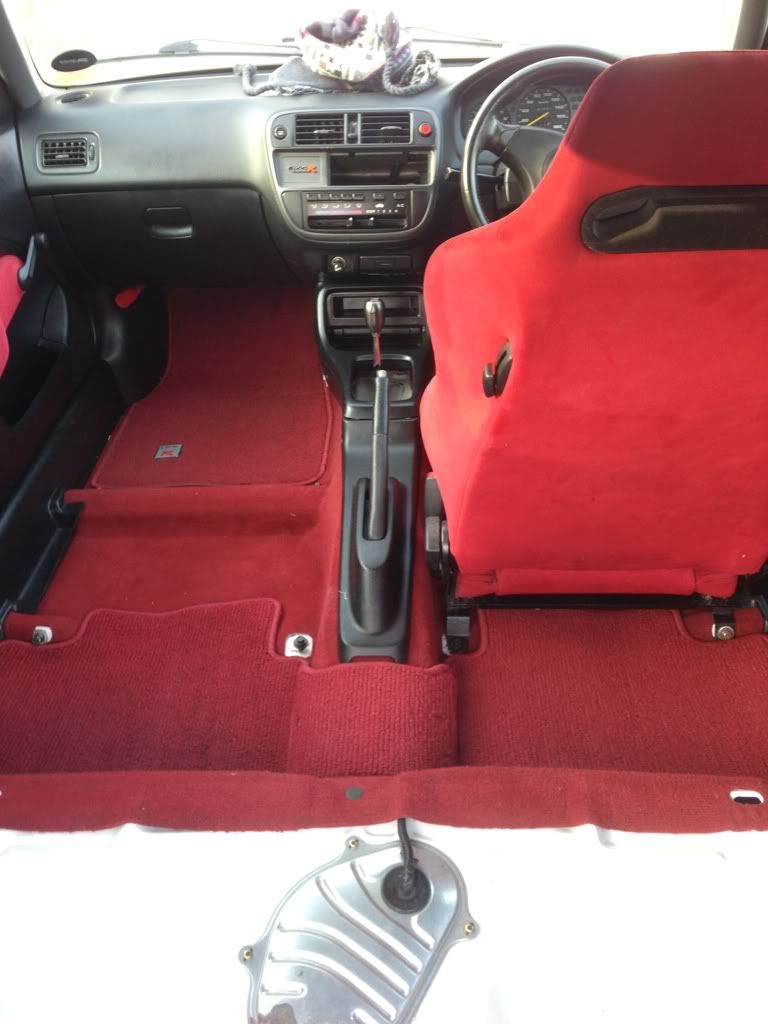
Refitted my now dry carpet and matts. Also refitted the quarter cards and took the speakers out as I don't use the radio anyway. Then gave all the plastics a clean up so looking all fresh now.
Can't wait to get the fronts done.
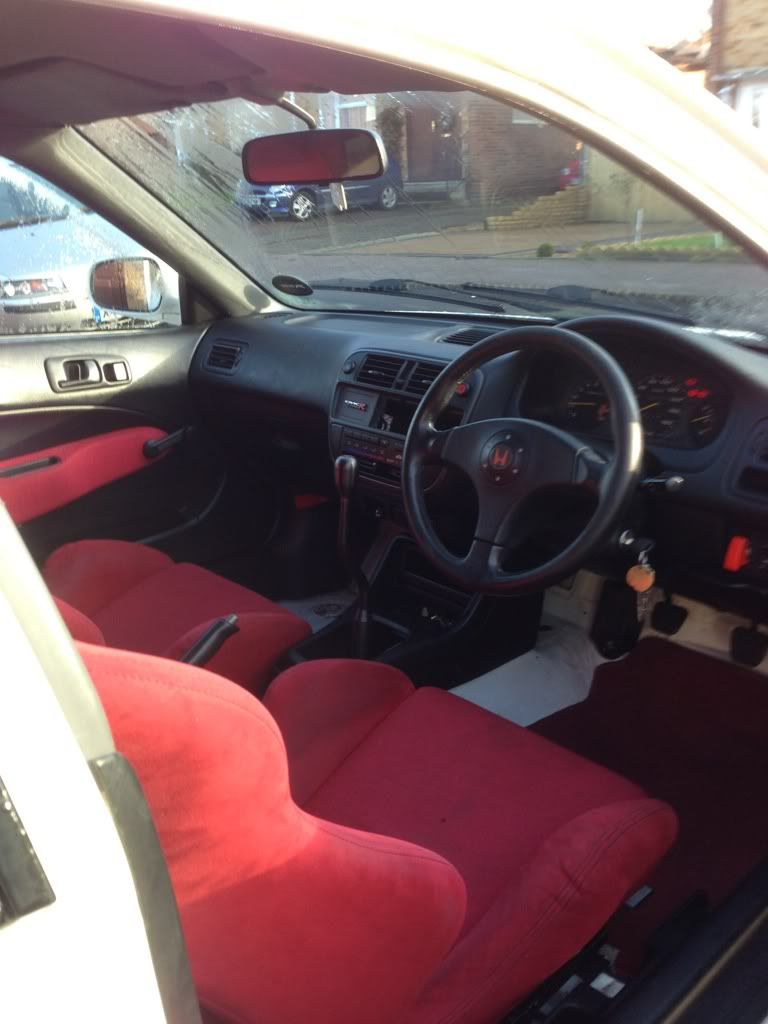
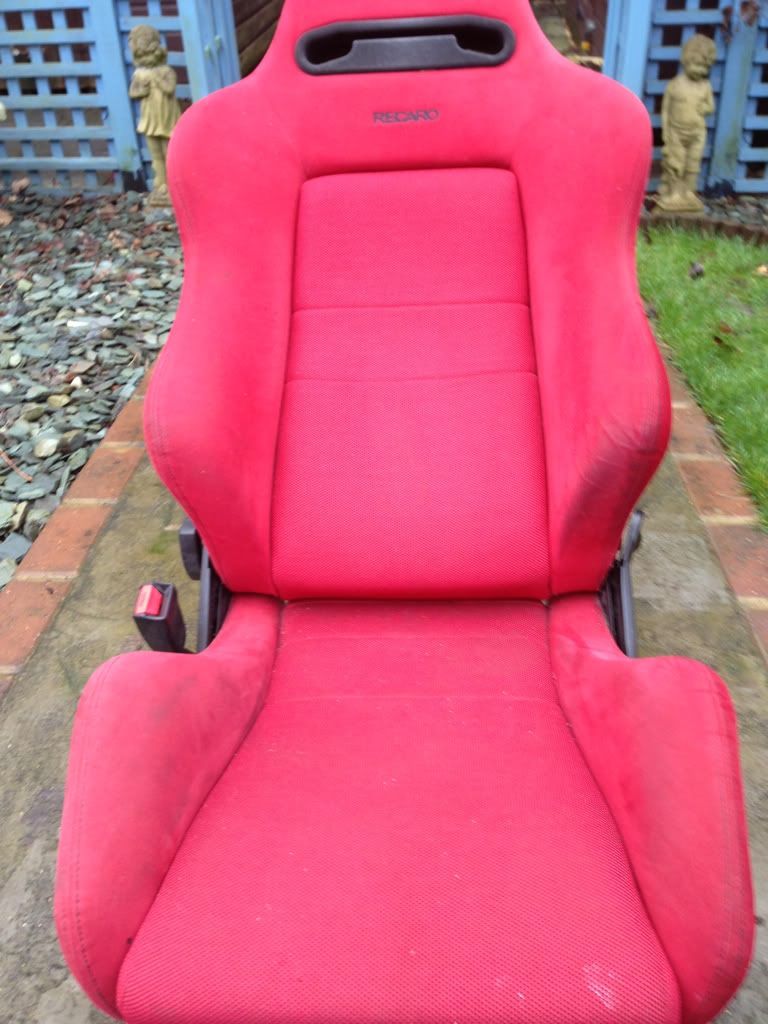
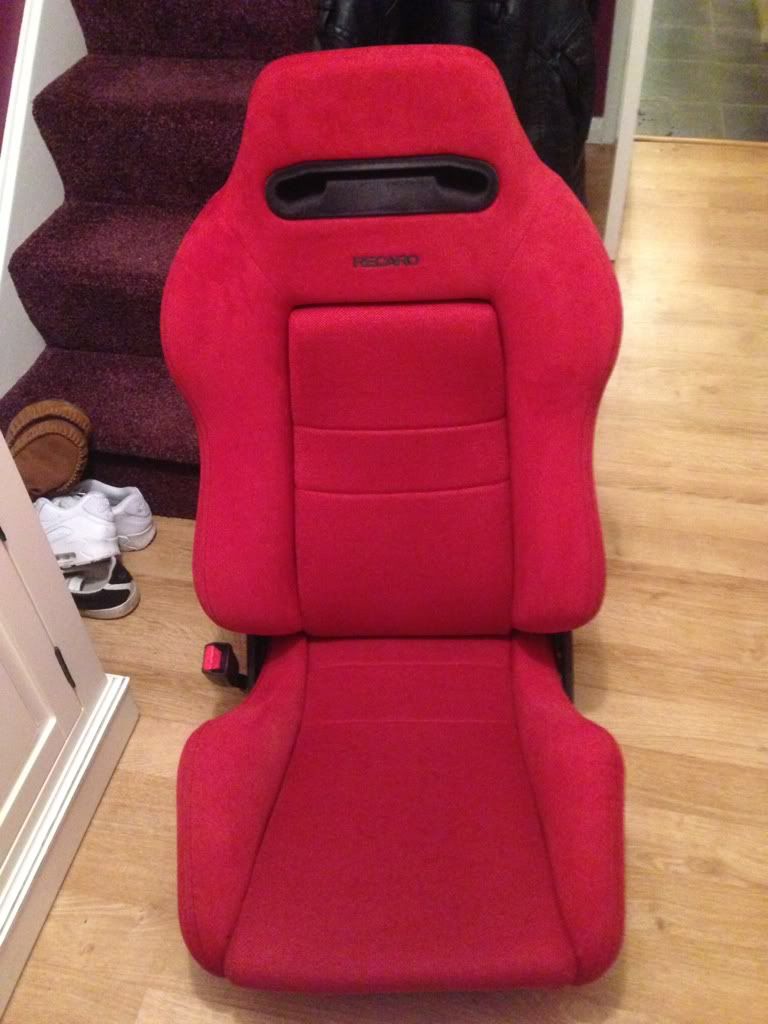
Passenger seat basically dry now. Came out great I think!
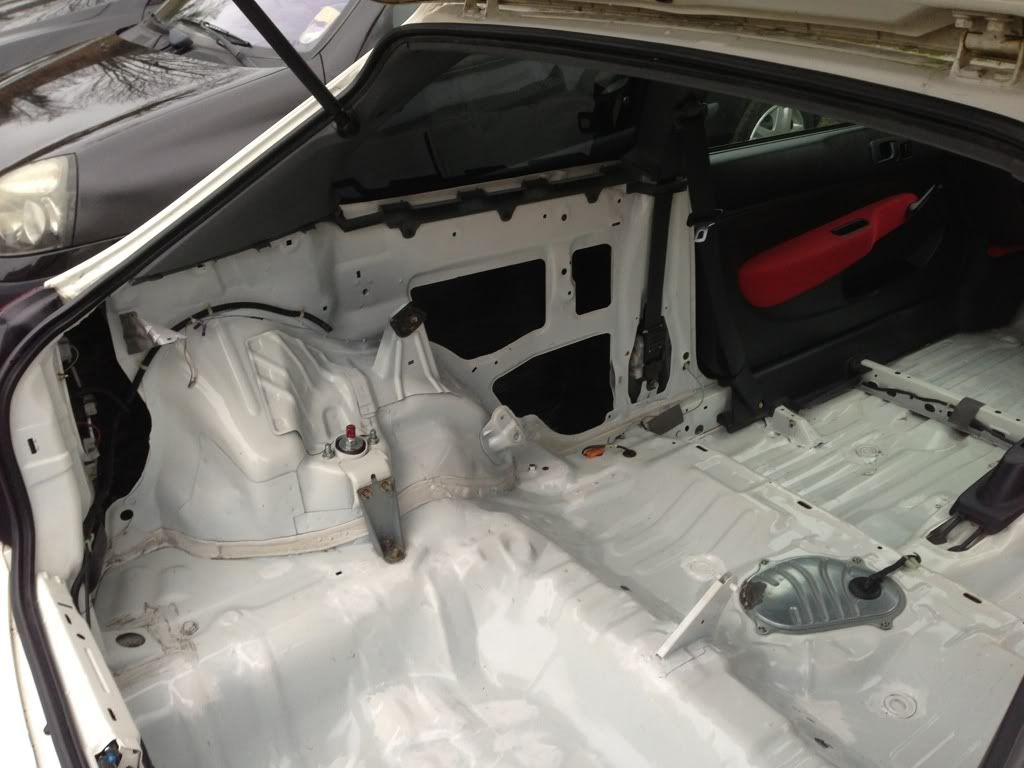
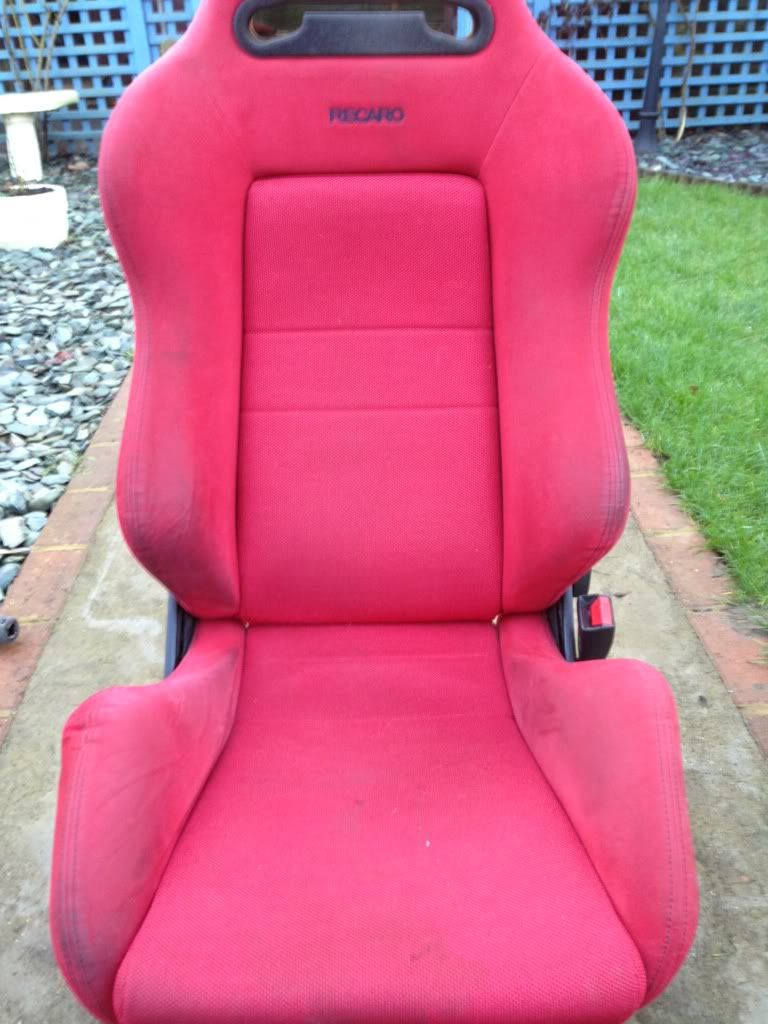
With that seat dry and ready to go back in I took the drivers seat out, this was filthy dirty and was really showing its age sat next to the clean one!
Okay next update.
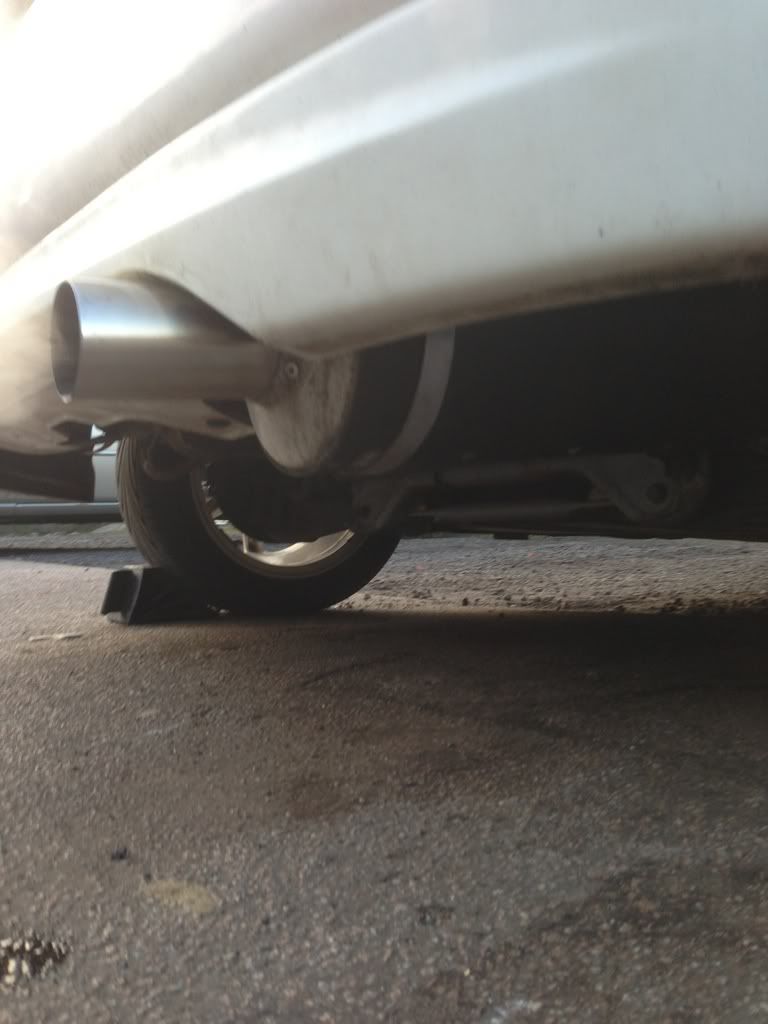
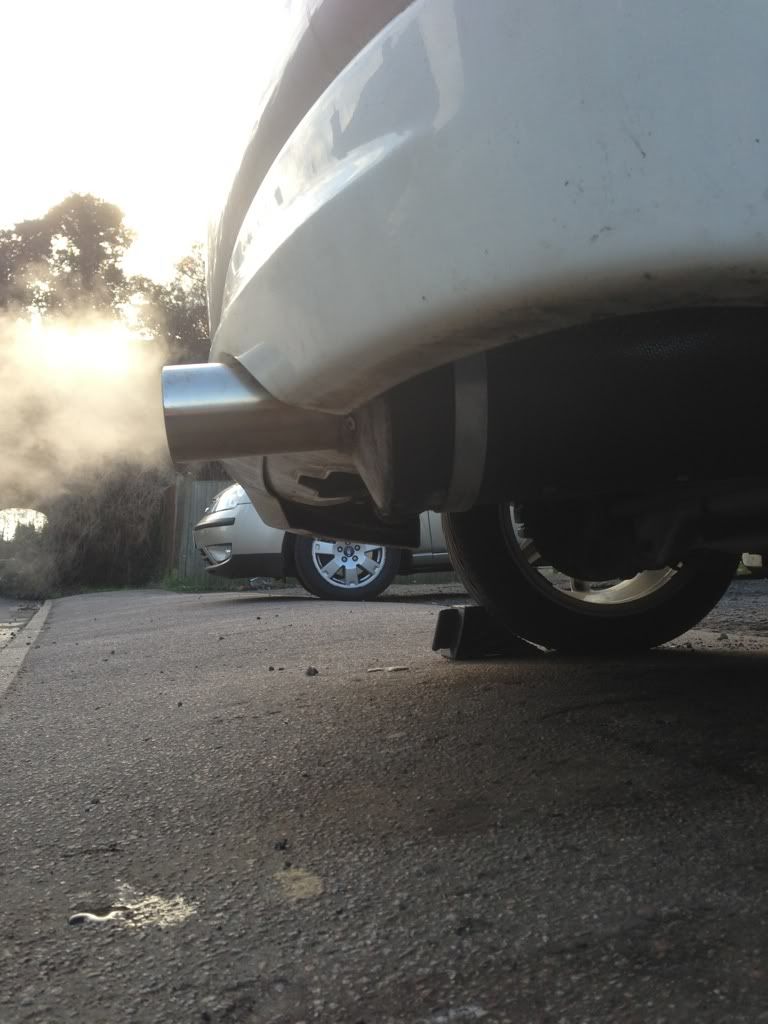
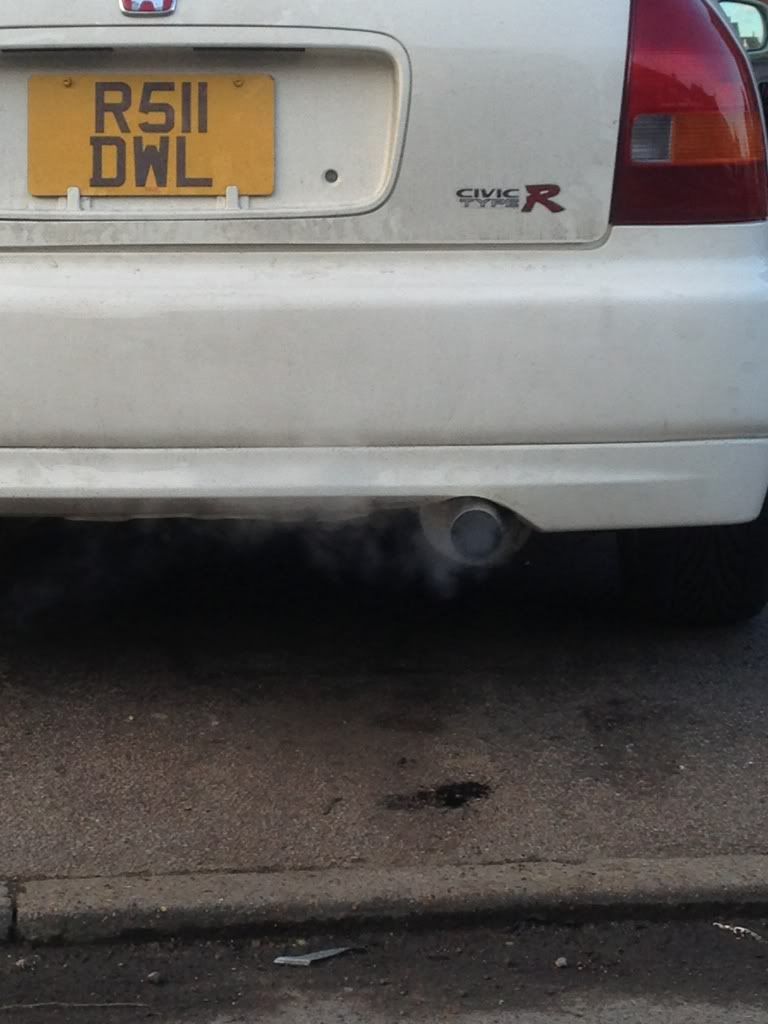
Exhaust has arrived!
Some of you may recognise it. Custom made 2.5" ID catback with repack rear box wrapped In hand layed carbon fibre.
I'm getting this exhaust extended again tomorrow as it was cut short for a k20 conversion.
Okay so got the exhaust extended by putting in an extra silencer so its now got 2 repackable silencers and a 90 cell sports cat.
It's alittle too quiet ATM at 91db but it doesn't feel restrictive or like the cars lost any power as this was one of my concerns with adding the central silencer.
Few pics on the car. I think the tip sticks out abit too much ATM, what do you guys think?
Will be cleaning the car tomorrow as it is filthy on the outside. Inside it now spotless thanks to all the jet washing lol
Recap on what I've done
Jet washed carpet, matts and both front seats.
Fixed water leak
Fixed rusty floor pan
Swapped loud exhaust for custom one
Swapped shifter for stock one.
Hopfully February or march brings the next big update!
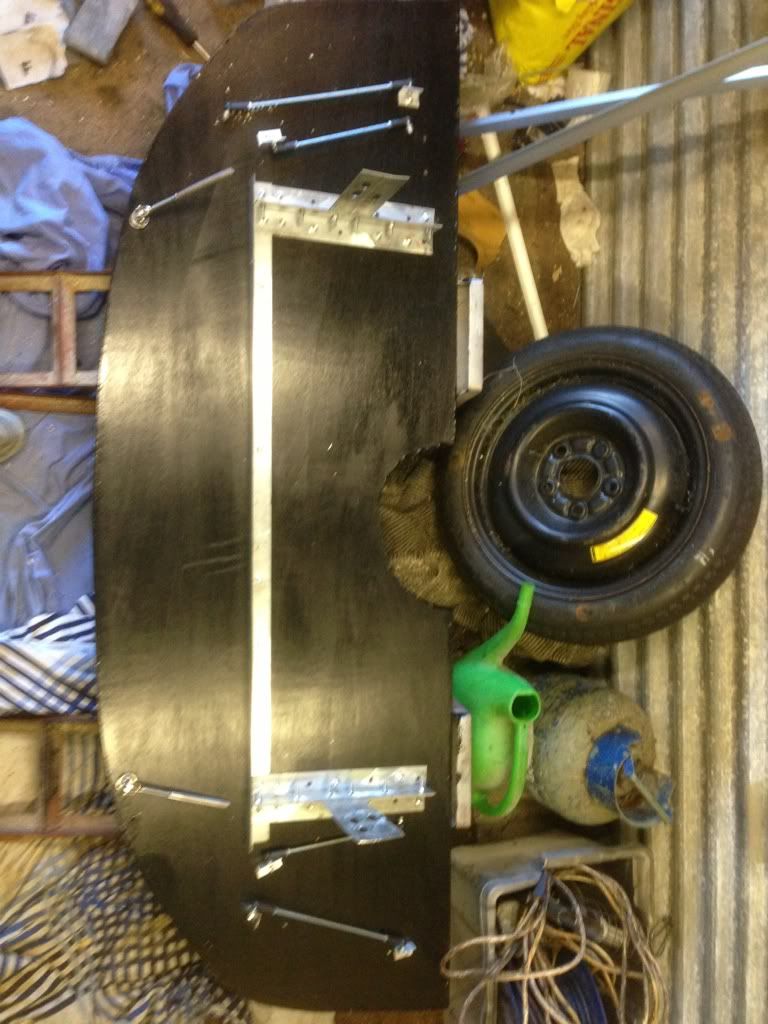
Finished painting the splitter today. So just need to fab up an airdam.
So was having issues when changing gear in the morning, the exhaust was catching the bottom of my shifter so obviously the engine was moving. This had done this since I bought it really but was worse with the wider exhaust and since I'd moved the system higher into the tunnel. The previous owner had put on an engine torque damper to help solve the issue but it was really just masking the issue.
I wanted stiff mounts but not overly hard as IMO that's for race/track only cars and has a detrimental effect on a road car.
After a wanted ad went out I got a pm from mrbuddyclub on here who offered me some avid racing steel engine mounts in 62 rating at a decent price.
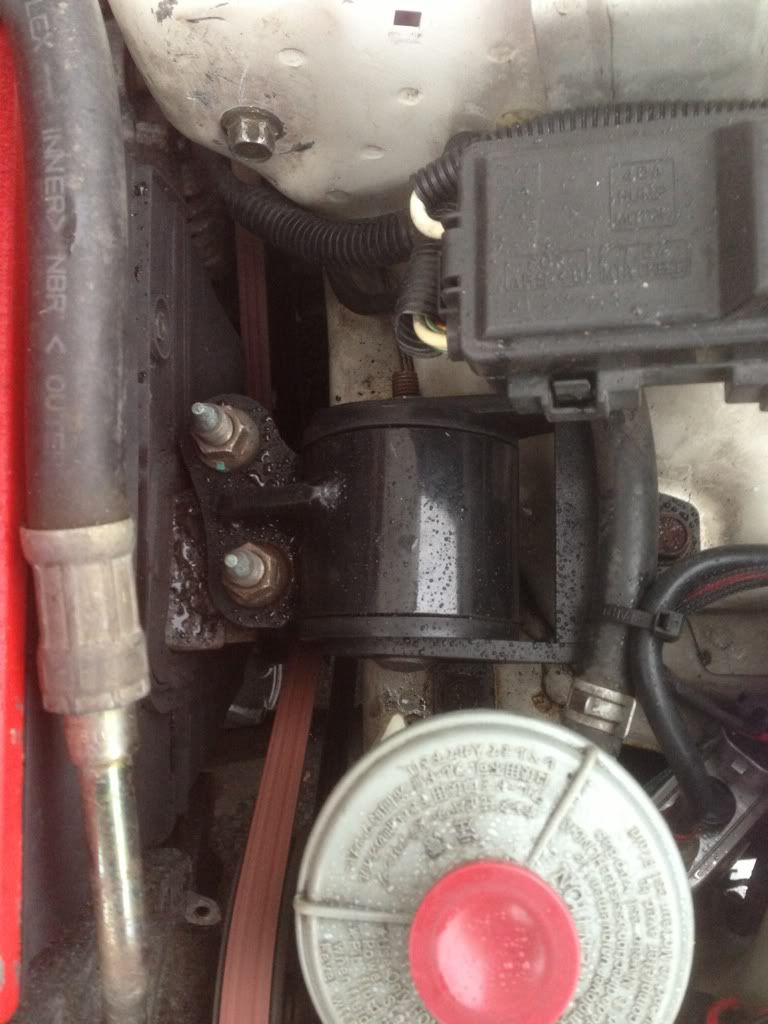
So bought them the next day they had arrived and I put the gearbox mount on yesterday before the snow.
Then today I decided I'm going to man it out and fit the other two mounts in the snow!
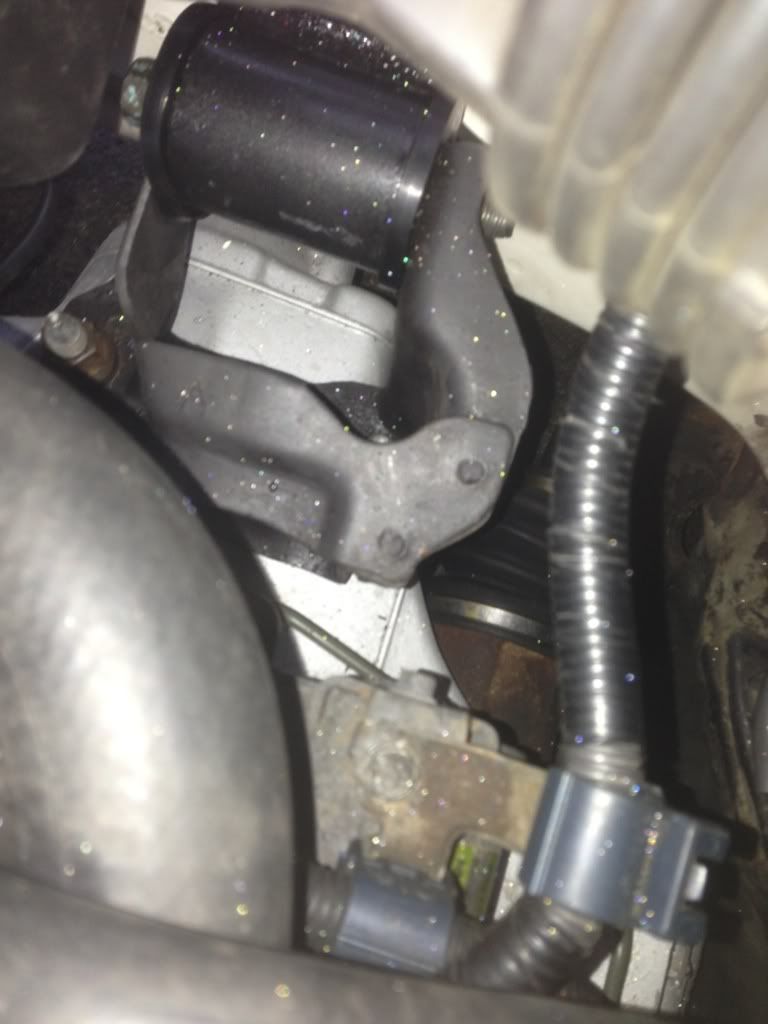
Here's the engine side mount
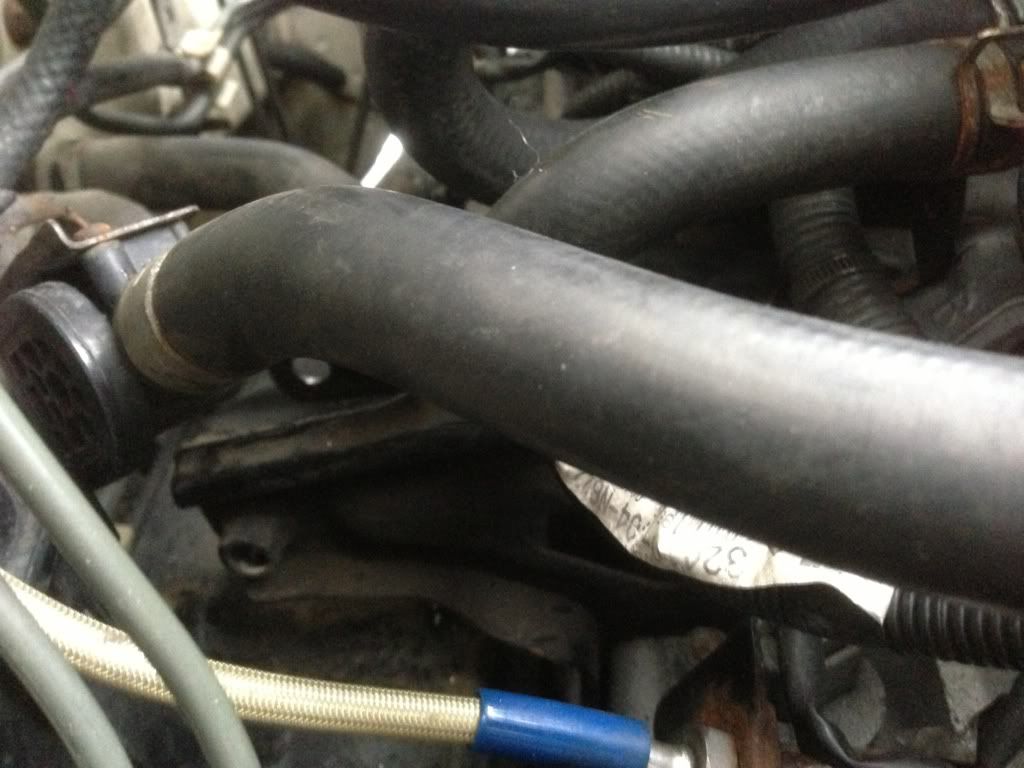
And then I had to tackle the rear mount which I was warned about being a tricky little fella!
Didn't take too long once I'd freed the bolts I basically pulled it out
Here's the culprit!
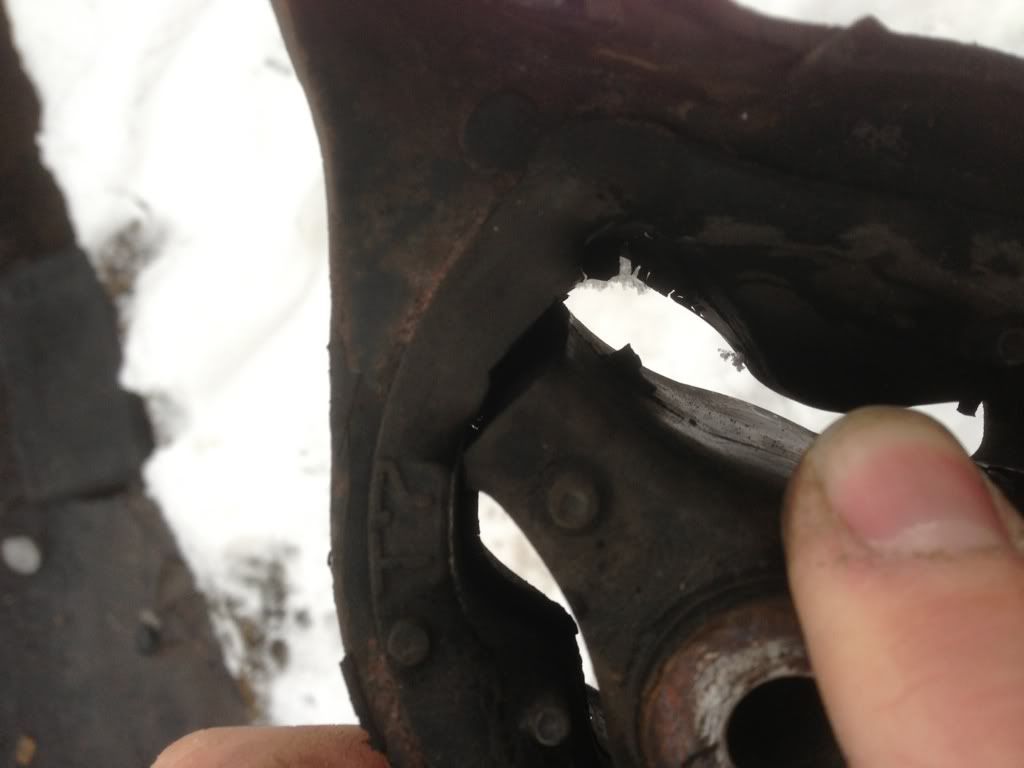
Obviously that was why it was moving so much!
Got the new one in easy enough and fired her up!
It's got some vibration even in the lowest rating I could find lol
Should dye down abit but its just right IMO. Revved the engine in neutral and there is no movement what so ever!
Okay so February's mission is to check and install this!
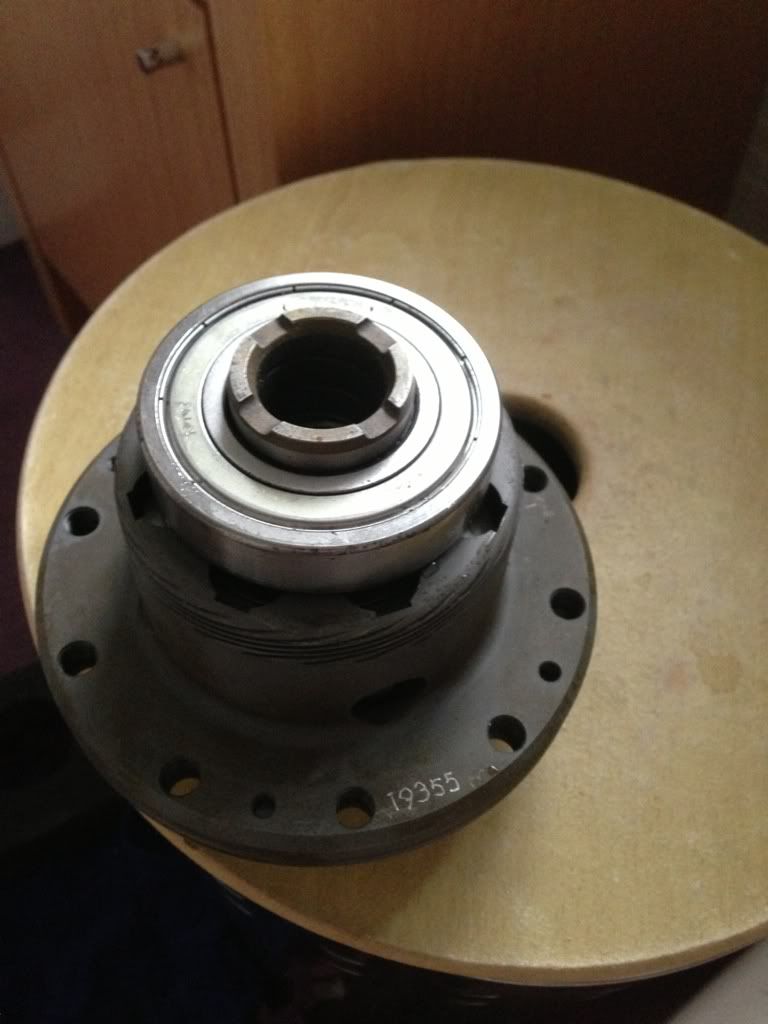
Ats carbon lsd bought from type r dunk.
Will update soon with pics from the inside of the LSD
I've reached my picture limit on this post so have moved camp to the bottom of page 5.
So all updates will now be put into page 5 until that limit is reached lol
Thanks for reading.
So story begins.... Lol
After seeing jake(civictyper89)'s car on a what's it worth thread I knew I was going to buy his one once my poxy s2k had sold.
So one Saturday in December I went to have a look and obviously brought it home with me. Cars a 98 preface lift in cw.
The cars spec as it stands ATM:
Engine:
B18c6
Feels exhaust manifold
Custom 2.5" ID thin wall catback exhaust with carbon fibre back box
90cell sports cat
Dc2 air box with spoon drop in filter
Rc 310 injectors
B16b inlet manifold
Jdm b18 70mm throttle body
Hondata s300 with launch control
Mapped by endless horizon
Avid racing steel engine mounts
HKS Superfire Spark Plugs
Magnacore 8.5mm HT leads
Spoon oil cap
Skunk2 magnetic drain plug
HKS earthing kit
Walbro 255l/ph fuel pump
Tegiwa thermal intake gasket
ARC prestige R radiator with cap
203 hp & 131 ft/lbs
Gearbox:
Ek9 s4c
Fidenza lightweight flywheel
Exedy stage 1 clutch
Mfactory 4.9 final drive
ATS 1.5 way carbon plate LSD
Skunk2 Magnetic drain plug
Skunk2 heavy billet shift knob
Solid shifter bushings
Feels braided clutch line
Chassis:
Meister r zeta r coilovers
Dc2 rear upper strut brace
Feels rear brake pads
Rsr front brake pads
Custom splitter (track only)
Interior/exterior:
Pair of Feels lower seat rails
Muteki Titanium Anodised Purple Wheel Nuts
Aerial Delete
Aero Flat Wipers
Honda Wind Deflectors
6k HIDs
So here's a picture once I got her home.
My track buddy and person to blame for all the on coming madness later in this build, Matt (mattek9) came straight over to help me with a few problems I had found with the car whilst I was viewing it.
These included a wet footwell and thus a slightly rusted floor pan, and some tegiwa bits lol
We got straight to work finding the leak which turned out to be the scuttle panel letting water seep into the passenger well some how. We also got the carpet up and Matt kindly donated his stock shifter so I could lose the tegiwa one. He worked 2 evenings with me on this dispite lashings from the missus. So thumbs up for that!
Few more pics. Befor shifter
After shifter
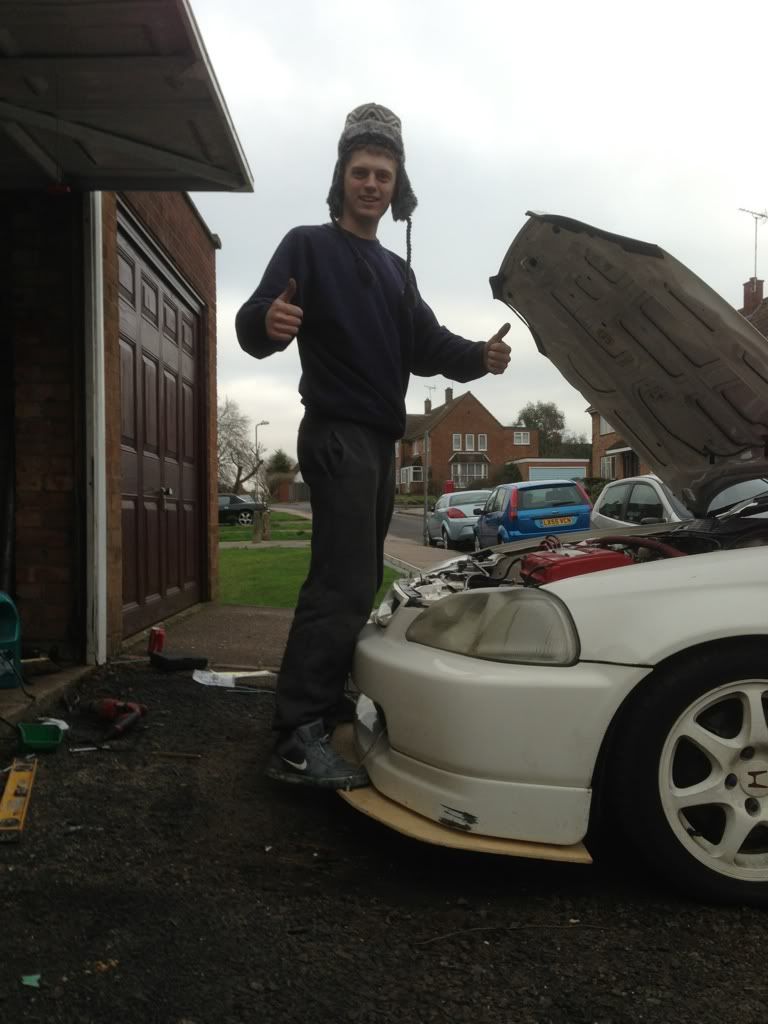
Now I was obviously abit poor after that purchase so I got too work on a little project I had been talking about for a while, needs and airdam now but getting ther with it(don't flame me until I've tested it with track times)
^ that's me btw lol
Painted the top half black today whilst I was getting on with some more bits.
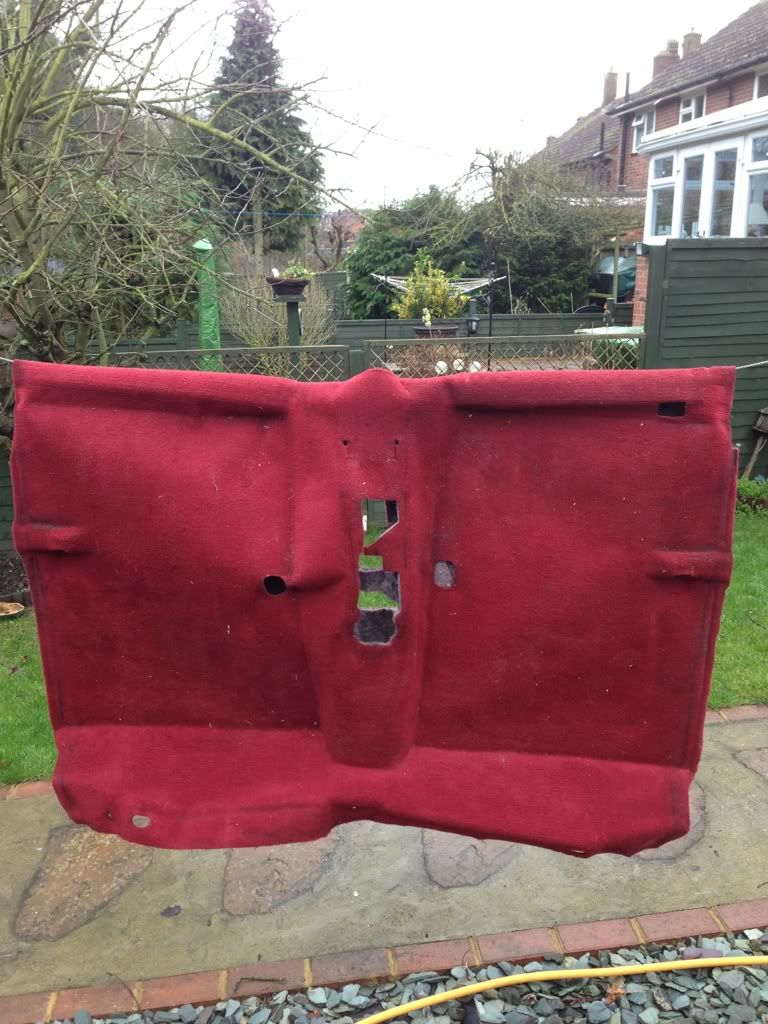
Whilst carpet was out I have it some jet wash
Befor
No after as its still drying but watch this space
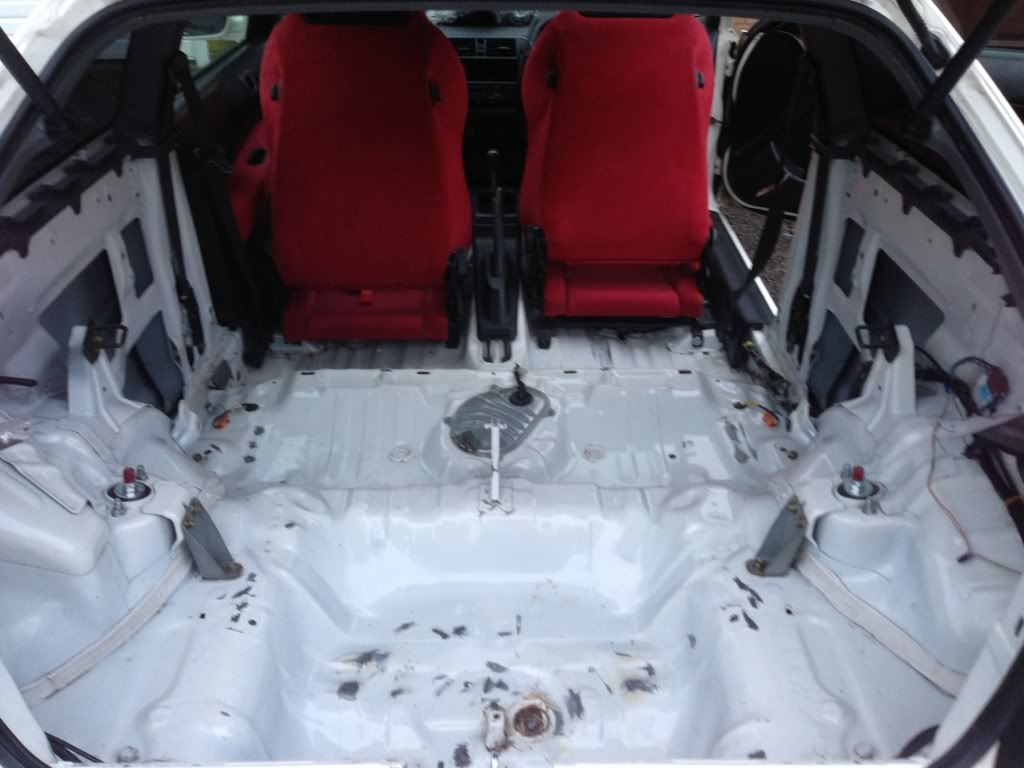
Then got to that rust I said about
Majority of it sanded back
Unfortunately I didn't get a picture of the worst area( passenger footwell)
And then I got to painting up the bare spots with some hammerite smooth.
Pictures to come of that once I've finished And then I'll be respraying the inside so its all fresh again.
6/01/13
Okay so didn't get much done today but here's how it finished
I ran out of white hammerite right at the end. But it's covered for now.
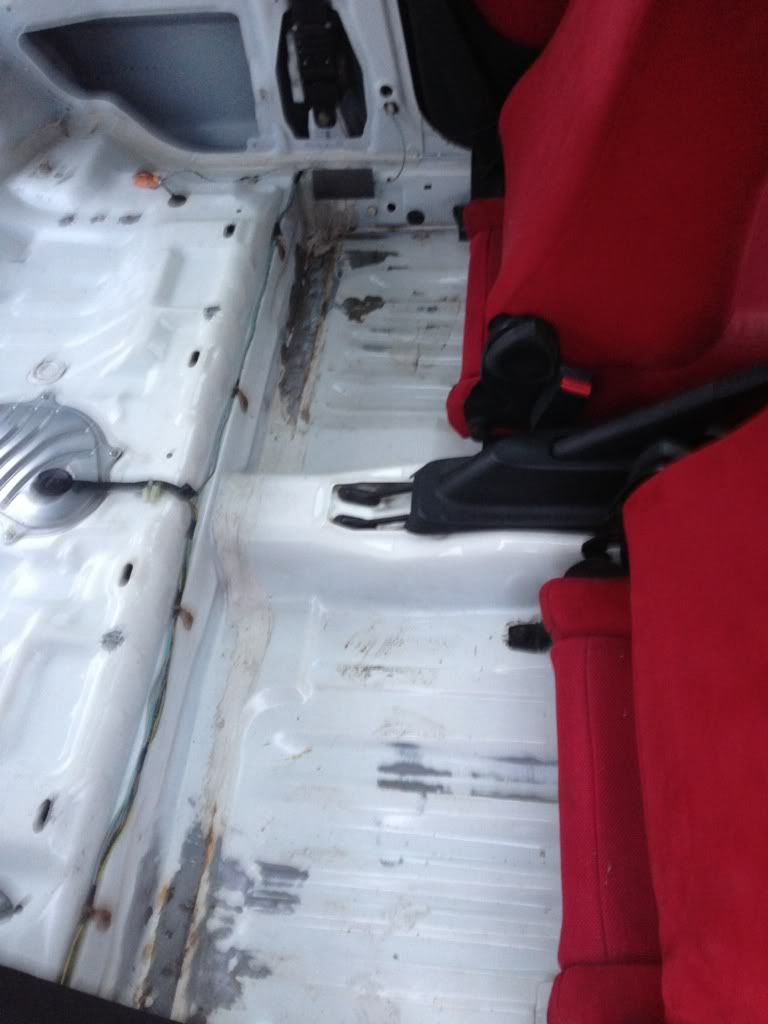
Check out the rust that had collected behind the passenger seat! Lucky it was all just surface and lifted straight off.
Also all the bright white paint in the passenger footwell was the rusty spots.
Ohh and my carpet is now dry! Passenger seat next to come.
7/01/13
So got the passenger seat out today and also got the matts ready for a clean with the jetwash.
^seat looks pink in that pic but it is still red lol
While I had that lot soaked and drying I got some underseal out and stuffed it down the inside of the quarter panels and arch area. Not sure if this is nessesary but after seeing the floor rust I thought I whack some In ther anyway. Plus it looks alittle more tidy when I've got the interior out.
Will update again once ther passenger seat and matts are dry.
8/01/13
Refitted my now dry carpet and matts. Also refitted the quarter cards and took the speakers out as I don't use the radio anyway. Then gave all the plastics a clean up so looking all fresh now.
Can't wait to get the fronts done.
Passenger seat basically dry now. Came out great I think!
With that seat dry and ready to go back in I took the drivers seat out, this was filthy dirty and was really showing its age sat next to the clean one!
Okay next update.
Exhaust has arrived!
Some of you may recognise it. Custom made 2.5" ID catback with repack rear box wrapped In hand layed carbon fibre.
I'm getting this exhaust extended again tomorrow as it was cut short for a k20 conversion.
Okay so got the exhaust extended by putting in an extra silencer so its now got 2 repackable silencers and a 90 cell sports cat.
It's alittle too quiet ATM at 91db but it doesn't feel restrictive or like the cars lost any power as this was one of my concerns with adding the central silencer.
Few pics on the car. I think the tip sticks out abit too much ATM, what do you guys think?
Will be cleaning the car tomorrow as it is filthy on the outside. Inside it now spotless thanks to all the jet washing lol
Recap on what I've done
Jet washed carpet, matts and both front seats.
Fixed water leak
Fixed rusty floor pan
Swapped loud exhaust for custom one
Swapped shifter for stock one.
Hopfully February or march brings the next big update!
Finished painting the splitter today. So just need to fab up an airdam.
So was having issues when changing gear in the morning, the exhaust was catching the bottom of my shifter so obviously the engine was moving. This had done this since I bought it really but was worse with the wider exhaust and since I'd moved the system higher into the tunnel. The previous owner had put on an engine torque damper to help solve the issue but it was really just masking the issue.
I wanted stiff mounts but not overly hard as IMO that's for race/track only cars and has a detrimental effect on a road car.
After a wanted ad went out I got a pm from mrbuddyclub on here who offered me some avid racing steel engine mounts in 62 rating at a decent price.
So bought them the next day they had arrived and I put the gearbox mount on yesterday before the snow.
Then today I decided I'm going to man it out and fit the other two mounts in the snow!
Here's the engine side mount
And then I had to tackle the rear mount which I was warned about being a tricky little fella!
Didn't take too long once I'd freed the bolts I basically pulled it out
Here's the culprit!
Obviously that was why it was moving so much!
Got the new one in easy enough and fired her up!
It's got some vibration even in the lowest rating I could find lol
Should dye down abit but its just right IMO. Revved the engine in neutral and there is no movement what so ever!
Okay so February's mission is to check and install this!
Ats carbon lsd bought from type r dunk.
Will update soon with pics from the inside of the LSD
I've reached my picture limit on this post so have moved camp to the bottom of page 5.
So all updates will now be put into page 5 until that limit is reached lol
Thanks for reading.
Last edited:
")

 Grrrr want that so bad lol