
- Joined
- Oct 16, 2012
- Messages
- 8,858
So i said I'd make one of these a decent time ago so here it is.
Disclaimer thing: if your retarded enough to make one of these(like me) then you do so at your own risk.
What is a wind splitter?
In basic terms a wind splitter is a downforce producing piece of wood,
It does this by stopping air from going under the car and forcing it over the car.
Air traveling under the car is being slowed down by all the arms/sump and other things sticking down under the floor pan.
Slow air is under higher pressure so is effectively pushing UP on the floor of the car as you drive. Now fast air is the opposite and is under low pressure(pulling the car DOWN!)
So you want fast air under the car and slow air above to work together to push the car down onto its wheels.
So by placing your wood under the front lip(lower the better) its stopping a lot of the air from going under the car and forcing it over.
What does the airdam do?
The airdam blocks the air from simply going between your wood and your bumper. Remember that slow air is effectively heavy? Well airdam is slowing the air down and this force is being placed right at the tip of the car(on the splitter)
So more of that magic word downforce!
Better and more in depth explanations are online.
Rundown of parts needed:
9-12mm exterior grade plywood 6x2 is enough for my pre facelift.
Metal angle- I used steel angle although its heavier than ally it is also stronger.
Aluminium sheet - for airdam
Some splitter support rods
Nuts and bolts with washers
Tools:
Jigsaw
Drill with bits
Angle grinder
Hammer(obviously)
Basic socket set
So you've gathered the tools for your crazy wind splitter idea!
Going to split it into steps to make things easier.
Step 1.
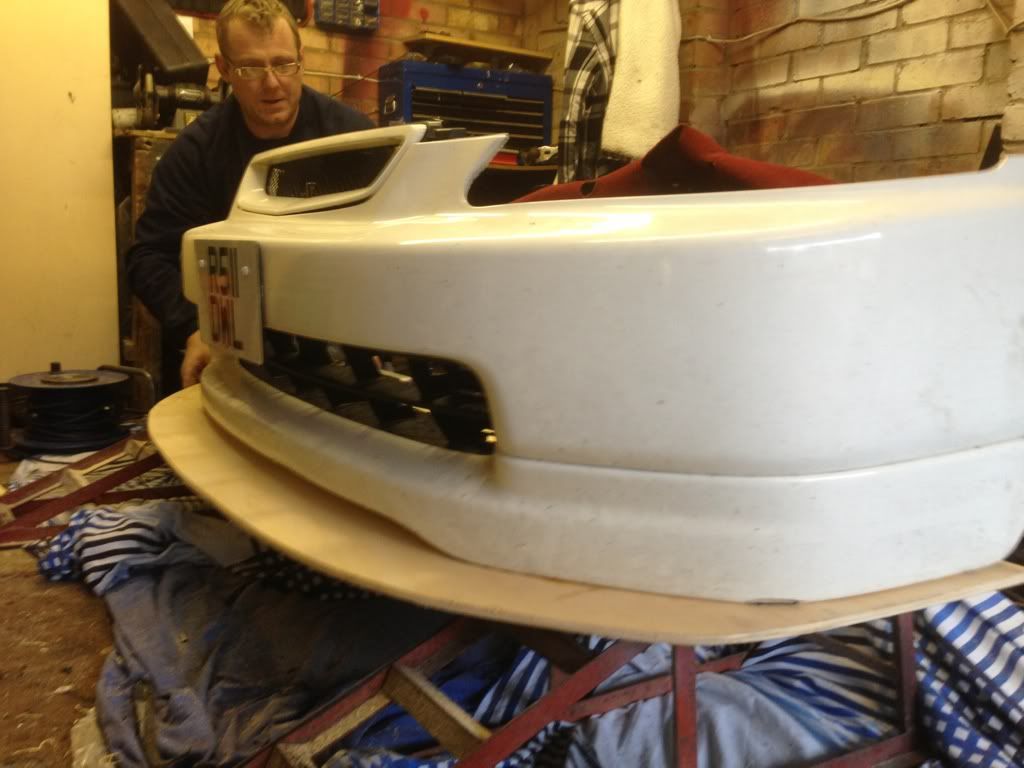
Remove bumper and place ontop of your plywood.
Now the length of the splitter(how much it pokes out) will determine how much force is placed on it. I've gone for 3 inches which is plenty without it looking silly(well more silly! Lol)
So draw your line. You want the splitter to sit almost flush with the bumper at the sides but come out at the front. You want the splitter to come right back so it covers under the whole bumper otherwise its a lot less effective(useless)
You should be at this stage now?
Step 2.
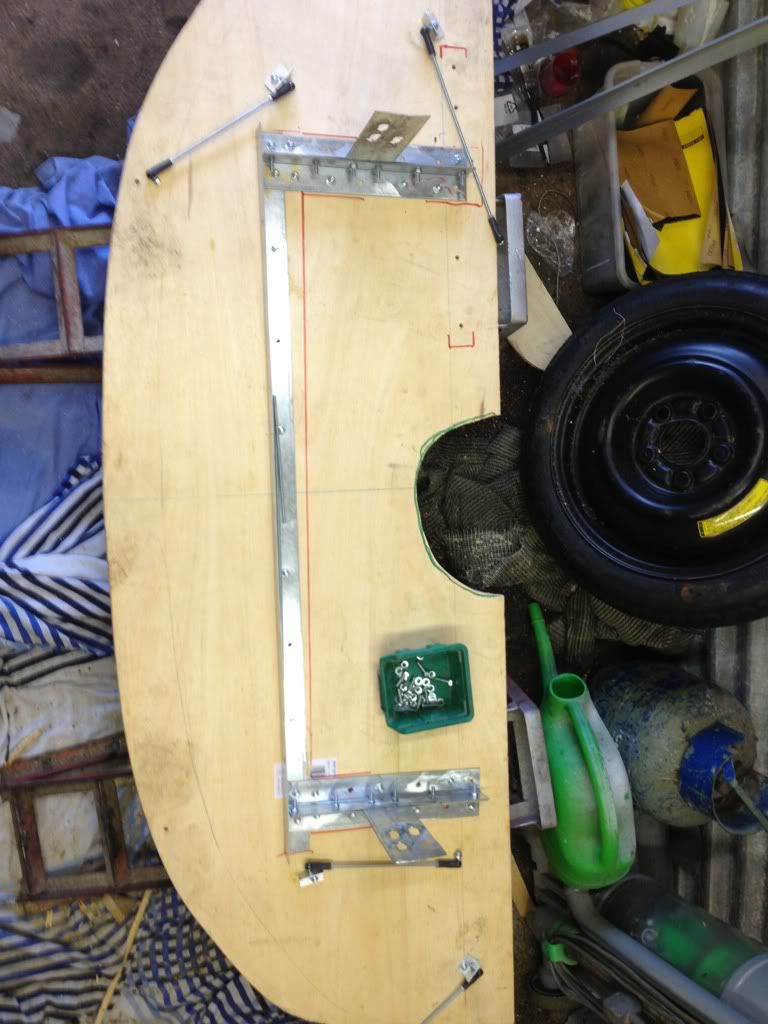
Make your brackets.
This is where a lot of measuring and Abit of drilling take place, you want it strong enough to stand on because the downforce(that word again) could reach the levels of your weight pushing down at high enough speeds.
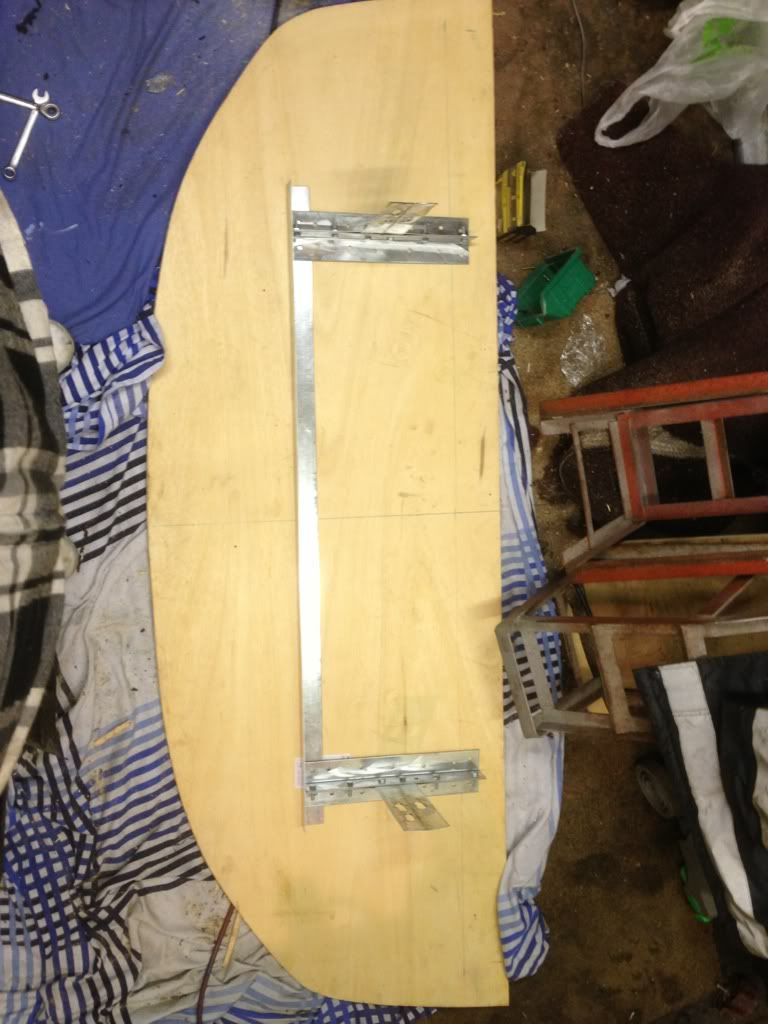
Basically I took my angle grinder and cut about a foot length of angle then used the hammer to make it a flat plate, ( i know its thin and bendy but the force is being placed downwards not side to side!) you need two of these so crack on!
Now you need to remove your toe points on both chassis legs(you might get away with keeping them but since your going to die anyway it doesn't matter right?) now copy the upper shape of the toe brackets onto the flat plate you just made. Drill the holes out and cut across the bottom with your grinder.
You then take two more pieces of angle about the same length and drill holes in them through the plate you've made and bolt them together.
(Will add better pic here soon)
Do both sides and then make a joining piece of angle to add some more strength to resist the flexing of the wood.
Should now look like this!
Now you need to fit the metal frame to the car. Bolt the metal plates up loosely and now is the time to mark out the holes for attachment of the wood.
Should look like this
Forget that rod will get to that bit later.
Now place your wood under the frame you've fitted, mark around it all with a pen so you know where the frame sits on the car, you want to put the bumper Into place for this and triple check it all lines up properly.
Take your frame and wood back off the car, your now ready to drill some holes to hold it all together.
Do that and bolt it all up, use plenty of bolts to hold the wood tight.
Step 3
Splitter support
So you've effectively got your splitter, you'll notice when you stand onit it will bend something crazy right? Yeah you need some support rods my crazy little friend!
So on eBay there's cheap support rods that are used to hold lamps up on rally cars. Grab a few of them. Like 6 lol
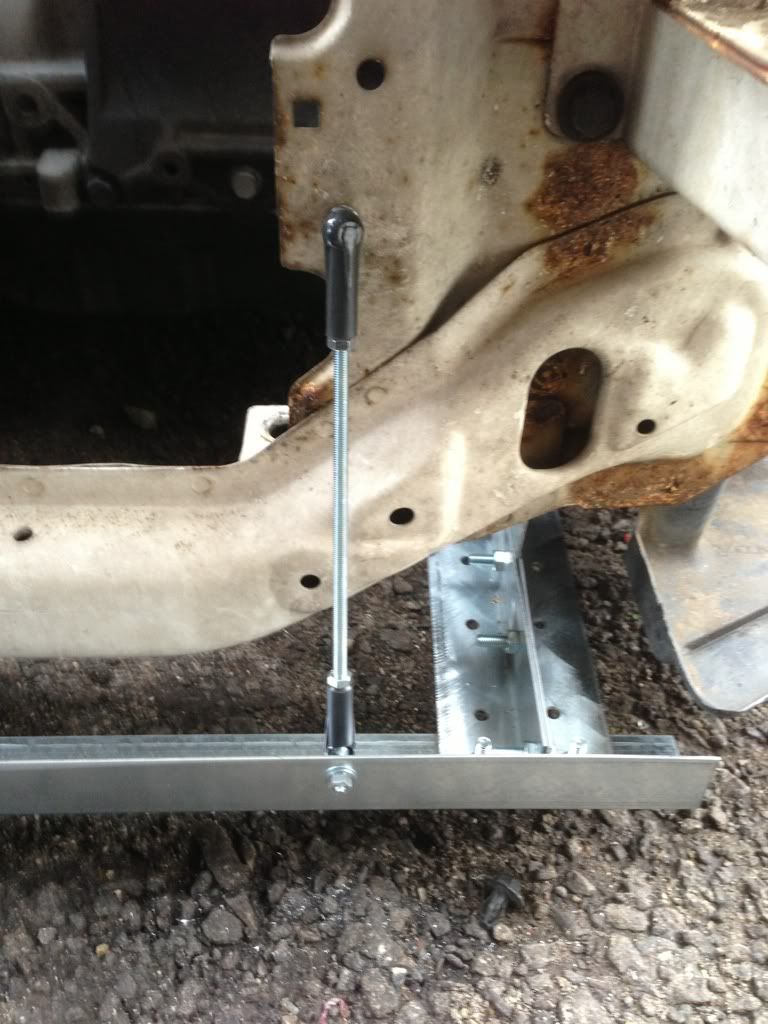
Now I managed to mount these without drilling into the car,
Here is where I placed them
One of these both sides
Catch the car cancer whilst your there!
Now I had to make some little brackets for these out of some angle. So if youve still got all your fingers fire up the grinder again son!
This mount goes where the washer bottle is held on
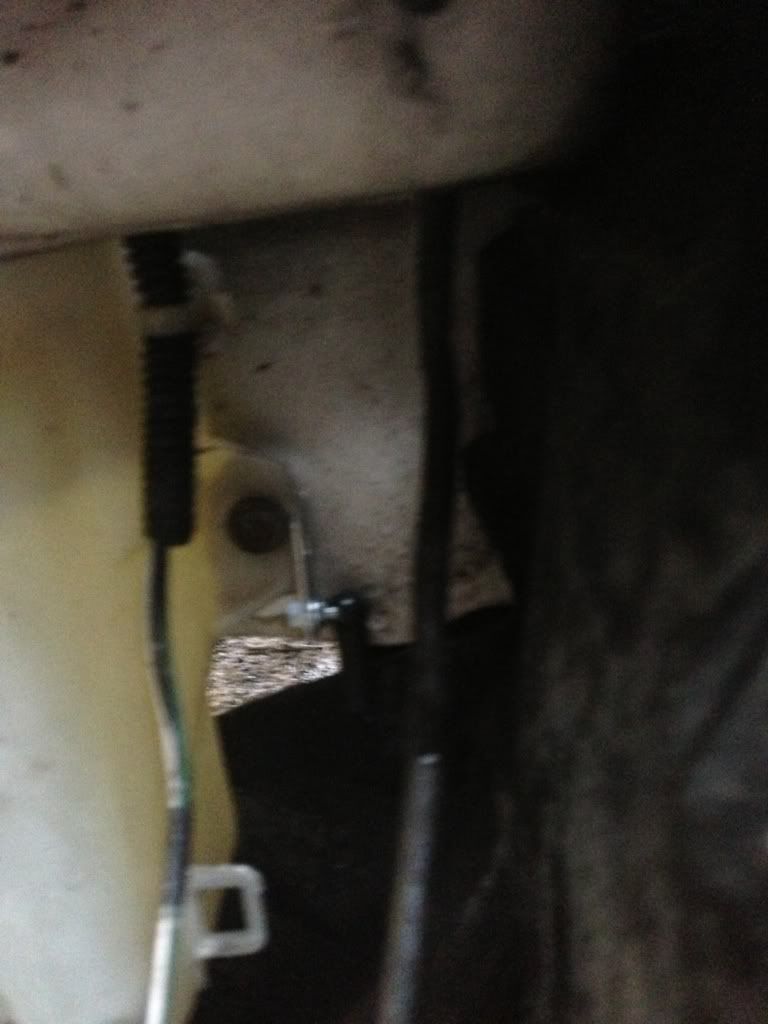
This one is under the passenger headlight
Now your going to have to drill your car!
Place one of these each side
Be sure to paint the hole you've just made to cover the bare metal over.
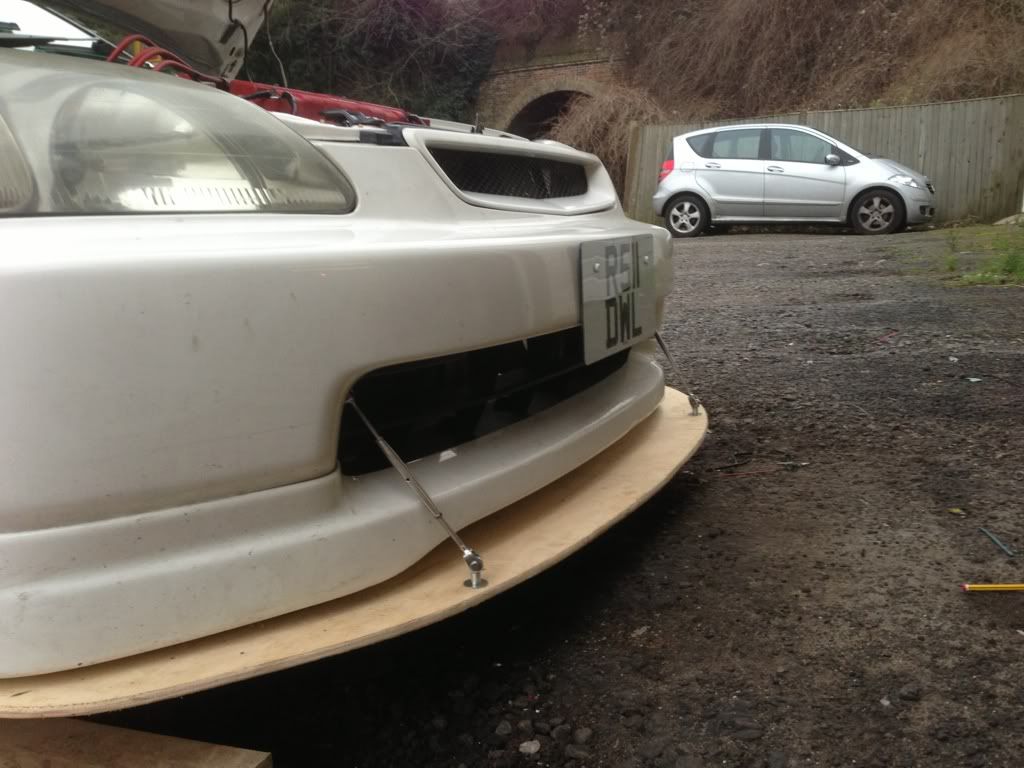
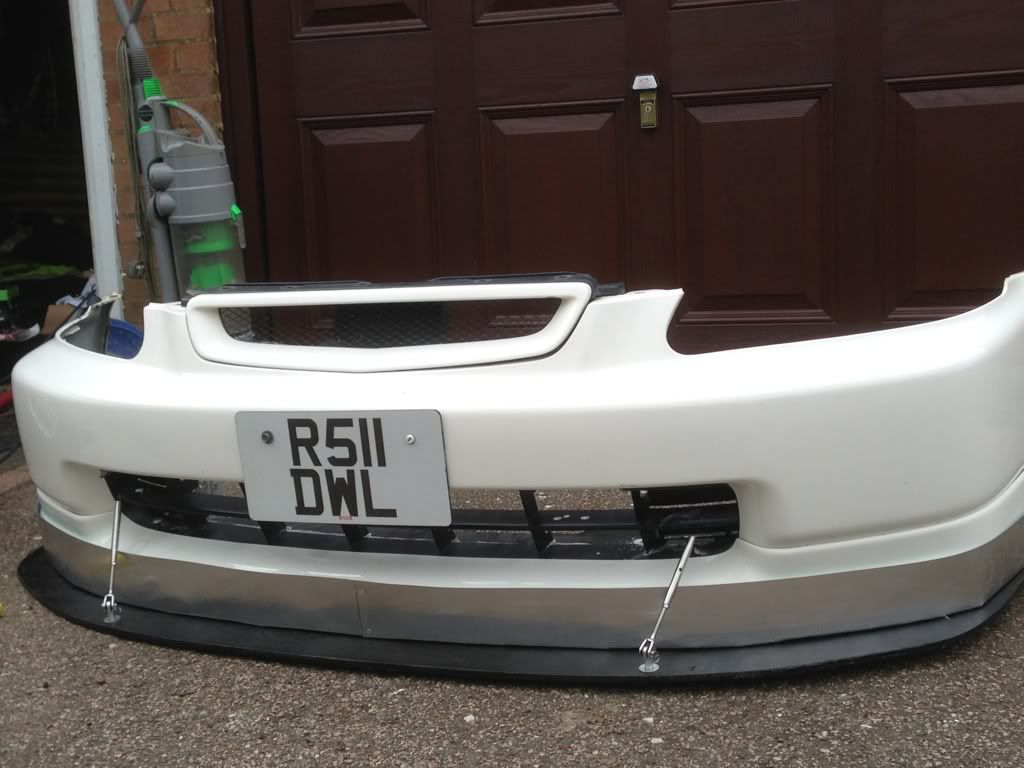
Now you need to refit the splitter. And mark on the wood where the ends of the rods go,
You need to make sure the rods are holding it at the position where its likely to move most, so outer edges. All these are hidden behind the bumper.
Should look like this
Notice how I measured it out wrong! Don't let this be you plonker!
Have alittle test fit because your bored of reading this ****!
Step 4
Paint and super cool looking front support struts!
So paint your splitter, dare you to do it pink!
And buy some proper cool front struts from carbon mods.com
Get those fitted by drilling(yes again) into the closest peice pf strong metal you can find. i used the ends of the chassis leg. have another test fit because we love it!
So you get them on you bad ass bastard!
Step 5
Airdam!
So need to mark the area where the splitter and the bumper meet. Then take them off and grab some sheet ally, now I made mine into a 90degree angle and cut triangles into it so it would be flexible.
(Will get better pics)
Attach your airdam with some rivets or whatever you want and seal the under edge so no air gets under it.
Will look like this
You need to get this 100% flat to the ground! I used my super high tech spirit level. Bolt it up toght so it doesn't move with the wind.
Now you can refit to the car and show all your friends at tesco how "race" you are!
Will grab better pics in a little while.
Will be testing this with lap times(or death) on the 13th.
Anything I can explain better let me know.
Disclaimer thing: if your retarded enough to make one of these(like me) then you do so at your own risk.
What is a wind splitter?
In basic terms a wind splitter is a downforce producing piece of wood,
It does this by stopping air from going under the car and forcing it over the car.
Air traveling under the car is being slowed down by all the arms/sump and other things sticking down under the floor pan.
Slow air is under higher pressure so is effectively pushing UP on the floor of the car as you drive. Now fast air is the opposite and is under low pressure(pulling the car DOWN!)
So you want fast air under the car and slow air above to work together to push the car down onto its wheels.
So by placing your wood under the front lip(lower the better) its stopping a lot of the air from going under the car and forcing it over.
What does the airdam do?
The airdam blocks the air from simply going between your wood and your bumper. Remember that slow air is effectively heavy? Well airdam is slowing the air down and this force is being placed right at the tip of the car(on the splitter)
So more of that magic word downforce!
Better and more in depth explanations are online.
Rundown of parts needed:
9-12mm exterior grade plywood 6x2 is enough for my pre facelift.
Metal angle- I used steel angle although its heavier than ally it is also stronger.
Aluminium sheet - for airdam
Some splitter support rods
Nuts and bolts with washers
Tools:
Jigsaw
Drill with bits
Angle grinder
Hammer(obviously)
Basic socket set
So you've gathered the tools for your crazy wind splitter idea!
Going to split it into steps to make things easier.
Step 1.
Remove bumper and place ontop of your plywood.
Now the length of the splitter(how much it pokes out) will determine how much force is placed on it. I've gone for 3 inches which is plenty without it looking silly(well more silly! Lol)
So draw your line. You want the splitter to sit almost flush with the bumper at the sides but come out at the front. You want the splitter to come right back so it covers under the whole bumper otherwise its a lot less effective(useless)
You should be at this stage now?
Step 2.
Make your brackets.
This is where a lot of measuring and Abit of drilling take place, you want it strong enough to stand on because the downforce(that word again) could reach the levels of your weight pushing down at high enough speeds.
Basically I took my angle grinder and cut about a foot length of angle then used the hammer to make it a flat plate, ( i know its thin and bendy but the force is being placed downwards not side to side!) you need two of these so crack on!
Now you need to remove your toe points on both chassis legs(you might get away with keeping them but since your going to die anyway it doesn't matter right?) now copy the upper shape of the toe brackets onto the flat plate you just made. Drill the holes out and cut across the bottom with your grinder.
You then take two more pieces of angle about the same length and drill holes in them through the plate you've made and bolt them together.
(Will add better pic here soon)
Do both sides and then make a joining piece of angle to add some more strength to resist the flexing of the wood.
Should now look like this!
Now you need to fit the metal frame to the car. Bolt the metal plates up loosely and now is the time to mark out the holes for attachment of the wood.
Should look like this
Forget that rod will get to that bit later.
Now place your wood under the frame you've fitted, mark around it all with a pen so you know where the frame sits on the car, you want to put the bumper Into place for this and triple check it all lines up properly.
Take your frame and wood back off the car, your now ready to drill some holes to hold it all together.
Do that and bolt it all up, use plenty of bolts to hold the wood tight.
Step 3
Splitter support
So you've effectively got your splitter, you'll notice when you stand onit it will bend something crazy right? Yeah you need some support rods my crazy little friend!
So on eBay there's cheap support rods that are used to hold lamps up on rally cars. Grab a few of them. Like 6 lol
Now I managed to mount these without drilling into the car,
Here is where I placed them
One of these both sides
Catch the car cancer whilst your there!
Now I had to make some little brackets for these out of some angle. So if youve still got all your fingers fire up the grinder again son!
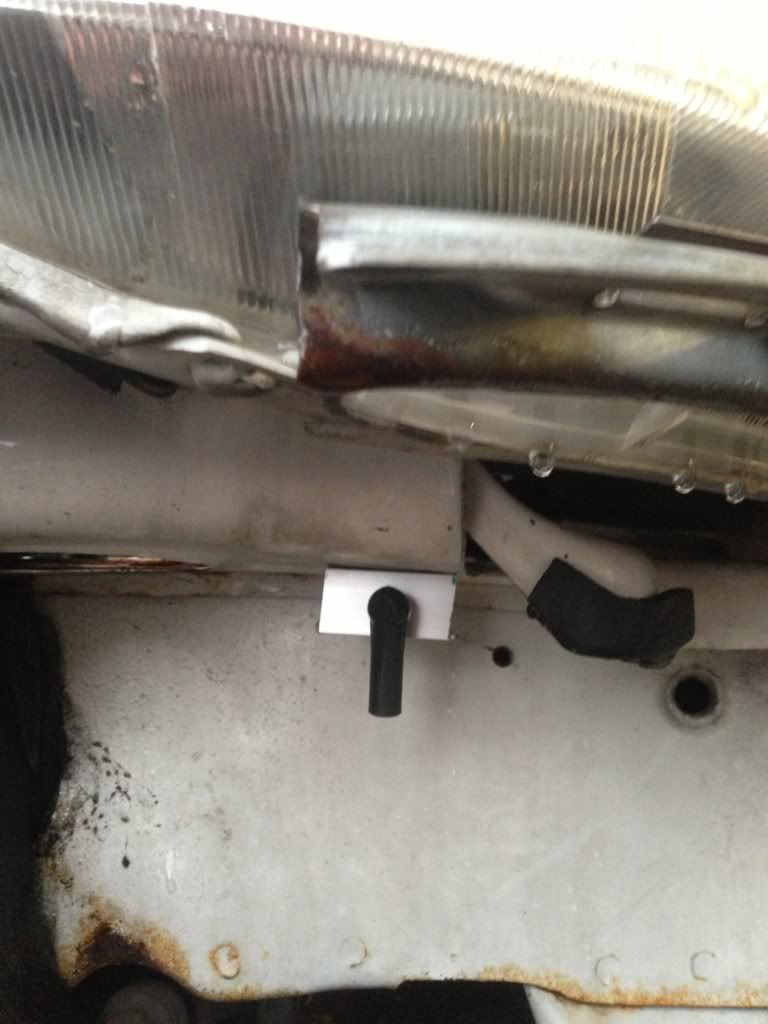
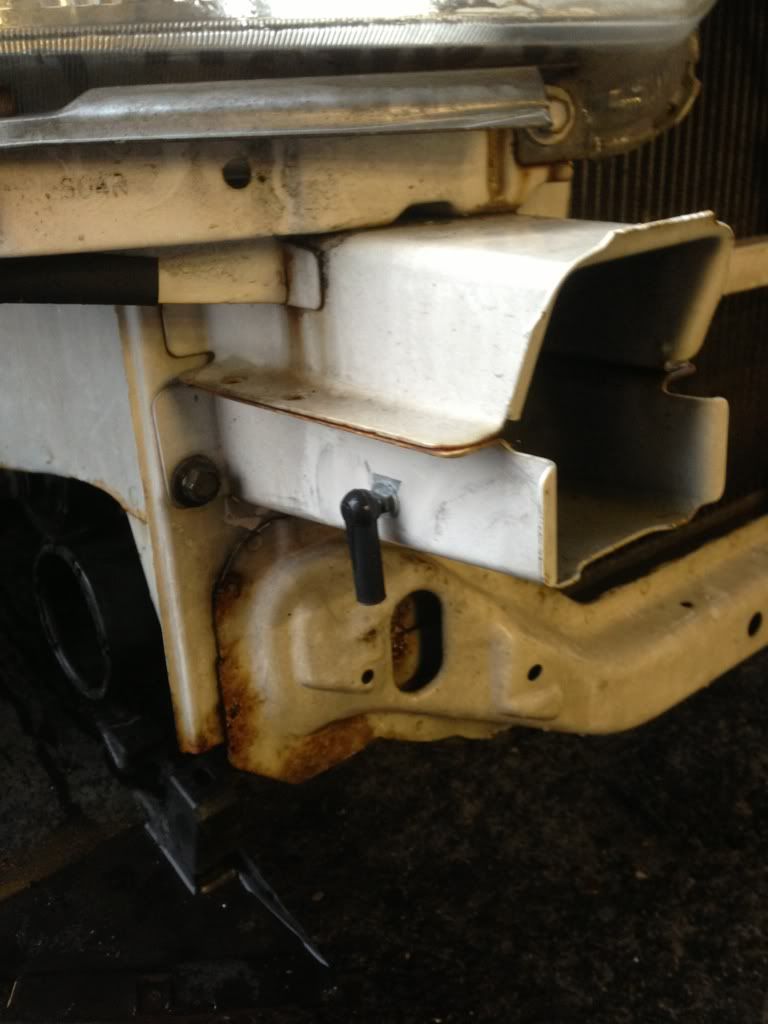
This mount goes where the washer bottle is held on
This one is under the passenger headlight
Now your going to have to drill your car!
Place one of these each side
Be sure to paint the hole you've just made to cover the bare metal over.
Now you need to refit the splitter. And mark on the wood where the ends of the rods go,
You need to make sure the rods are holding it at the position where its likely to move most, so outer edges. All these are hidden behind the bumper.
Should look like this
Notice how I measured it out wrong! Don't let this be you plonker!
Have alittle test fit because your bored of reading this ****!
Step 4
Paint and super cool looking front support struts!
So paint your splitter, dare you to do it pink!
And buy some proper cool front struts from carbon mods.com
Get those fitted by drilling(yes again) into the closest peice pf strong metal you can find. i used the ends of the chassis leg. have another test fit because we love it!
So you get them on you bad ass bastard!
Step 5
Airdam!
So need to mark the area where the splitter and the bumper meet. Then take them off and grab some sheet ally, now I made mine into a 90degree angle and cut triangles into it so it would be flexible.
(Will get better pics)
Attach your airdam with some rivets or whatever you want and seal the under edge so no air gets under it.
Will look like this
You need to get this 100% flat to the ground! I used my super high tech spirit level. Bolt it up toght so it doesn't move with the wind.
Now you can refit to the car and show all your friends at tesco how "race" you are!
Will grab better pics in a little while.
Will be testing this with lap times(or death) on the 13th.
Anything I can explain better let me know.
Last edited:
")

")
